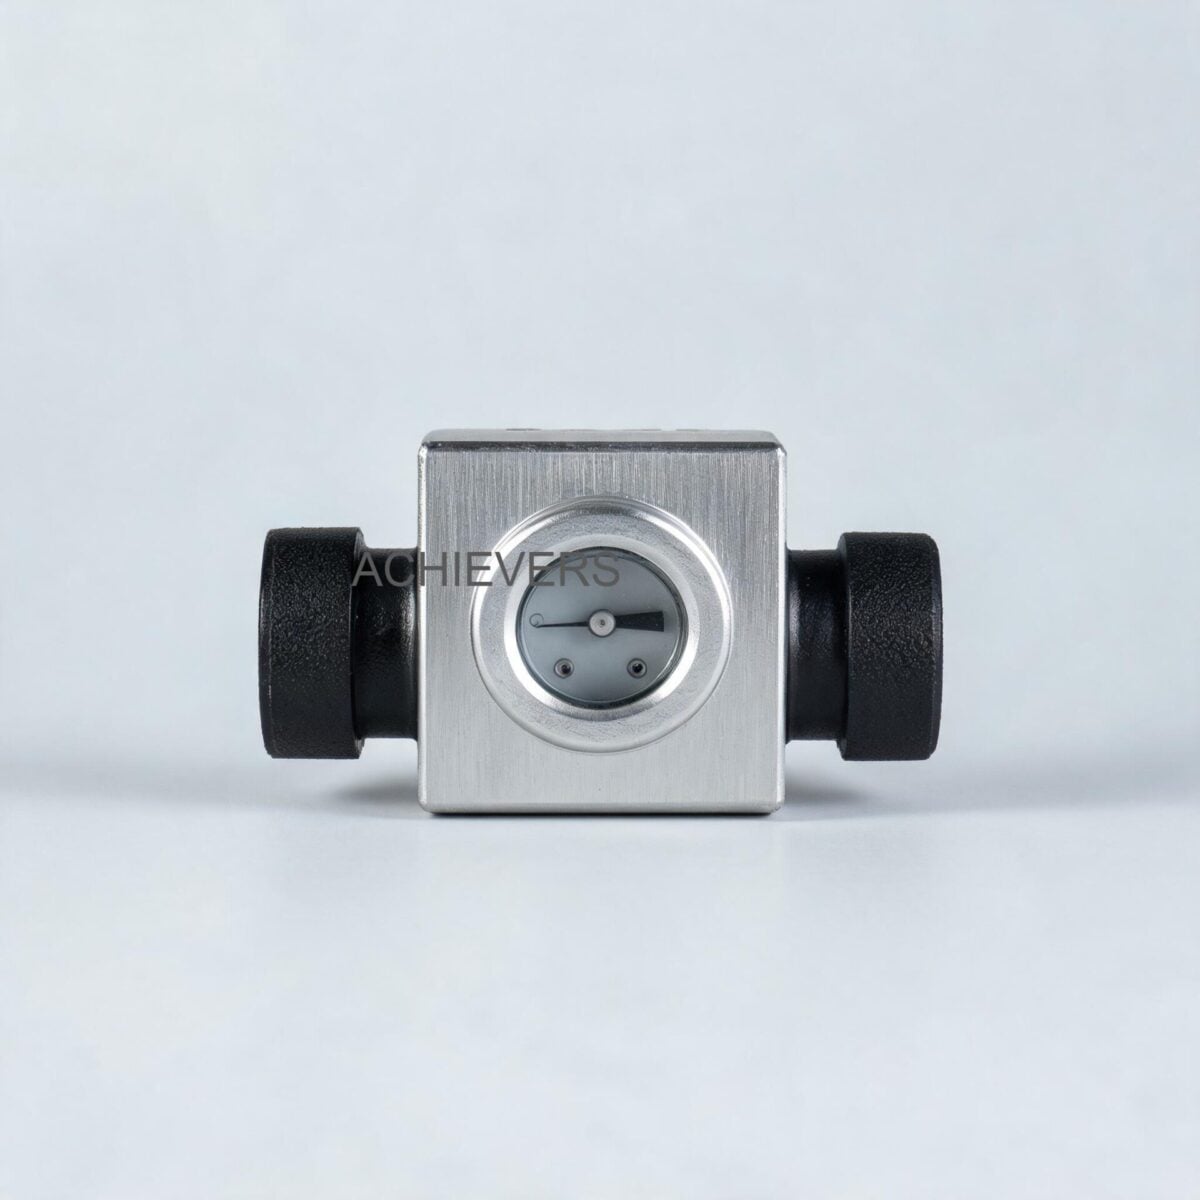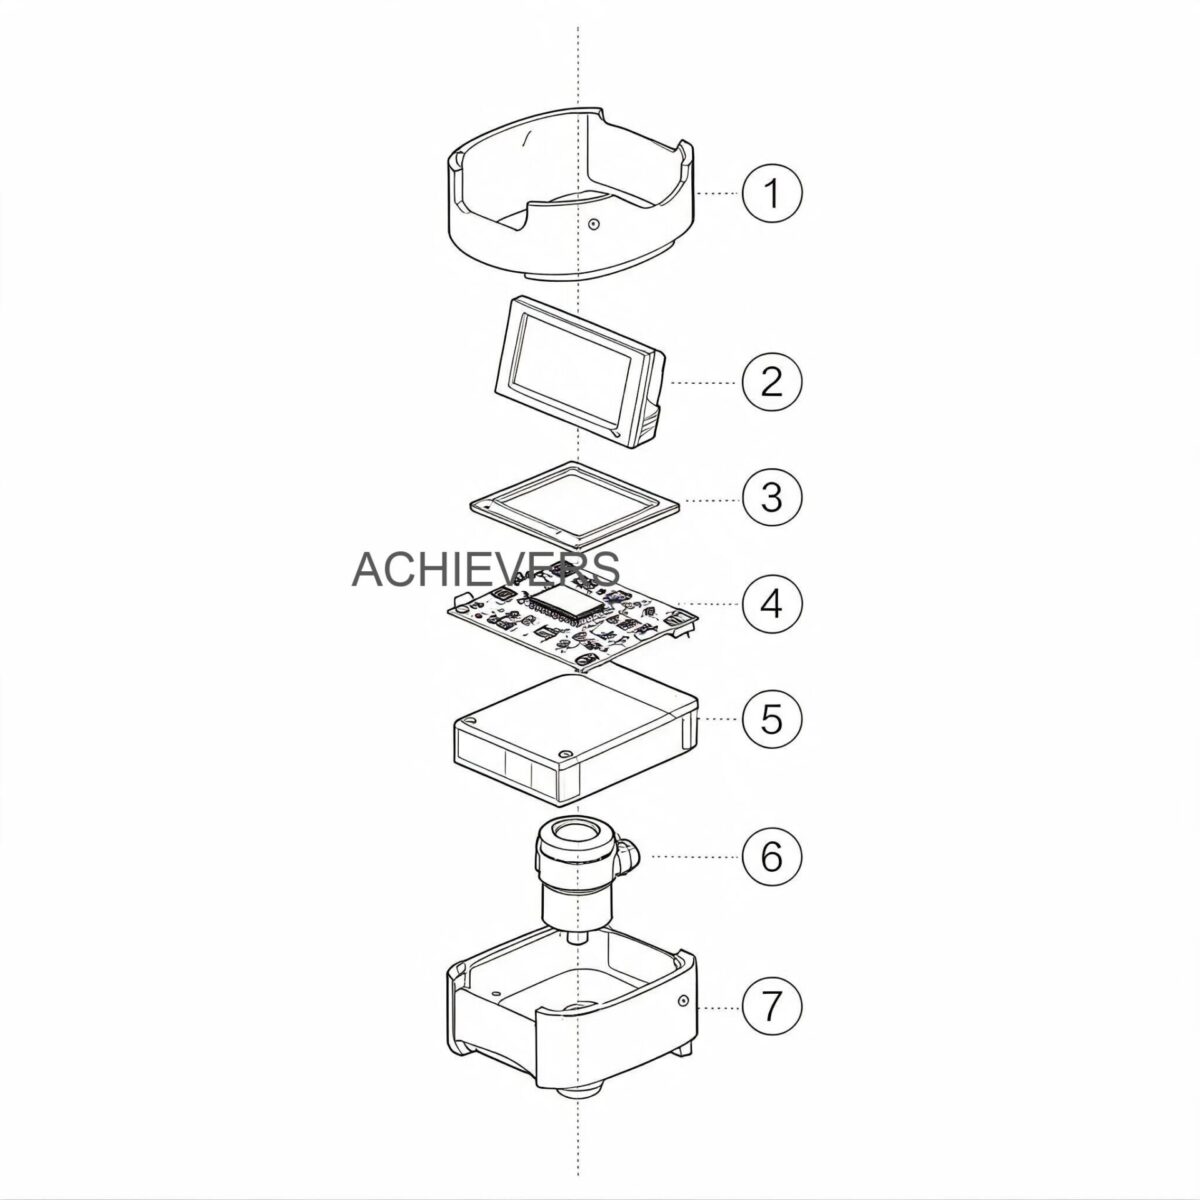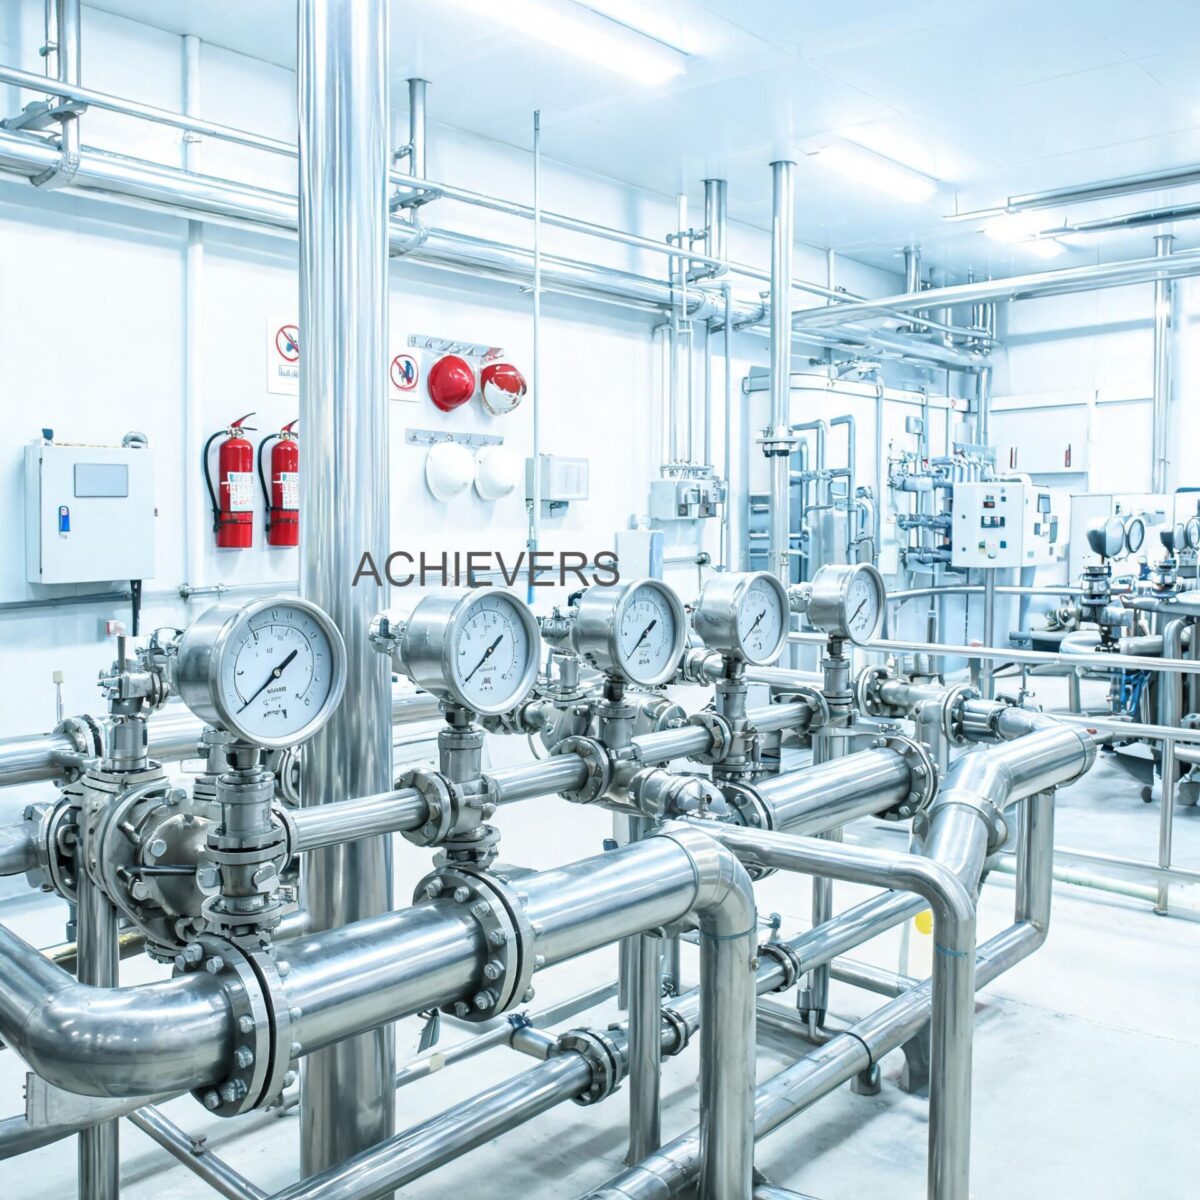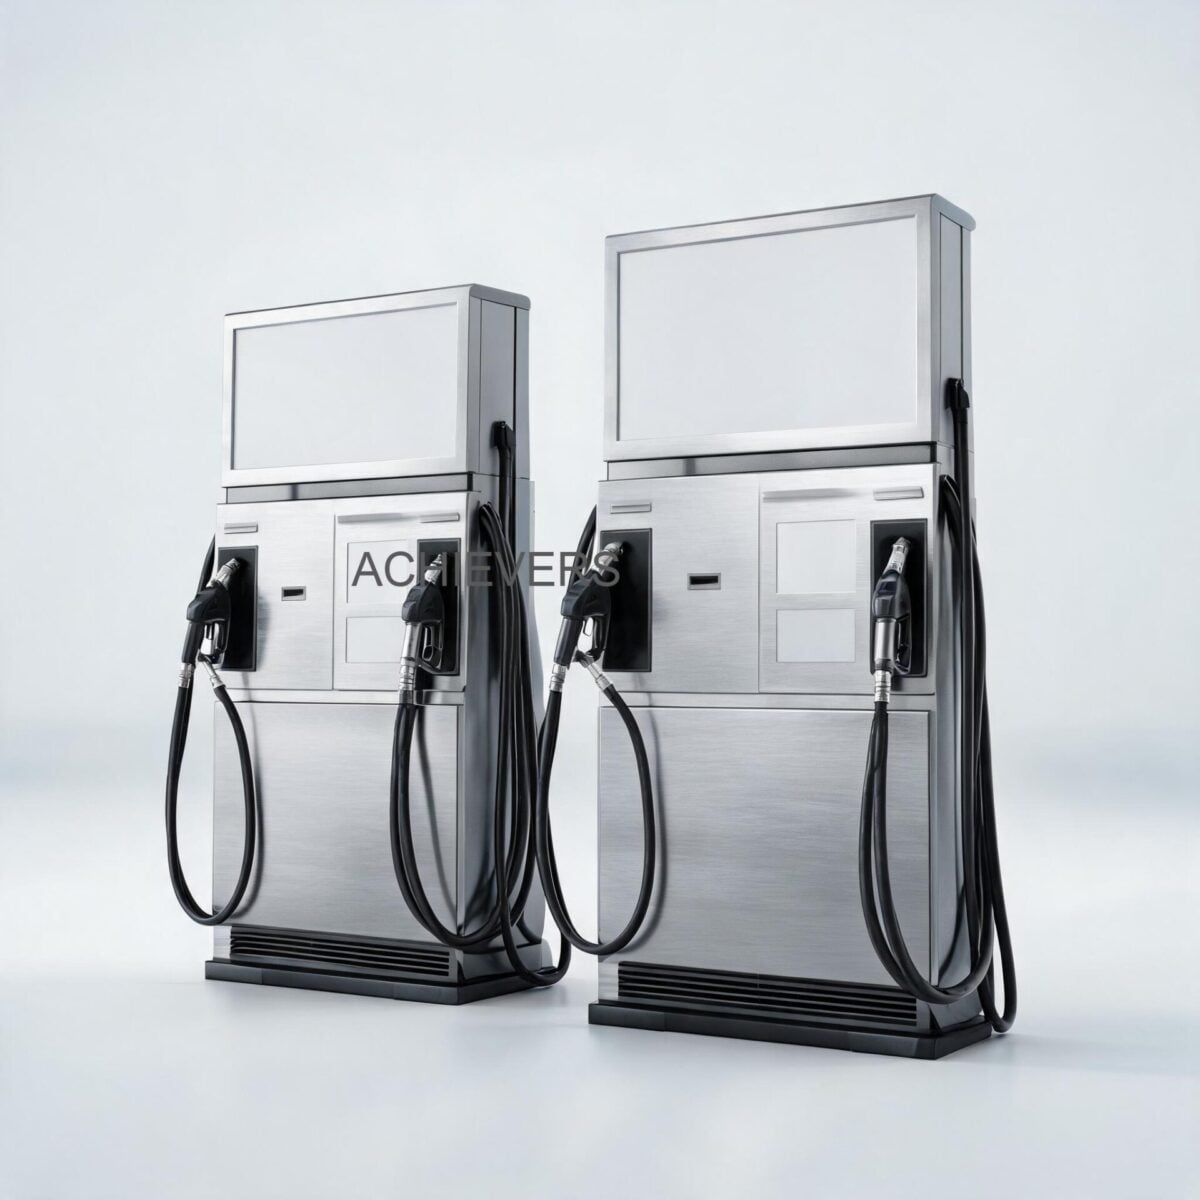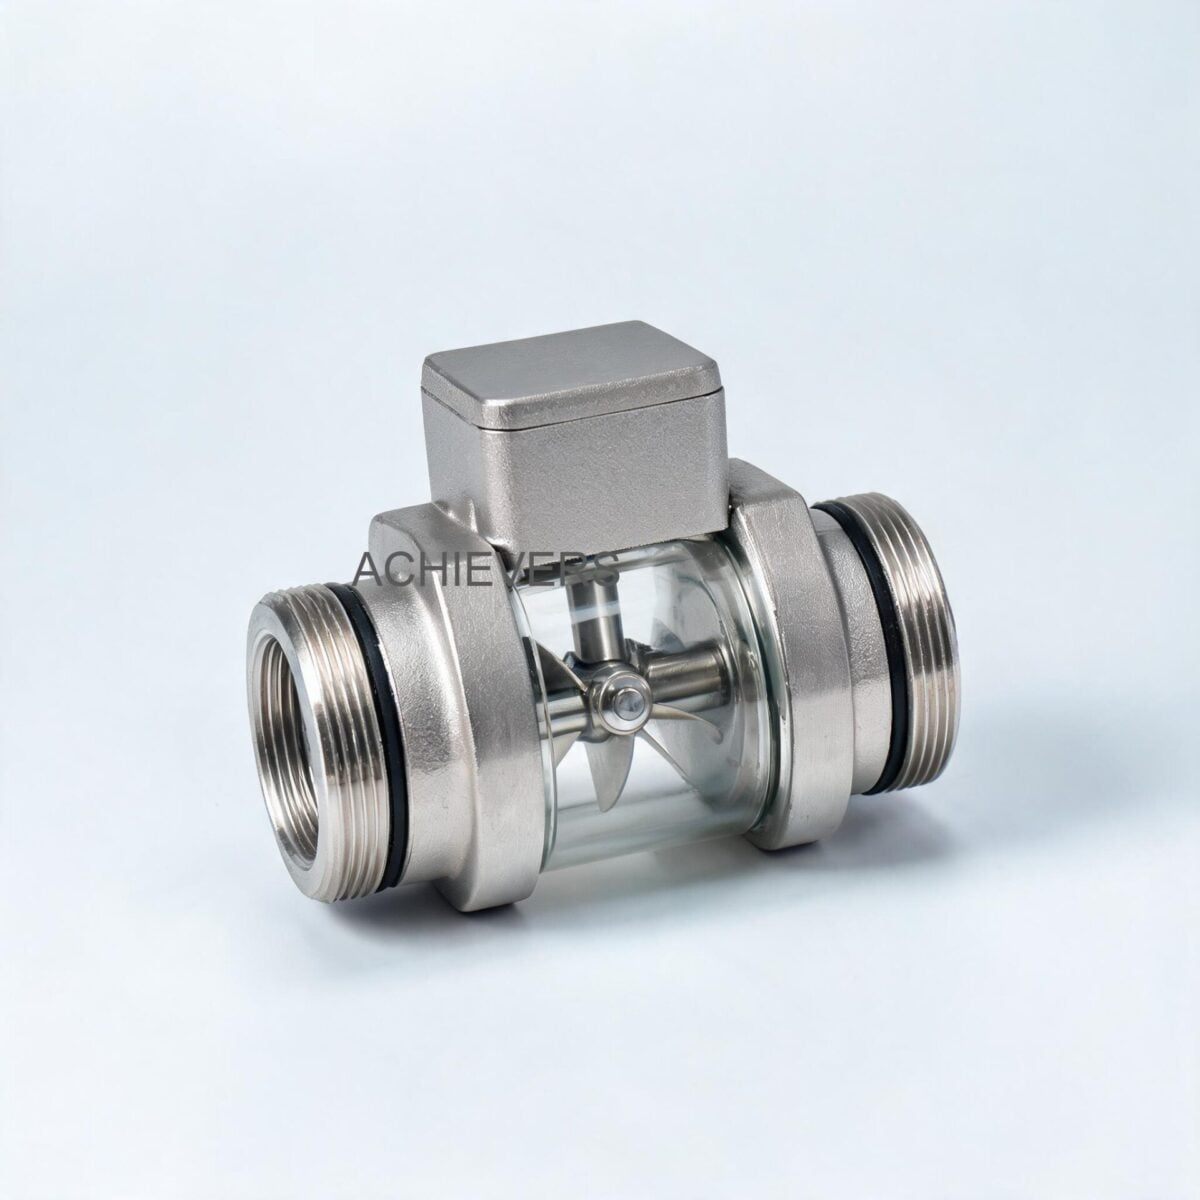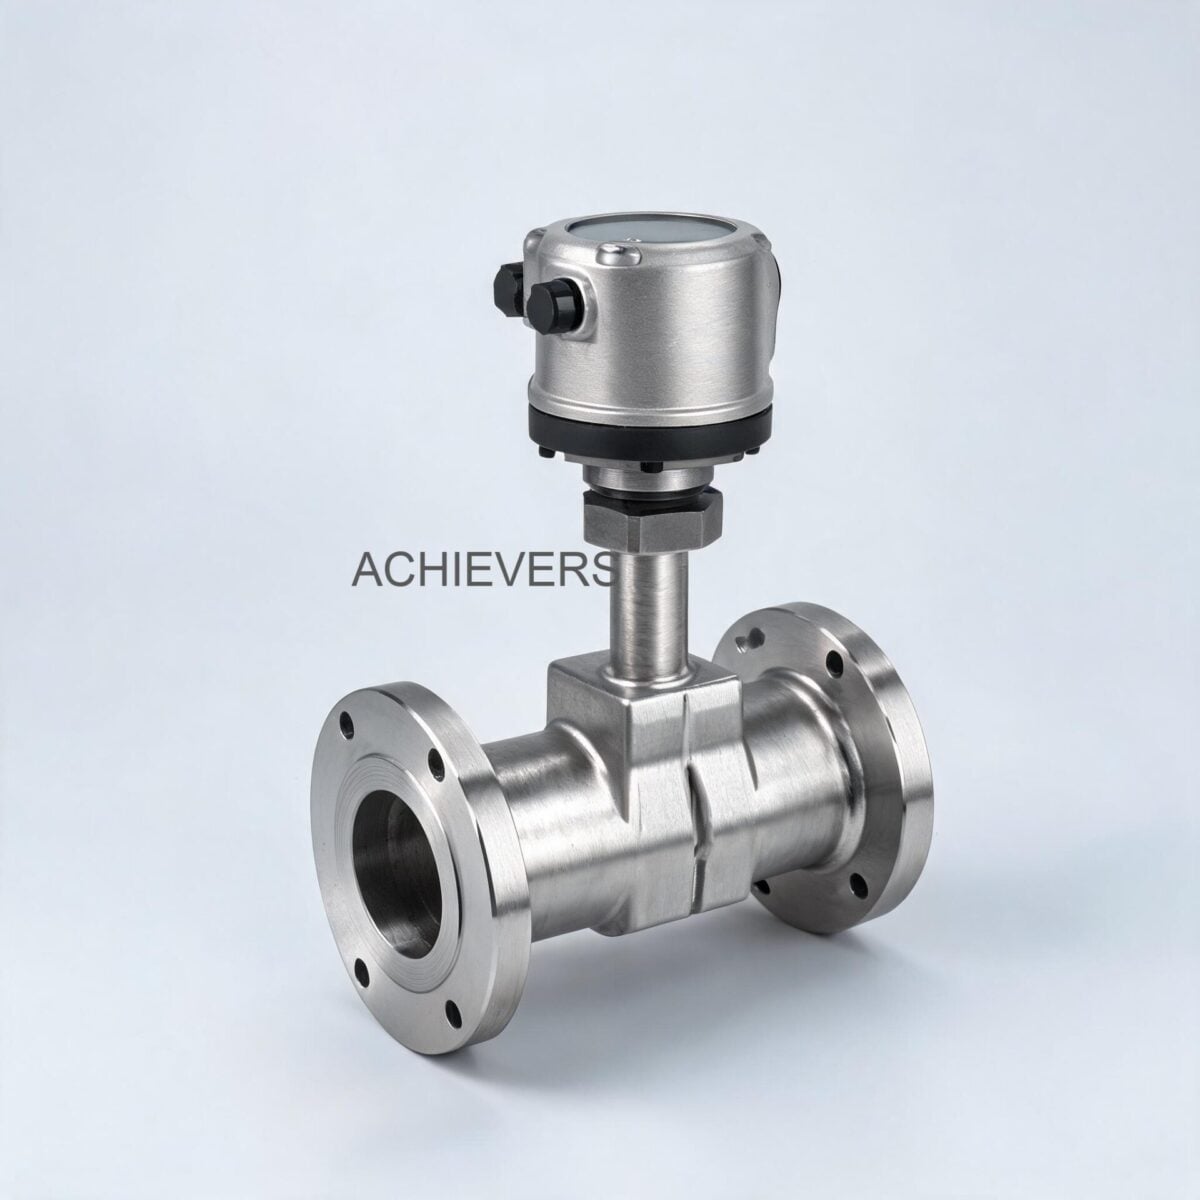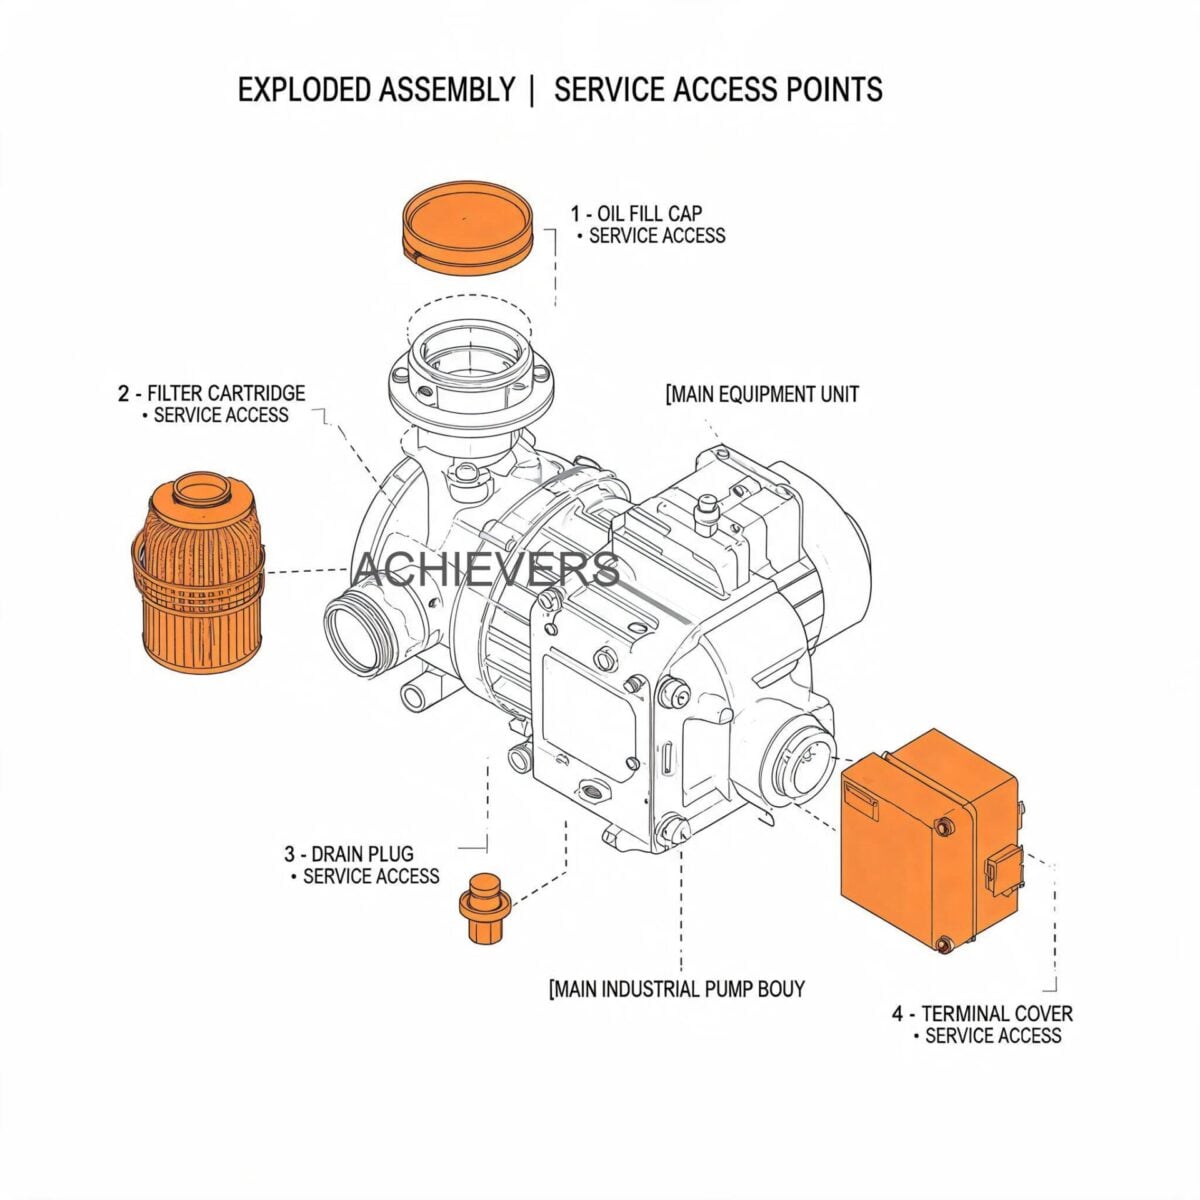
Vortex Flow Meters Troubleshooting: High Pressure Drop, Unexpected Noise, and Flow Capacity Loss

Unplanned downtime in Indian process plants—whether in a Gujarat petrochemical refinery, a Maharashtra pharmaceutical facility, or a thermal power plant—carries an immense financial burden. When plant engineers encounter a sudden increase in pressure drop (ΔP), unexplained piping noise, or an apparent loss of flow capacity, the immediate reaction is often to blame the flow meter. Prematurely replacing process instrumentation can result in ₹20,000 to ₹10,00,000 in wasted CapEx and labor, especially when the root cause lies in process conditions, piping installation, or signal interference.

Correctly diagnosing these symptoms requires separating true process restrictions from meter-specific issues. This comprehensive engineering guide helps you troubleshoot Vortex Flow Meters to restore optimal performance without unnecessary equipment replacements.

1. Quick Reference: How Vortex Flow Meters Work

Before diving into fault diagnosis, it is critical to understand the measurement physics. Vortex Flow Meters operate on the Von Kármán effect. A non-streamlined obstacle (the bluff body) is placed in the path of the flowing fluid. As the fluid passes this bluff body, it separates and forms alternating low-pressure areas (vortices) downstream.

A piezoelectric or capacitive sensor detects the mechanical stress or pressure variations caused by these shedding vortices. The frequency of the vortex shedding is directly proportional to the fluid velocity.

Engineering Formula: Von Kármán Frequency

The relationship is defined as:

f = (St * V) / d

Where:

  • f = Frequency of vortex shedding (Hz)
  • St = Strouhal number (a dimensionless calibration constant, typically around 0.22 for standard bluff bodies over a wide range of Reynolds numbers)
  • V = Fluid velocity (m/s)
  • d = Width of the bluff body (m)

Because the frequency only depends on velocity and the geometry of the bluff body, the meter is largely immune to changes in fluid density, viscosity, or temperature—provided the fluid remains in a turbulent flow regime (Reynolds number > 10,000).

Technical Specifications (Lumen Instruments "Achivers" Series)

To accurately troubleshoot, you must verify that your process conditions do not exceed the manufacturer's nameplate limits. Below are the definitive specifications for our vortex instruments:

ParameterSpecification Rating
Line SizeDN 15 to DN 300mm
Temperature Range-50°C to 350°C
Maximum Pressure20 kg/cm²
Signal Output4-20 mA, Pulses, RS 485 Modbus
Power Supply24Vdc two-wire
CompensationInbuilt pressure & temperature compensation
Mounting TypesFlange type, Sandwich (Wafer) type, Clamp On / Insertion

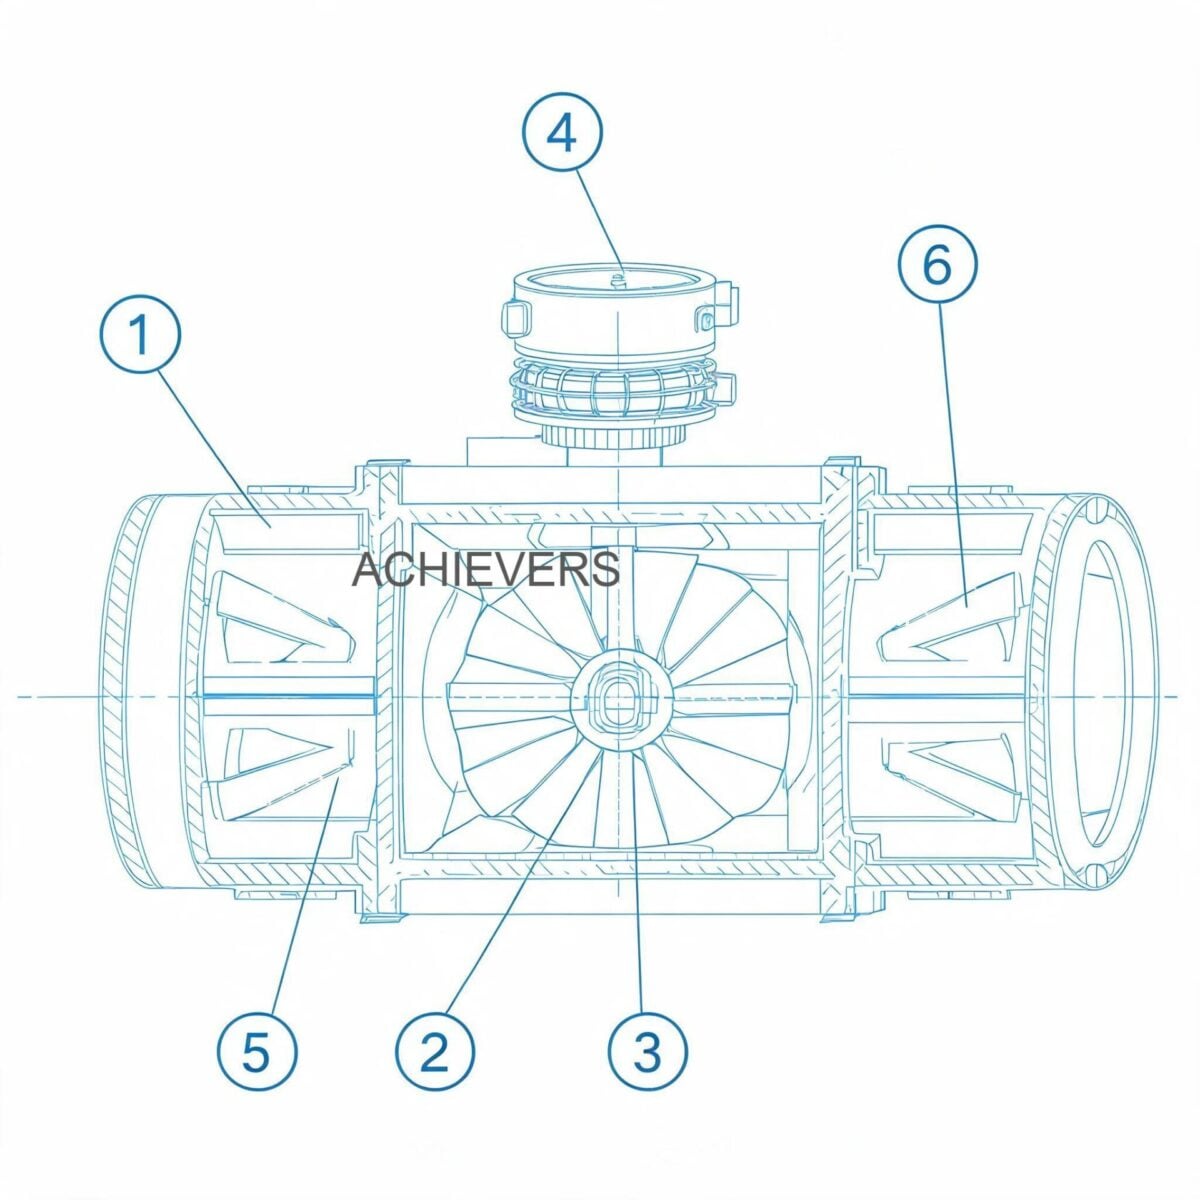
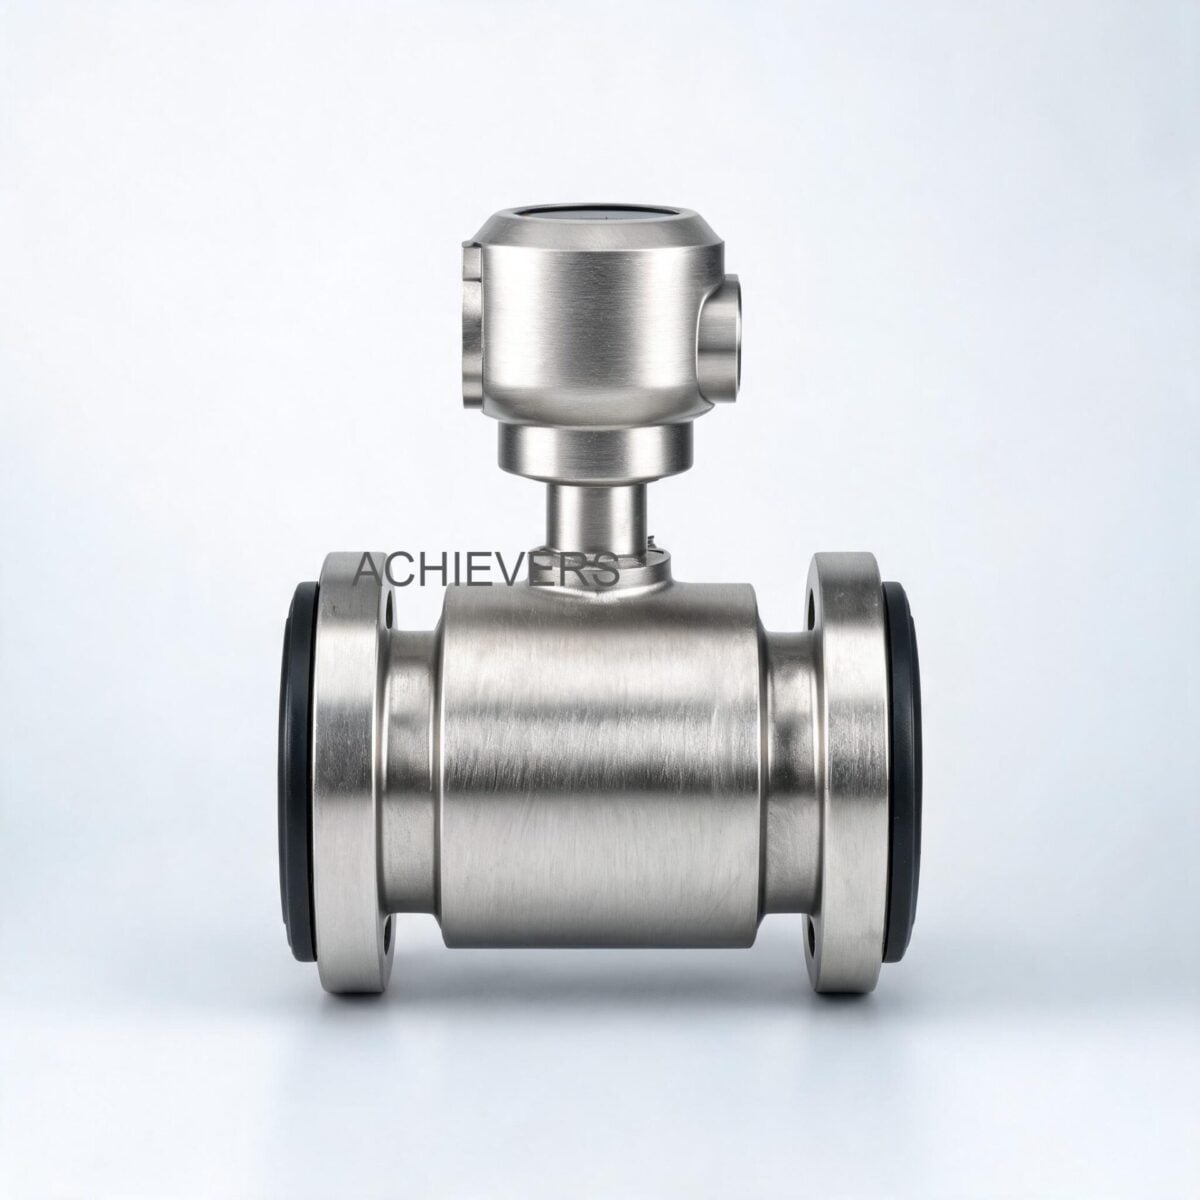
Labeled diagram of Vortex Flow Meters identifying key components relevant to troubleshooting including the bluff body, piezoelectric sensor, and transmitter housing

Technology Comparison Table

No single flow measurement technology fits every Indian industrial application. Here is how vortex technology compares to Electromagnetic Flow Meters and Turbine Flow Meters to help you verify if you selected the right tool for the job.

ParameterVortex Flow MeterElectromagnetic Flow MeterTurbine Flow Meter
Best ForSteam, gases, clean low-viscosity liquidsConductive liquids, slurries, wastewaterClean hydrocarbons, batching operations
Moving PartsNone (Solid-state sensor)NoneYes (Rotor and bearings)
Pressure DropModerate (due to bluff body)Zero (unobstructed pipe)High (due to rotor assembly)
Max TemperatureUp to 350°CTypically up to 150°C (PTFE liner)Typically up to 150°C – 250°C
Media ConductivityIndependentRequires > 5 µS/cmIndependent
Reynolds RequirementRe > 10,000 (Turbulent)Profile dependent, forgivingProfile dependent

Decision Matrix: When to Use This Technology

  • Use Vortex when: Measuring saturated or superheated steam in boiler networks, monitoring compressed air lines, or measuring high-temperature thermic fluids up to 350°C.
  • Do NOT use Vortex when: The fluid is highly viscous (heavy furnace oil), heavily particulate-laden (slurries that will abrade the bluff body), or moving at very low velocities where turbulent flow cannot be sustained.

2. Troubleshooting Matrix

When encountering high pressure drops, unexpected piping noise, or a sudden loss in flow readings, consult this matrix before disassembling the Vortex Flow Meters.

SymptomLikely CauseDiagnosis StepsFix
Sudden High Pressure Drop (ΔP)Strainer fouling upstreamMeasure ΔP across the upstream strainer using pressure gauges.Isolate line, blow down, and clean the Y-strainer mesh.
Piping Noise / HammeringWet steam / Condensate poolingCheck for missing insulation or failed steam traps upstream of the meter.Repair steam traps; ensure piping is sloped correctly away from the meter.
Noise + Erratic High ReadingPipe vibrationCheck local piping with a vibration pen. Ensure frequency is outside meter's cut-off.Add pipe supports/anchors within 1 meter of the sensor. Adjust Low Flow Cut-off (LFC).
Zero Reading but Fluid is FlowingLow velocity (Laminar flow)Calculate actual Reynolds number based on flow rate and viscosity.If Re < 10,000, reduce pipe size at meter run to increase velocity.
Drifting / Unstable OutputVoltage fluctuations / Ground loopsMeasure 24Vdc supply loop stability. Check for 50Hz AC ripple on the DC line.Install a clean regulated power supply. Ensure single-point grounding per BIS standards.
Display Error / Fault CodeMoisture in transmitterInspect transmitter housing for condensation common during Indian monsoons.Dry the enclosure. Replace silica gel packets. Ensure cable glands are IP67 sealed.
Lower Flow Capacity than ExpectedIncorrect K-Factor programmedVerify the K-factor on the display against the meter's original calibration certificate.Reprogram the K-factor (Pulses/Unit Volume) in the transmitter menu.
Sudden Capacity Loss (Liquid)Cavitation or FlashingCheck if downstream pressure drops below the fluid's vapor pressure.Increase downstream backpressure (e.g., install a restriction orifice or valve downstream).
Leakage at FlangesThermal cycling / Gasket failureInspect flange mating surfaces and gasket condition, especially after a cold start.Replace gaskets. Torque flange bolts in a star pattern to rated specification.
Output Signal Loss (4-20mA)Blown loop fuse / Wiring breakCheck loop continuity and resistance. Ensure total loop load < 600 ohms.Replace fuse; repair wire terminations. Check for rodent damage common in cable trays.

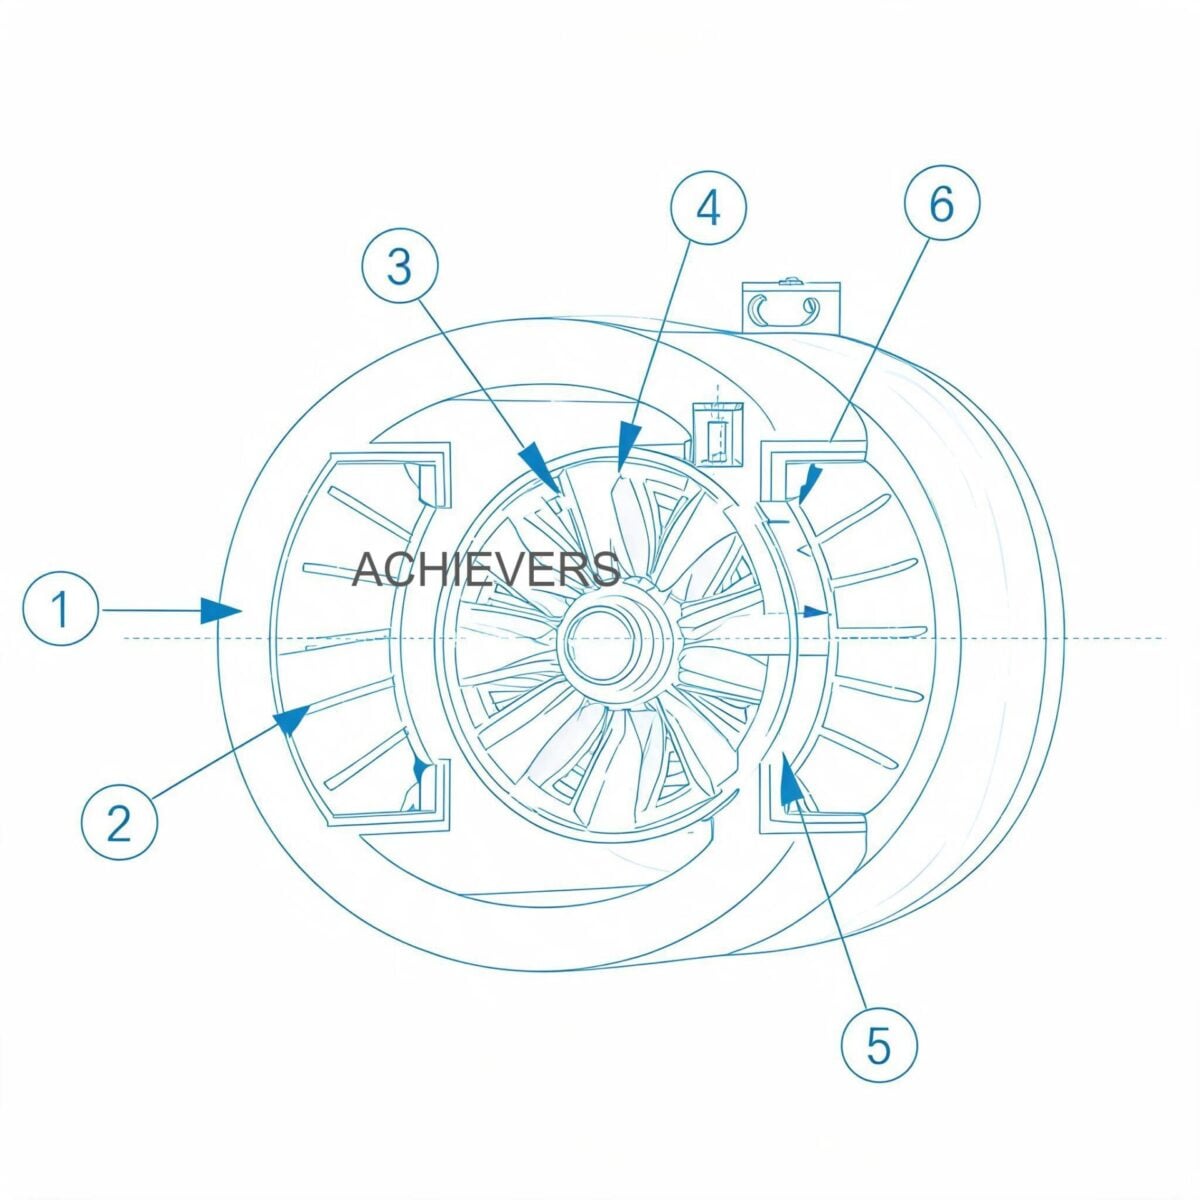
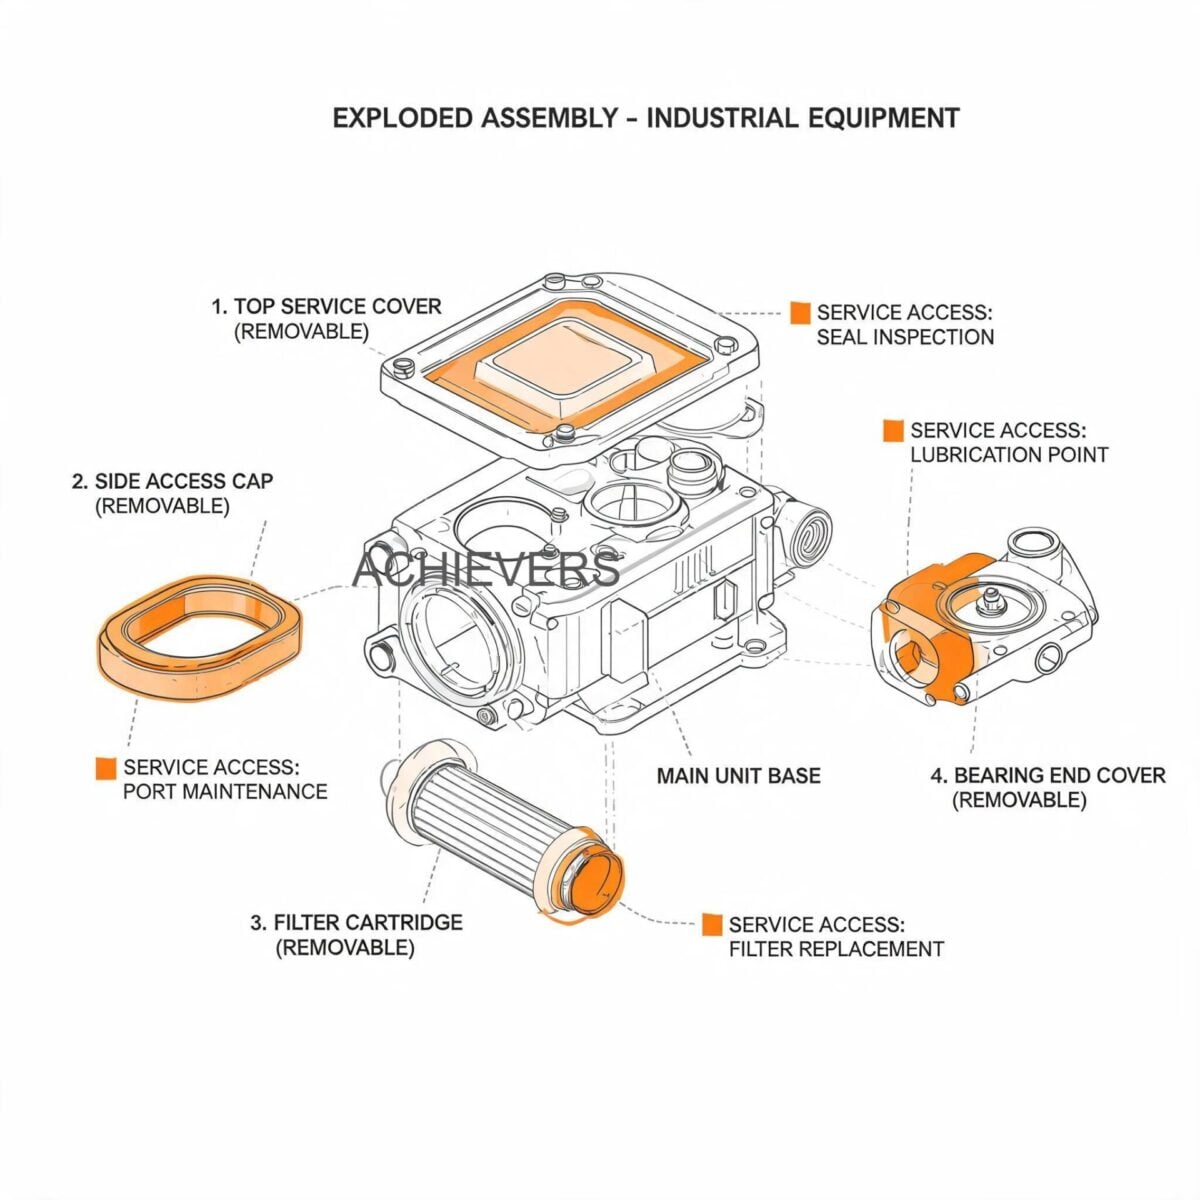
Schematic or cross-section of Vortex Flow Meters showing internal flow path, bluff body position, and sensor location

3. Step-by-Step Field Diagnosis Procedure

When a vortex meter in your facility exhibits high pressure drop or throughput loss, follow this 8-step field diagnostic procedure.

Tools Required: Digital Multimeter (DMM) with frequency and 4-20mA loop measurement, portable oscilloscope (optional but recommended), ultrasonic thickness gauge, vibration pen, and the original factory calibration sheet.

Step 1: Verify the Local Display vs. Control Room

Determine if the issue is mechanical or electronic. If the local display shows 50 m³/hr but the PLC/DCS reads 0 m³/hr, the problem is in the 4-20mA loop, RS-485 Modbus wiring, or PLC scaling—not the meter hardware.

Step 2: Inspect for Upstream Restrictions

A sudden increase in line pressure drop is rarely caused by the vortex meter itself, as the bluff body geometry does not change. Check the Y-strainers and isolation valves immediately upstream. In Indian water and steam lines, scale buildup (hard water) and weld slag are common culprits.

Step 3: Check for Pipeline Vibration

Vortex sensors detect microscopic deflections. If nearby heavy machinery (like a reciprocating compressor or positive displacement pump) is vibrating the pipe, the sensor will interpret this mechanical noise as flow, resulting in erratic or falsely high readings. Use a vibration pen. If vibration is present, adjust the Low Flow Cut-off (LFC) parameter in the transmitter or brace the pipe.

Step 4: Analyze for Cavitation and Flashing (Liquid Applications)

If the fluid is liquid and you hear a sound like gravel moving through the pipe, you are experiencing cavitation. This happens when the pressure at the bluff body drops below the liquid's vapor pressure, forming bubbles that collapse violently. Ensure that your downstream backpressure (P_back) satisfies this engineering rule of thumb:

P_back > (2.9 * ΔP) + (1.3 * P_vapor)

If it does not, throttle a valve downstream of the meter to increase backpressure.

Step 5: Diagnose Wet Steam Conditions (Steam Applications)

If throughput drops and noise increases in a steam application, you likely have wet steam. Condensate pooling at the bottom of the pipe hitting the bluff body causes severe noise and measurement errors. Check the thermodynamic steam traps upstream of the meter to ensure they are functioning.

Step 6: Verify the K-Factor Configuration

Go into the transmitter menu. Check the programmed K-Factor. If a technician accidentally altered the K-factor during routine maintenance, the meter will calculate flow capacity incorrectly. The programmed K-factor must perfectly match the tag plate or calibration certificate.

Step 7: Check Signal Integrity and Power Quality

Indian industrial grids often suffer from voltage spikes and harmonics. Use your DMM to measure the 24Vdc two-wire loop. It should read a stable voltage between 18V and 36V. If measuring the 4-20mA output, ensure the loop resistance is within the transmitter's drive capability.

Step 8: Sensor Diagnostics (Oscilloscope Check)

If flow is occurring but the meter reads zero, connect an oscilloscope to the raw sensor output terminals (if accessible per the manual). You should see a clean sine wave. A flatline indicates a shattered piezoelectric crystal or flooded sensor assembly.

4. Installation and Setup Errors That Cause Ongoing Problems

Many troubleshooting calls stem not from equipment failure, but from poor initial installation. An incorrectly installed vortex meter will never yield accurate results and will constantly trigger process alarms.

Installation ErrorSymptomCorrection
Inadequate Straight Pipe RunsErratic readings, low accuracyEnsure minimum 10D (diameters) upstream and 5D downstream of straight, unobstructed pipe.
Protruding Flange GasketsHigh pressure drop, inaccurate flowEnsure gaskets are perfectly centered. A protruding gasket acts as a secondary bluff body, ruining the flow profile.
Meter Installed at Pipe High-Point (Liquids)Zero flow reading, erratic spikingEntrapped air bubbles gather at high points. Relocate meter to a lower section or vertical line with upward flow.
Meter Installed at Pipe Low-Point (Gases/Steam)Mechanical damage, erratic flowCondensate pools at low points. Install meter in vertical lines or higher horizontal runs.
Control Valve Placed UpstreamSevere signal noise and driftControl valves generate extreme turbulence. Always place control valves downstream (at least 5D away) of the flow meter.
Incorrect Internal Diameter (Schedule)Consistent over/under readingThe K-factor is calibrated for a specific pipe ID. If installed in a Schedule 80 pipe when calibrated for Schedule 40, recalculate the scaling.

5. Preventive Maintenance to Avoid Recurrence

While solid-state flow meters require far less maintenance than mechanical meters, the harsh conditions of Indian industrial environments dictate a rigorous preventive maintenance schedule to maximize the lifespan of your ₹20,000+ investment.

Quarterly Electrical Checks:

Monsoon humidity often breaches poorly sealed enclosures. Inspect the transmitter housing for moisture. Ensure cable glands are tight and apply dielectric grease to terminals. If using the RS-485 Modbus output, verify termination resistors are intact to prevent signal reflection.

Bi-Annual Process Checks:

For steam and dirty liquid applications, schedule a shutdown to remove the meter and inspect the bluff body. Look for scaling (calcium/magnesium deposits common in Indian borewell water), pitting, or erosion. A deformed bluff body changes the Strouhal number, permanently altering the meter's calibration. Clean the bluff body carefully using mild solvents and non-abrasive tools.

Vibration Isolation Verification:

Over time, pipe supports can loosen due to thermal expansion and contraction. Re-torque pipe anchors and vibration dampeners on either side of the meter run every six months to prevent mechanical noise interference.

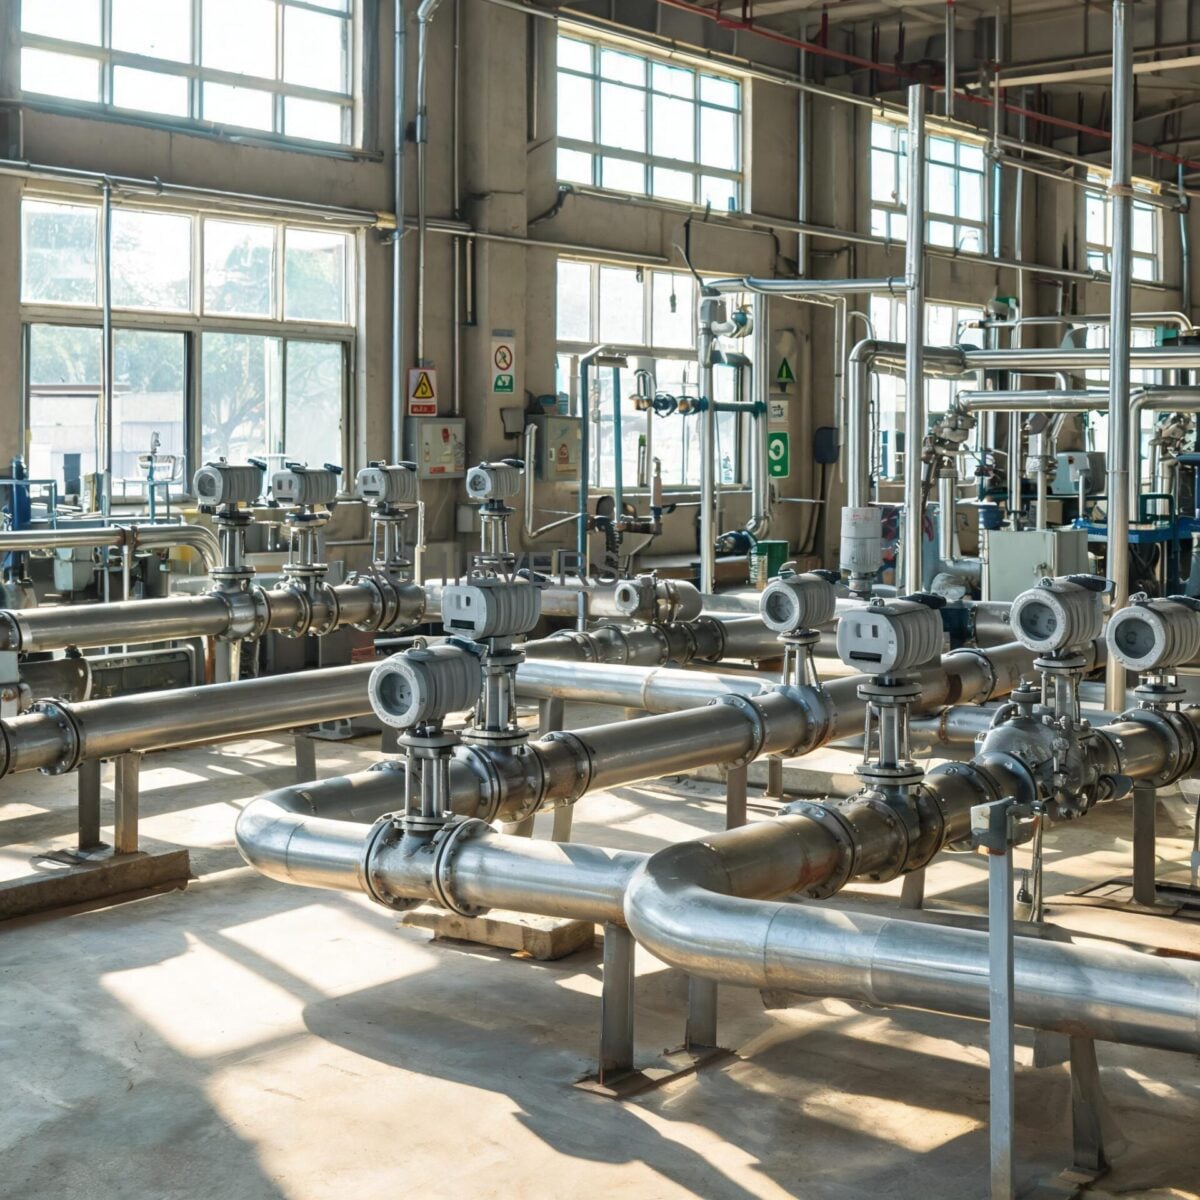
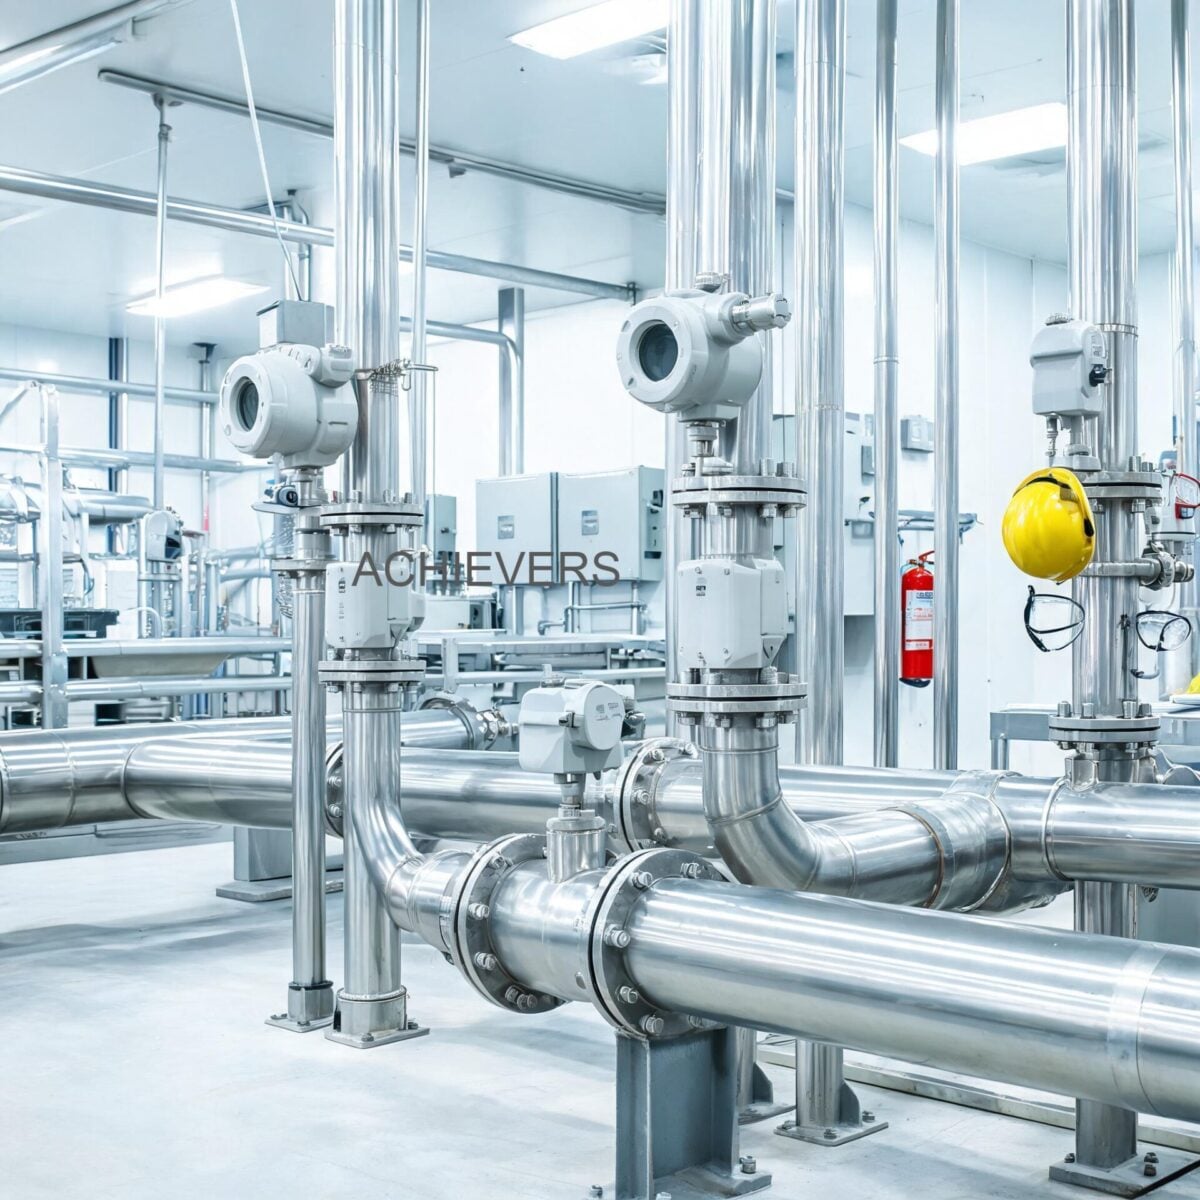
Well-maintained Vortex Flow Meters installation at a clean Indian industrial site showing proper straight pipe runs and secure flange bolting

6. When to Call Service vs. Fix Yourself

Knowing your limits prevents voiding warranties and causing permanent damage.

Field-Fixable Issues:

  • Reprogramming K-factors, output scaling (4-20mA ranges), and Modbus addresses.
  • Adjusting the Low Flow Cut-off (LFC) to eliminate vibration noise.
  • Replacing external loop wiring, fuses, and power supplies.
  • Cleaning the pipeline strainers and replacing flange gaskets.

Requires Factory Service / Replacement (Contact Lumen Instruments):

  • Sensor Replacement: If the piezoelectric sensor is mechanically shattered by water hammer or shorted due to process fluid ingress, it must be replaced and the unit recalibrated.
  • Bluff Body Erosion: If the bluff body is heavily worn down by particulate matter, the meter's fundamental geometry is altered. It cannot be fixed via software scaling; the unit must be rebuilt or replaced.
  • Transmitter PCB Failure: If a high-voltage spike has fried the main processing board, it requires a factory replacement PCB mapped to the specific sensor.
  • PESO / Legal Metrology Seals Broken: If working in a highly regulated hazardous area (Zone 1/Zone 2) or custody transfer application, opening hermetically sealed components may violate PESO (Petroleum and Explosives Safety Organisation) certification.

FAQ

Q: Can a vortex flow meter cause a complete loss of flow capacity in my pipeline?

A: No. Because the bluff body only obstructs a small percentage of the cross-sectional area, a vortex meter cannot completely block flow unless a massive foreign object is pinned against it. If you have zero flow capacity, look for closed block valves, heavily clogged strainers, or a failed pump upstream.

Q: My 4-20mA output fluctuates wildly, but the local LCD display shows a steady flow. What is wrong?

A: This points directly to an electrical issue, not a mechanical or process one. Check for loose terminal connections, moisture inside the electrical housing, or ground loops. Ensure the instrument casing is tied to a clean instrumentation earth.

Q: How do I know if my problem is cavitation or just normal pipe noise?

A: Cavitation sounds distinctly like rocks or marbles flowing rapidly through the pipe. It also usually coincides with a sudden, erratic drop in the flow reading as bubbles form around the sensor. Calculating your downstream pressure against the fluid's vapor pressure is the definitive engineering check.

Q: What is the maximum temperature the Lumen Instruments vortex meters can handle?

A: Our standard specifications accommodate temperatures from -50°C to 350°C. This makes them ideal for thermic fluids, superheated steam, and cryogenic applications. Exposing the meter to temperatures above 350°C can permanently depolarize the piezoelectric sensor crystal.

Q: The flow meter under-reads consistently by about 10%. Why?

A: Consistent percentage errors are almost always setup issues. The most common causes are an incorrect internal pipe diameter (e.g., using heavy-wall pipe when the meter was calibrated for thin-wall), an incorrectly entered K-factor, or failing to meet the upstream 10D straight-run requirement, leading to a skewed velocity profile.

Q: Do I need to recalibrate my vortex meter if the fluid density changes?

A: No. Vortex meters are volumetric devices that measure fluid velocity based on shedding frequency, which is largely independent of fluid density, viscosity, and pressure (as long as the Reynolds number remains above 10,000). However, if you are calculating mass flow, your external flow computer must be updated with the new density values.

Q: Why does the meter read a small flow rate when the valves are closed and the pump is off?

A: This is caused by pipeline vibration being detected by the sensor crystal. To fix this without altering the piping, enter the transmitter setup menu and raise the Low Flow Cut-off (LFC) value until the false reading drops to zero.

Are you experiencing persistent measurement issues, or are you looking to upgrade your plant's instrumentation with equipment designed for harsh Indian site conditions? Contact Lumen Instruments today. Please provide your required product name, expected flow capacity, fluid type, operating temperature, and site conditions, and our engineering team will help you select and size the perfect solution.

Automatic Shutoff vs Manual Fuel Nozzles: Safety, Flow Control, and Best-Fit Industrial Use

The selection of dispensing hardware at the terminus of a fluid transfer system is a critical engineering decision that dictates operational safety, flow control accuracy, and environmental compliance. Plant managers and instrumentation engineers often encounter operational bottlenecks or hazardous spill incidents simply because the incorrect dispensing mechanism was specified for the duty cycle. This guide provides a definitive automatic shutoff vs manual fuel nozzles comparison for diesel dispensing, stripping away marketing claims to evaluate these devices on pure engineering criteria: venturi sensitivity, pressure-drop behavior, and mechanical failure modes.

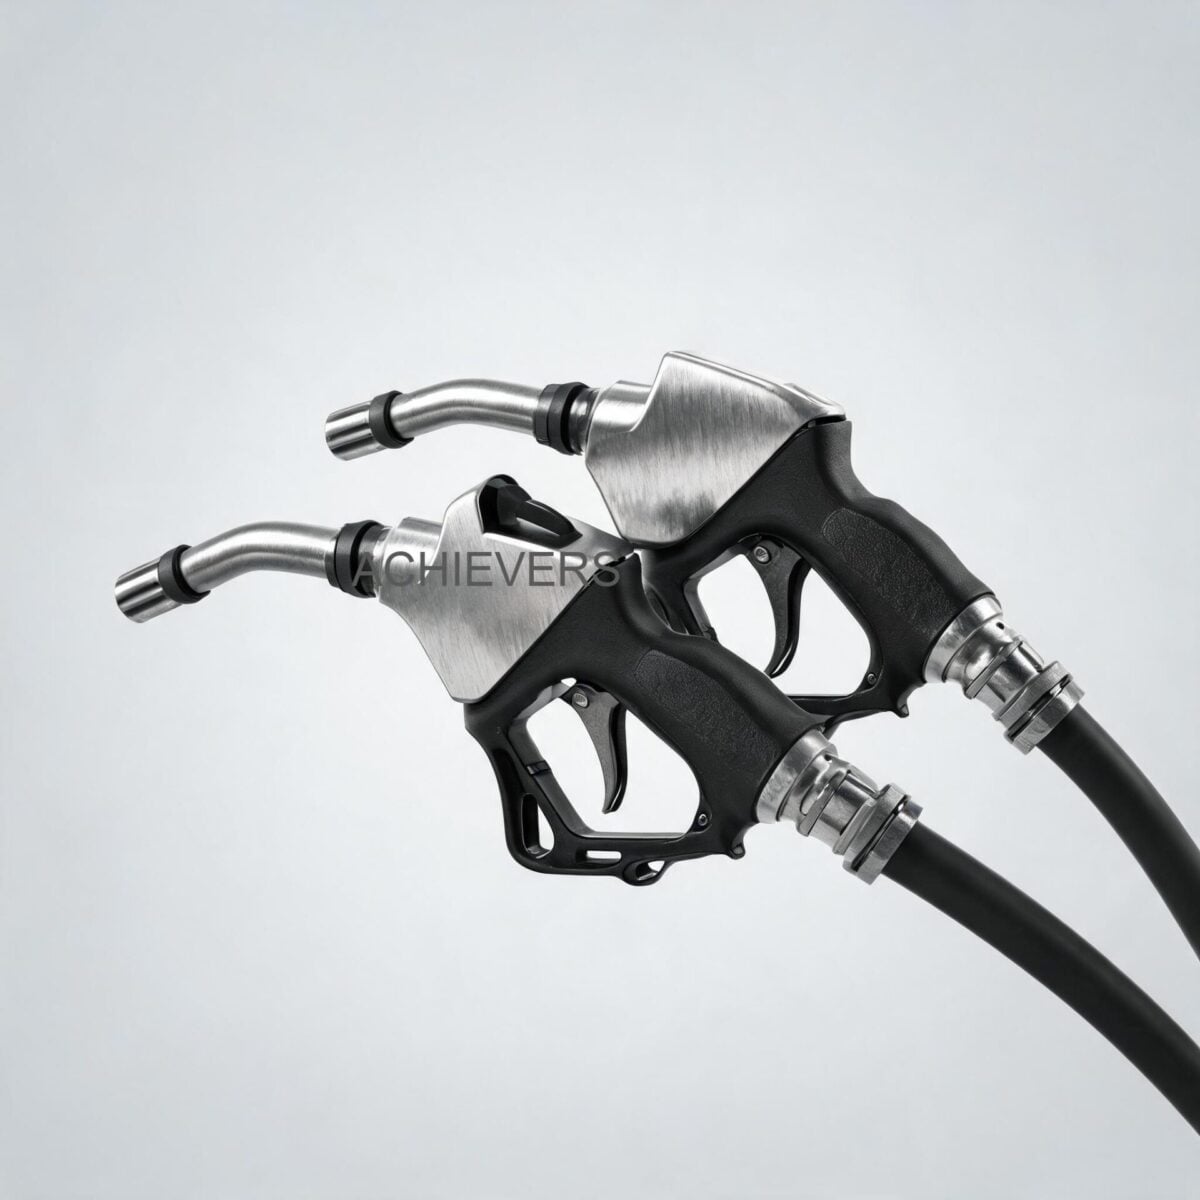
Understanding the internal fluid dynamics and actuation mechanisms of Fuel Nozzles is essential for standardizing safe transfer protocols. Whether you are refuelling a multi-megawatt backup generator at a data center or managing a high-volume mobile transfer unit at a remote mining facility, the nozzle dictates the final flow velocity, aeration levels, and ultimate metering accuracy. By analyzing these technologies head-to-head, industrial buyers can specify the most reliable equipment to reduce downtime and eliminate costly spillage risks.

1. Overview of Fuel Nozzles Family

The fundamental purpose of industrial Fuel Nozzles is to provide controlled, directional fluid dispensing while minimizing flow restriction and preventing fluid surge. However, the internal architecture varies drastically between automatic and manual variants, dictating their suitability for different fluid types and operating pressures.

Manual nozzles operate via a direct-acting mechanical poppet valve. When the operator depresses the lever, the cam physically lifts the poppet against a return spring, allowing fluid to bypass the seat. This design offers a nearly straight-through flow path, resulting in an exceptionally low pressure drop (Delta P) across the valve body. It is highly robust, relying solely on operator intervention to halt the flow, which makes it ideal for high-viscosity fluids or gravity-fed systems where line pressure is minimal.

Automatic shutoff nozzles, conversely, are complex hydro-mechanical devices relying on the Venturi effect to autonomously halt fluid flow. The spout of an automatic nozzle contains a small sensing port connected to a vacuum tube that runs back to a diaphragm in the nozzle body. As fluid rushes through a venturi ring inside the nozzle, it creates a low-pressure zone.

Engineering Principle: Venturi Vacuum Generation

The actuation relies on Bernoulli's principle for incompressible fluids. The pressure drop created at the venturi throat is calculated as:

Differential Pressure = 0.5 * Fluid Density * ((Velocity at throat)^2 – (Velocity at inlet)^2)

As long as the sensing port at the tip of the spout remains exposed to air, air is drawn in, and the diaphragm remains in equilibrium. However, when the rising liquid level in the receiving tank submerges the spout tip, air can no longer enter the sensing port. The fluid flow continues to generate a vacuum, which abruptly pulls the internal diaphragm upward. This movement trips a mechanical latch pin holding the main valve stem, causing the heavy return spring to slam the main poppet shut in milliseconds, preventing an overflow.

Modern variants often integrate digital flow metering directly into the nozzle body. By incorporating miniaturized Turbine Flow Meters before the spout assembly, these intelligent nozzles provide real-time batch totals and cumulative volumetric data.

Overview of the main Fuel Nozzles configurations and variants available including automatic and manual dispensing designs

2. Head-to-Head Specification Comparison

To effectively specify industrial fuel nozzle specifications for manufacturers, engineers must cross-reference application limits against the nozzle's certified ratings. The following table contrasts a standard high-grade automatic shutoff nozzle against a heavy-duty manual equivalent based on actual baseline specifications for a 1-inch to 3/4-inch reducer application.

Technical Specification / FeatureAutomatic Shutoff NozzleManual Nozzle
:—:—:—
Primary Shutoff MechanismHydro-mechanical Venturi & DiaphragmDirect Operator-Actuated Poppet
Inlet Thread SpecificationBSP 3/4" (Standardized for metered lines)BSP 3/4" or BSP 1"
Spout Outer Diameter13/16" (Unleaded/Diesel standard)Variable (up to 1-1/4" for high flow)
Calibrated Flow Rate Range0 – 60 L/min0 – 80+ L/min (Limited by pump)
Maximum Operating Pressure0.18 MPa (1.8 Bar)Up to 0.34 MPa (3.4 Bar)
Average Net Weight1.14 kgs/pc (Heavier due to latching internals)0.85 kgs/pc (Lighter, simpler casting)
Pressure Drop (Delta P)Moderate to High (Venturi restriction)Low (Straight flow path)
Insulator / Jacket ColorRed (Standardized visual coding)Variable / Often unjacketed
Fluid Viscosity LimitLow to Medium (Diesel, Kerosene, Petrol)High (Heavy oils, lubricants, biofuels)
Minimum Operating PressureRequires minimum flow to generate vacuumZero minimum pressure (Gravity feed ok)
Primary Failure ModeBlocked sensing port or torn diaphragmO-ring wear or return spring fatigue
Operator Attendance RequirementMinimal (Latch clip allows hands-free filling)Constant (Dead-man switch principle)

Technical comparison diagram highlighting the key differences between Fuel Nozzles variants and internal poppet structures

When selecting a Fuel Nozzles supplier, these specifications act as the baseline. The 0.18 MPa pressure limitation on the automatic variant is critical; exceeding this pressure can cause the internal poppet to flutter or fail to close against the fluid force, negating the safety mechanism.

3. Application Comparison Table

Different industrial environments impose distinct rheological and environmental challenges on dispensing equipment. The best fuel nozzle for high flow diesel transfer at a retail depot will fail catastrophically if applied to high-viscosity bunker fuel transfer at an offshore facility.

Application ScenarioRecommended OptionEngineering Reasoning
:—:—:—
Standard Fleet Diesel RefuelingAutomatic ShutoffAllows operators to manage other tasks while dispensing; eliminates tank overflow and environmental contamination.
High Viscosity Lube Oil DispensingManual NozzleHeavy oils cannot generate sufficient velocity to create the required venturi vacuum, rendering automatic shutoff mechanisms useless.
Gravity-Fed Storage TanksManual NozzleGravity systems often operate below the minimum pressure required (e.g., < 0.5 bar) to trip an automatic diaphragm.
Hazardous Area (ATEX Zones)Automatic ShutoffReduces operator exposure time near open fuel necks; limits vapor displacement and static charge accumulation through controlled shutoff.
Mobile Fueling CartsAutomatic ShutoffPrevents splashing and spillage in unstable environments where tank levels are difficult to monitor visually.
High-Volume Bulk Transfer (>100 L/min)Manual Nozzle (High Flow)Large internal bore provides lower flow restriction (higher Cv value), preventing cavitation at the pump head.
Abrasive or Contaminated FluidsManual NozzleParticulates will rapidly clog the 1mm sensing port in an automatic nozzle spout, causing continuous failure to shut off.
Winter/Extreme Cold EnvironmentsAutomatic ShutoffOperators wearing heavy PPE lack tactile feedback for manual valves; automatic latching ensures safe, precise fills in freezing conditions.

4. Total Cost Comparison

Procurement teams must evaluate dispensing hardware not just on initial capital expenditure, but on the total lifecycle cost, including maintenance intervals and expected service life under industrial duty cycles. The table below represents a global cost baseline (presented in INR equivalents for standardized comparative modeling).

Nozzle OptionPurchase Range (INR Equivalent)Annual Maintenance (INR)Expected Life (Standard Duty)Best For…
:—:—:—:—:—
Standard Manual Nozzle₹1,500 – ₹3,500₹500 (O-ring replacement)3 – 5 YearsGravity systems, viscous oils, harsh particulate environments.
Heavy-Duty Manual₹4,000 – ₹7,000₹800 (Seal & spring kits)5 – 8 YearsHigh-volume bulk transfer, offshore, aggressive chemicals.
Standard Auto-Shutoff₹3,500 – ₹6,500₹1,200 (Spout & diaphragm cleaning)2 – 4 YearsFleet depots, commercial pumps, standard diesel dispensing.
Auto-Shutoff w/ Digital Meter₹8,500 – ₹15,000₹2,000 (Calibration & battery)2 – 5 YearsDecentralized inventory tracking, mobile dispensing units.

Note: Lifespans assume standard non-corrosive fluid use within the 0.18 MPa pressure rating and standard 0-60 L/min flow limits.

5. Decision Guide: Which One for Your Plant?

Standardizing your fluid transfer operations requires mapping the dispensing hardware to your specific plant conditions. Follow this 8-step decision matrix to ensure you specify the correct equipment.

  1. Assess the Fluid Viscosity:
  2. If your fluid exceeds 10 cSt (centistokes) at operating temperature (such as heavy gear oils or cold hydraulic fluid), you must default to a manual nozzle. The venturi vacuum cannot overcome the sluggish fluid dynamics of highly viscous media to trigger the shutoff.

  3. Calculate System Delivery Pressure:
  4. Check the output pressure of your transfer pump. If it exceeds 0.18 MPa (approx. 26 psi), a standard automatic nozzle may suffer from hydraulic lock or fail to shut off. You will need a pressure-reducing valve or a specialized high-pressure manual nozzle.

  5. Determine the Required Flow Rate:
  6. For precision dispensing into small tanks or generators, a standard 0-60 L/min automatic nozzle with a 13/16" spout is optimal. If you are filling massive earth-moving equipment tanks and need 150+ L/min, the flow restriction of a standard automatic nozzle will bottleneck the system; specify a 1" or 1.5" manual high-flow nozzle instead.

  7. Evaluate System Integration:
  8. If you utilize Mobile Diesel Dispensers that travel to various sites, integrating an automatic nozzle with an inline digital flow meter provides vital, on-the-spot batching accuracy and prevents overfills on uneven terrain.

  9. Analyze the Operational Environment (Particulates):
  10. In dusty mining environments or agricultural sectors where fuel polishing is poor, debris can easily clog the venturi sensing port at the tip of an automatic nozzle. If filtration cannot be guaranteed below 30 microns, a manual nozzle will offer far higher reliability.

  11. Consider Operator Ergonomics and Safety:
  12. For dispensing operations taking longer than 2-3 minutes, requiring an operator to manually depress a stiff lever causes ergonomic strain. Automatic nozzles with latch pins allow hands-free operation, allowing the operator to stand back from potential vapor zones.

  13. Check Tank Neck Geometry:
  14. The venturi shutoff mechanism requires the fluid level to abruptly cover the spout tip. If the receiving tank has a long, highly angled, or obstructed fill pipe that causes severe fluid splashing, the automatic nozzle may suffer from "premature shutoff" due to foam or splash covering the sensing port before the tank is full.

  15. Review Calibration Requirements:
  16. If the nozzle is intended for custody transfer or precise inventory logging, ensure the selected nozzle has laminar flow characteristics that do not disrupt the upstream flow meter. Manual nozzles generally produce less turbulence, but metered automatic nozzles are factory-calibrated to account for the internal venturi disturbance.

Fuel Nozzles in use at a representative global industrial application connected to high flow transfer pumps

FAQ

Q: Why does my automatic shutoff nozzle keep clicking off before the tank is full?

A: Premature shutoff is typically caused by excessive dispensing velocity creating fluid turbulence and foam in the fill pipe. The foam blocks the venturi sensing port at the tip of the spout, tricking the diaphragm into triggering the shutoff. Reducing the flow rate or altering the angle of insertion usually resolves this.

Q: Can I use an automatic nozzle on a gravity-fed fuel tank?

A: Generally, no. Automatic nozzles require a minimum flow velocity to generate the necessary vacuum in the venturi tube to pull the internal diaphragm. Gravity-fed systems usually lack the pressure (head) to achieve this velocity, resulting in the nozzle failing to shut off when the tank is full.

Q: What does the 0.18 MPa pressure specification mean for my system?

A: This refers to the maximum operating pressure the internal valve components can safely withstand. Exceeding 0.18 Megapascals (roughly 26 PSI) can cause the main poppet valve to remain forced open against the return spring, rendering the automatic shutoff mechanism useless and risking a massive spill.

Q: How often should the digital meter on a metered dispensing nozzle be calibrated?

A: In standard industrial applications, calibration should be verified every 6 to 12 months using a certified volumetric proving can. Extreme temperature fluctuations or dispensing abrasive fluids may necessitate quarterly calibrations to maintain accuracy within a 1% margin.

Q: Why is the spout size (13/16") important when ordering?

A: Spout diameter dictates compatibility with vehicle or equipment fill necks. A 13/16" spout is the global standard for unleaded petrol and standard light-duty diesel equipment. Using an oversized spout will prevent insertion, while an undersized spout can cause blow-back and poor sealing.

Q: Are manual nozzles inherently less safe than automatic ones?

A: Not necessarily. Manual nozzles force the operator to remain engaged (the "dead-man" principle). While they lack overfill prevention, operator attendance ensures immediate reaction to leaks or hazards, making them highly reliable in applications where automatic sensing ports would clog.

Q: Can I dispense highly viscous engine oil through an automatic diesel nozzle?

A: No. High viscosity fluids (above 10 cSt) move too slowly and are too thick to properly actuate the vacuum sensing port and diaphragm mechanism. The nozzle will function as a manual valve but will fail to shut off automatically.

Ready to upgrade your plant's dispensing safety and accuracy? Contact our engineering team today with your required flow rate, fluid type, and operating pressure. We will help you specify the exact Fuel Nozzles configuration—whether high-flow manual or metered automatic—engineered to withstand your site's specific duty cycle and eliminate costly downtime.

Oil Flow Meters: Positive Displacement vs Turbine vs Oval Gear for Accurate Oil Consumption

Indian industrial plants operate in unforgiving conditions. From extreme ambient temperature swings spanning Delhi winters to Chennai summers, to inconsistent power quality and heavily contaminated fuel supplies, instrumentation engineers face unique challenges when specifying flow measurement devices. When managing high-value petroleum products—where discrepancies cost lakhs of rupees monthly—selecting the right technology is not just an engineering decision; it is a financial mandate.

For plant managers and procurement heads trying to ensure accurate oil consumption tracking, a common dilemma arises: choosing between turbine meters, standard rotary piston meters, and oval gear positive displacement systems. Buyers often default to cheaper turbine technologies, only to face massive inaccuracies when fluid viscosity shifts or when operating under gravity-fed conditions.

This comprehensive technical guide provides a deep-dive positive displacement vs turbine oil flow meter comparison, outlining exactly how to specify Oil Flow Meters for harsh industrial applications. Whether you are tracking heavy furnace oil in boilers, metering diesel for backup generator sets, or unloading tankers, this guide unpacks the engineering fundamentals behind reliable oil flow measurement.

1. Overview of the Oil Flow Meters Family

To achieve precise fluid measurement, the fundamental metering principle must match the fluid dynamics of the application. The three primary technologies utilized in industrial fluid measurement are Turbine, Rotary Piston, and Oval Gear—the latter two falling under the broader category of Positive Displacement Flow Meters.

Overview of the main Oil Flow Meters configurations and variants available including mechanical registers and pulse output electronics

The Turbine Meter Conundrum

Turbine Flow Meters calculate flow by inferring the fluid velocity. As oil passes through the meter body, it spins a rotor. The rotational speed is theoretically proportional to the flow rate. However, turbine meters are highly dependent on the fluid's Reynolds number. If you are measuring light, consistent liquids like water, turbines excel. But in oil applications, viscosity variations drastically alter the velocity profile. If ambient temperatures drop, oil viscosity increases, causing viscous drag on the turbine blades and leading to severe under-registration.

The Positive Displacement (PD) Advantage

For high-thickness, viscous liquids, positive displacement is the gold standard. PD meters isolate a specific volume of fluid and physically transport it from the inlet to the outlet. Because they measure discrete volumetric parcels, their accuracy is largely independent of the fluid's velocity profile.

Lumen's Oil Flow Meters utilize an advanced oval gear design. The meter houses two precision-machined oval gears that rotate in tandem. As fluid pressure pushes against the gears, a defined volume is trapped in the crescent-shaped cavity between the gear and the outer housing.

Engineering Formula: Volumetric Flow Rate in Oval Gear Meters

The total flow (Q) is determined by the volume of the measuring chamber (V), the rotational speed of the gears (N), and the volumetric efficiency (eta_v).

Q = V * N * eta_v

Where Volumetric Efficiency (eta_v) is calculated as:

eta_v = 1 – (Q_slip / Q_theoretical)

Engineering Calibration Note: Slip flow (Q_slip) is the minute amount of fluid that bypasses the gears through the mechanical clearances. In turbine meters, high viscosity causes errors. In oval gear Oil Flow Meters, high viscosity actually improves accuracy by acting as a dynamic seal in these clearances, reducing slip flow nearly to zero. This is why step-less alignment systems in modern PD meters provide repeatability better than 0.02%.

2. Head-to-Head Specification Comparison

When evaluating buy oil flow meters supplier specifications, B2B procurement teams must look past marketing claims and analyze the raw instrumentation data. Below is a strict technical comparison of how Oval Gear technology (specifically Lumen's Achievers series) compares to standard industrial alternatives.

Technical ParameterLumen Oval Gear (PD)Standard Turbine MeterRotary Piston (PD)
:—:—:—:—
Typical Accuracy+/- 0.5% (Up to +/- 0.2% on request)+/- 1.0% to 2.0% (viscosity dependent)+/- 0.5%
RepeatabilityBetter than 0.02%+/- 0.1%+/- 0.05%
Line Size Availability6mm to 150mm (1/4" to 6")15mm to 300mm15mm to 100mm
Viscosity HandlingExcellent (Improves accuracy)Poor (Causes extreme viscous drag)Good
Pressure DropUltra-Low (Works under 1" gravity head)Moderate to High (Requires pump)Moderate
Flow Profile RequirementNone (No straight pipe runs needed)10D upstream, 5D downstream requiredNone
Power RequirementNone (Mechanical), 12-24V for Pulse PG124V DC typically requiredNone (Mechanical)
Maintenance ProfileLow (Single moving part exposed to metered liquid)High (Bearings wear quickly with dirty oil)Moderate (Capillary seals can wear)

Technical comparison diagram highlighting the key differences between Oil Flow Meters variants, including pressure drop curves and viscosity tolerance

Electronic Integration Capabilities

In modern Indian process plants, local mechanical readouts are often insufficient. Plants utilizing SCADA, DCS, or PLC systems require robust digital integration. Lumen meters handle this through modular electronics:

  • Pulse Generator (PG 1): Converts the mechanical rotary motion into a digital pulse signal. Operates on a standard 12 to 24-volt DC supply, outputting via a stable three-core cable.
  • Remote Totalizer (TF 200): Takes the PG1 pulse and converts it into a flow rate indication and totalized volume. Through an FI converter, this unit easily generates an industry-standard 4 – 20 mA signal.
  • Batching Controller (BTF 200): Combined batching, totalization, and rate of flow unit with two set points for dispensing pre-determined quantities of liquids—critical for chemical dosing or precise tanker loading.

3. Application Comparison Table

Selecting the best oil flow meter for viscosity variation and intermittent flow requires matching the meter's strengths to the specific operational challenge. Below is a decision matrix tailored for common Indian industrial scenarios.

Application ScenarioRecommended OptionEngineering Reason
:—:—:—
Intermittent Generator Loads (DG Sets)Oval Gear PD (15mm – 25mm)DG sets draw fuel sporadically based on load. Turbines fail to measure low/start-up flows. PD meters capture every drop of low-flow consumption.
Gravity Tank Draw-OffOval Gear PD (80mm)Oval gear vs PD for tank draw off is a common debate. Oval gears have the lowest pressure drop, operating effectively even under a mere 1" static head without a pump.
High Viscosity Furnace Oil (Boilers)Oval Gear PDHigh thickness liquids increase volumetric efficiency in oval gears, whereas turbines will stall or grossly under-register.
Tanker Unloading (Pumped)Oval Gear PD (50mm – 80mm)Requires high flow capacity with structural rigidity. An upstream air release system ensures accuracy during turbulent pumped delivery.
Hazardous Area / Remote SitesMechanical Oval Gear PDRequires zero power. The mechanical register can be rotated to any of the four 90º cardinal positions for easy reading in tight, off-grid locations.
Process Control & DosingOval Gear PD with BTF 200Precise batch control. The 0.02% repeatability ensures consistent chemical/oil dosing, reducing raw material waste.
Dirty / Contaminated Fluid SystemsNeither (Pre-filtration required)All precision meters will jam on hard particulates. A 100-mesh strainer must be installed upstream before any meter technology is deployed.
Aviation Refueling VehiclesHigh-Precision Oval GearMeets strict accuracy requirements and handles varying flow rates during mobile dispensing seamlessly.

4. Total Cost Comparison

Procurement teams must evaluate Total Cost of Ownership (TCO), not just the initial capital expenditure. Oil flow meters in India for generators and boilers often suffer from hidden costs if the wrong technology is specified.

Technology OptionPurchase Range (INR)Annual Maintenance FocusExpected LifeBest For
:—:—:—:—:—
Lumen Oval Gear Oil Meters₹9,999 – ₹62,499Low. Periodic strainer cleaning (100 mesh) and minor calibration checks.10–15 YearsDG sets, Boiler oil feeds, Gravity discharge, High accuracy custody transfer.
Industrial Turbine Meters₹15,000 – ₹45,000High. Frequent bearing replacement due to lack of lubricity in certain fluids; recalibration due to blade wear.3–5 YearsClean, low-viscosity fluids (water, light solvents) pumped at constant, high velocities.
Rotary Piston Meters₹12,000 – ₹50,000Moderate. Checking capillary wear and maintaining precise filtration to prevent piston jamming.7–10 YearsClean oils at moderate pressures, but higher pressure drop than oval gear designs.

Note: Lumen Achievers meters come with a 1-year standard warranty and up to 2 years of extended warranty on demand, significantly de-risking the capital investment.

5. Decision Guide: Which One for Your Plant?

Proper specification prevents premature failure. Use this 8-step engineering procedure when specifying and installing your measurement system to ensure absolute accuracy and longevity.

  1. Calculate Flow Rate vs. Line Size First: Do not size a meter strictly by the existing pipe diameter. If the pipeline size is large but the flow rate is small, use reducers. For monitoring DG set oil consumption, 15 mm, 20 mm, or 25 mm sizes are recommended based on maximum flow rate and available head.
  2. Determine Gravity vs. Pumped Delivery: If you are emptying oil under a gravity head from a storage tank, the pressure is incredibly low. Standardize on 80mm meters (or 50mm alternatively) because oval gear designs can operate efficiently under just 1" of liquid head. For pumped unloading, 50mm/80mm meters are ideal.
  3. Mandatory Upstream Filtration: Indian site conditions involve significant particulate contamination. You must install a strainer of at least 100 mesh upstream of the meter. Before final fitting, completely flush the pipelines to remove construction debris or welding slag.
  4. Install an Air Release System: When pumping petroleum products from underground tanks, air pockets are inevitable. Installing an air eliminator upstream of the meter ensures that the volumetric chamber measures only liquid, preventing costly metering errors (charging for air).
  5. Design for Maintenance (Bypass Lines): Industrial processes cannot shut down for instrument calibration. Install every meter and its associated filter with a mechanical bypass loop. This simplifies subsequent servicing without halting plant operations.
  6. Select the Output Architecture: If you need manual reading only, the mechanical counter requires zero power. If integration into a DCS is required, specify the PG 1 pulse generator, feed it into a TF 200 totalizer, and output a 4-20 mA signal to your control room.
  7. Optimize Visual Ergonomics: Installations in cramped boiler rooms make reading dials difficult. The register top on these meters can be easily removed and rotated to any 90º orientation, ensuring operators can log readings without error.
  8. Validate Alignment and Calibration: Ensure your setup takes advantage of the step-less calibration system. Because the accuracy is consistent between calibration levels, you achieve reliable +/- 0.5% reading accuracy independent of external installation stresses (unlike turbine meters which warp under flange stress).

Oil Flow Meters in use at a representative Indian industrial application monitoring fuel consumption for a heavy-duty diesel generator set

FAQ

Q: Will an Oval Gear meter cause a pressure drop that stops my gravity-fed tank flow?

A: No. One of the primary advantages of this volumetric rotary design is its incredibly low pressure drop. The meter is engineered to operate effectively even under just 1" of static oil head, making it ideal for gravity draw-offs where turbine meters would completely stall.

Q: Do I need straight pipe runs before and after the meter?

A: Unlike turbine or ultrasonic meters that require fully developed laminar flow profiles (often demanding 10 pipe diameters upstream and 5 downstream), positive displacement meters isolate and measure precise volumes. Therefore, they are entirely unaffected by external flow components and do not require straight pipe runs.

Q: How does fluctuating Indian ambient temperature affect accuracy?

A: Ambient temperature changes fluid viscosity. In turbine meters, higher viscosity causes severe drag and under-reading. In oval gear meters, higher viscosity actually increases volumetric efficiency by sealing mechanical clearances. You maintain a stable accuracy of +/- 0.5% regardless of normal seasonal viscosity shifts.

Q: What power supply is required for remote monitoring?

A: The mechanical meter itself requires no power. If you utilize the PG 1 Pulse Generator for remote instrumentation, it requires a standard 12 to 24-volt DC power supply, which is typically provided directly by the remote totalizer (like the TF 200).

Q: Can I use this meter for batching exact amounts of oil into mixing tanks?

A: Yes. By pairing the meter's pulse output with the BTF 200 Combined Batching Unit, you can set two pre-determined set points. This allows for automated, highly repeatable (better than 0.02%) dispensing of petroleum products.

Q: What happens if contaminated fuel passes through the meter?

A: Oval gear meters are precision-machined instruments. Hard particulates can jam the rotary gears. It is absolutely mandatory to install a 100-mesh strainer upstream of the meter to capture sludge, rust, and particulates before they enter the measuring chamber.

Q: Is it difficult to repair these meters in the field?

A: No. The straightforward construction means only a single moving assembly is exposed to the metered liquid. By using an efficient magnetic coupling between the measuring chamber and the register, maintenance is incredibly simple. Spare parts are readily available, and the system is backed by a 1-year warranty (extendable to 3 years).

To permanently resolve fuel discrepancies and automate your industrial oil tracking, selecting the correct instrumentation is critical. Contact our engineering team today with your specific fluid type, maximum flow rate, pipeline size, and site conditions (pumped vs. gravity). We will help you specify the exact Oil Flow Meters configuration—including strainers, air eliminators, and 4-20mA electronics—to guarantee absolute precision in your facility.

Oil Flow Meters Troubleshooting: Mechanical Totalizer Not Moving, Sticking Digits, and Reset Failures

In Indian industrial operations, whether you are running a 1000 kVA DG set during a grid outage, managing continuous process boilers, or monitoring draw-offs from bulk storage, accurate fuel measurement is critical. Unrecorded consumption due to a failed flow meter register can quickly lead to inventory discrepancies running into lakhs of rupees. When mechanical registers stall, digits stick, or counters reset erratically, plant engineers need a definitive fault isolation path before deciding to replace expensive equipment.

This guide provides a comprehensive Oil Flow Meters troubleshooting framework. Rather than blindly swapping out a ₹20,000 to ₹60,000 device, identifying the root cause—be it a sheared magnetic coupling, bypassed strainer, or viscous drag—can restore your Oil Flow Meters to factory-level accuracy. We will cover the mechanical intricacies of positive displacement mechanisms, the impact of Indian site conditions (from monsoon humidity to particulate-laden adulterated fuel), and specific field-corrective actions to resolve totalizer problems.

1. Quick Reference: How Positive Displacement Oil Flow Meters Work

To troubleshoot a mechanical totalizer not working in oil flow meter causes and fixes, one must first understand the fluid mechanics and power transmission inside the meter. Our Oil Flow Meters operate on the Positive Displacement (PD) principle, specifically utilizing an oval gear or volumetric rotary cylinder design.

In a PD meter, the fluid itself provides the motive force. As diesel, LDO, or furnace oil enters the meter chamber, the pressure differential across the meter forces the internal gears or cylinders to rotate. Because the measuring chamber has a fixed, known volume, every single rotation correlates to an exact volume of displaced fluid.

The critical engineering feature in these Oil Flow Meters is the magnetic coupling. To prevent leaks, the wet side (measuring chamber) is completely sealed from the dry side (mechanical register). A drive magnet attached to the rotating gears magnetically engages a follower magnet connected to the totalizer's gear train. If the meter is flowing but the register is dead, the fault almost always lies in the breakdown of this magnetic transmission or the mechanical gear train itself.

Cross-section of a positive displacement oil flow meter showing the oval gears, magnetic coupling barrier, and mechanical register gear train

Key Technical Specifications

Before diagnosing, verify that the meter is operating within its designed limits. Operating outside these parameters will cause mechanical binding.

Specification ParameterTechnical Rating / Limit
:—:—
Measuring PrinciplePositive Displacement (Oval Gear / Rotary Cylinder)
Line Size Range006mm to 150mm (1/4 inch to 6 inch)
Standard Accuracy+/- 0.5% of reading (Up to +/- 0.2% on request)
RepeatabilityBetter than 0.02%
Pressure DropExceptionally low; operates under 1 inch gravity head of oil
Filtration RequirementMinimum 100-mesh strainer upstream
Flange StandardDIN ND10 (Screwed ends available for 15-25mm)

2. Troubleshooting Matrix: Oil Flow Meter Totalizer Problem in India Industrial Plants

Use this comprehensive diagnostic matrix to isolate the root cause when your mechanical register behaves erratically.

SymptomLikely CauseDiagnosis StepsField Fix / Correction
:—:—:—:—
Totalizer completely dead (Fluid is flowing)Decoupled or broken magnetic driveRemove register head. Pass a strong magnet over the follower. If digits move, the internal drive magnet is jammed or demagnetized.Replace magnetic coupling assembly. Ensure fluid temperature has not exceeded magnet's Curie point.
Digits sticking halfway (e.g., stuck between 9 and 0)Gear train binding due to dust/humidityInspect mechanical register for ingress of moisture, rust, or Indian site dust.Clean register gears with contact cleaner; replace if nylon gears are stripped.
Erratic or jumping countsAir entrainment in fluidCheck for vortexing in storage tanks or suction side pump leaks.Install an air release valve upstream of the meter.
Meter under-registering by >2%Internal blow-by / rotor wearCheck fluid viscosity. High wear from particulate matter bypasses the 100-mesh strainer.Inspect rotors for clearance tolerances. Replace rotors or entire measuring chamber.
Meter over-registeringPipe vibrations simulating pulsesCheck pipe supports. Mechanical vibration can cause the sensitive register to increment.Isolate meter with flexible couplings or reinforce pipe supports.
Register turns backwardsReverse flowCheck downstream check-valve (NRV) integrity during pump shutdown.Install or repair the Non-Return Valve (NRV) downstream.
Totalizer stops intermittentlyDebris stalling the oval gearsIsolate meter, open chamber, inspect for weld slag, rust, or contaminated fuel debris.Clean chamber; flush pipeline. Clean the 100-mesh upstream strainer.
Pulse output lost (PG 1 models)Loss of 12-24V power or sensor failureCheck voltage at PG 1 terminals with a multimeter. Check for open circuits in the 3-core cable.Restore power supply. If power is good, replace the PG 1 pulse generator module.
High pressure drop (Pump cavitating)Clogged strainer or high viscosityCheck differential pressure across the upstream strainer.Clean the strainer basket. If fluid is Furnace Oil, check the heating/tracing system.
Reset knob fails to zero the batchReset clutch mechanism brokenAttempt manual reset. If it spins freely without engaging, the internal clutch spring is snapped.Replace the mechanical register block. Avoid forcefully slamming the reset knob in the future.

Engineering schematic detailing the internal flow path, strainer integration, and magnetic coupling alignment of an industrial oil meter

3. Step-by-Step Field Diagnosis Procedure

When conducting an oil flow meter repair and calibration service on-site, follow this logical, 8-step isolation procedure to safely diagnose a stalled mechanical totalizer without compromising line integrity.

Tools Required: Metric spanner set, hex keys, feeler gauges, digital multimeter (if electronic), bucket, and specialized cleaning solvent.

  1. Bypass the Flow: Engage the bypass loop valves to isolate the flow meter. Never attempt to open a meter under pipeline pressure. Drain the residual fluid from the meter casing into a safe container.
  2. Remove the Mechanical Register: Unbolt the register top (which can usually be rotated to 90º orientations). Lift it straight up to avoid bending the connecting pins.
  3. Test the Register Independently: Manually rotate the magnetic follower on the bottom of the register. If the mechanical digits turn smoothly, the register is healthy. The fault lies in the wet chamber.
  4. Check the Magnetic Coupling: Look at the drive magnet on the meter body. Ensure no fine ferrous particles (common in poorly filtered industrial tanks) have bridged the magnetic gap, causing a stall.
  5. Inspect the Upstream Strainer: Open the strainer housing. A positive displacement meter must have a minimum 100-mesh strainer. If the basket is ruptured or missing, debris has entered the measuring chamber.
  6. Open the Measuring Chamber: Carefully remove the front cover. Inspect the volumetric rotary cylinders or oval gears. Check for scoring marks on the chamber walls—a clear sign of particulate damage.
  7. Verify Clearances: Use a feeler gauge to check the clearance between the gears and the chamber wall. Excessive clearance causes "slip" (under-registration), while no clearance indicates thermal expansion or foreign matter jamming the gears.
  8. Reassemble and Conduct a Wet Test: Reassemble the gears ensuring the timing marks align perfectly. Reattach the register, open the isolation valves slowly to prevent pressure spikes (water hammer effect), and bleed all air from the system.

Engineering Calibration Note: Calculating the Meter Factor

After any repair, the meter must be proven against a known master volume. If you are experiencing positive displacement oil flow meter register sticking digits, repairing it may alter its calibration.

To calibrate, dispense a known volume (e.g., into a Legal Metrology certified 20-liter proving can).

Calculate the Meter Factor (MF):

Meter Factor = Actual True Volume / Meter Indicated Volume

If the meter reads 19.8 Liters but exactly 20.0 Liters was dispensed:

MF = 20.0 / 19.8 = 1.0101.

The internal step-less calibration mechanism can then be adjusted to bring the error within the +/- 0.5% specification.

4. Installation and Setup Errors That Cause Ongoing Problems

Many recurring failures are not manufacturing defects but installation errors. In the Indian market, where retrofitting is common and piping infrastructure may be decades old, correct installation geometry is paramount.

Installation ErrorResulting SymptomEngineering Correction
:—:—:—
No 100-Mesh Strainer InstalledRotors jam repeatedly; severe internal scoring.Always install a 100-mesh strainer upstream. For highly contaminated fuel, use a dual-stage filtration system.
Absence of Air Release SystemOver-registration; erratic mechanical counting; air passes as liquid.Install an air release valve at the highest point before the meter, especially critical in pump-unloading applications.
Piping Stress on Meter FlangesOval gears bind and stall due to casing distortion.Ensure pipes are independently supported. The meter should not bear the weight of the piping network.
Incorrect OrientationTotalizer is unreadable or magnetic coupling is misaligned.Ensure rotor shafts are in the horizontal plane. Rotate the register top (increments of 90º) for readability, do not tilt the meter body.
Meter OversizingMeter fails to register low flows (e.g., idling generator).Select meter based on flow rate, not pipe size. Use reducers. E.g., Use 15mm-25mm meters for monitoring boiler consumption.
Operating Below Minimum HeadFluid bypasses meter without turning gears (stalling).Ensure at least 1 inch of gravity head for unpumped systems, or switch to an 80mm size meter to reduce pressure drop.

For applications handling aggressive chemicals rather than standard hydrocarbons, or if you require completely non-intrusive measurement without mechanical parts, you might explore alternative technologies like Positive Displacement Flow Meters for thicker resins, or electromagnetic meters for conductive fluids.

5. Technology Comparison & Decision Matrix

No single flow meter fits every application. When upgrading or replacing equipment, plant managers must evaluate if a mechanical positive displacement meter remains the best choice for their specific fluid and site conditions.

Technology Comparison Table

ParameterPositive Displacement (Oval Gear)Turbine Flow MetersElectromagnetic Flow Meters
:—:—:—:—
Primary ApplicationHigh viscosity oils, Diesel, LDO, Furnace OilLow viscosity, clean liquids, waterConductive liquids, water, slurries
Viscosity DependencyAccuracy improves with higher viscosityAccuracy degrades with high viscosityIndependent of viscosity
Straight Pipe Run RequiredNone (0D upstream / 0D downstream)High (10D upstream / 5D downstream)Moderate (5D upstream / 2D downstream)
Power RequirementZero (for mechanical registers)Loop power / Battery required24V DC / 220V AC required
Pressure DropModerate to Low (Operates on 1" head)ModerateZero (Unobstructed flow path)
Filtration NeedsHigh (100-mesh strainer mandatory)ModerateLow
Typical Cost Range (INR)₹9,999 – ₹62,499₹15,000 – ₹80,000₹25,000 – ₹1,50,000+

'When to Use This Technology' Decision Matrix

  • Choose Positive Displacement Oil Meters when: You are measuring non-conductive, viscous hydrocarbons (Diesel, LDO, Lubricants) in spaces with no straight pipe runs available, and you require a purely mechanical display that functions during power outages.
  • Choose Turbine Flow Meters when: You have clean, low-viscosity fluids flowing at high velocities, and you have ample straight pipe runs to condition the flow profile.
  • Choose Electromagnetic Meters when: You are measuring water, wastewater, or conductive chemicals where pressure drop is unacceptable and particulate matter is highly prevalent.

6. Preventive Maintenance to Avoid Recurrence

To ensure you don't continually need to buy oil flow meter with service support India, institute a robust preventive maintenance schedule. The harsh operating environments in Indian manufacturing, petrochemical, and construction sectors demand proactive care.

  • Monthly Strainer Checks: The 100-mesh strainer is the primary defense. Check and clean it monthly. During monsoons, check storage tanks for water ingress, which causes rust that blinds the strainer.
  • Register Greasing: The mechanical register top should be kept free of heavy dust. A light application of non-corrosive lubricant on the external reset mechanism prevents sticking.
  • Calibration Verification: Under the Indian Legal Metrology Act, equipment used for custody transfer (like diesel dispensers) must be verified annually. Even for internal accounting, verify the step-less calibration system every 12 months using a certified prover tank.
  • System Flushing: Before commissioning a new pipeline or after major pipe repairs, bypass the meter and flush the lines completely to remove welding slag and pipe tape.

A perfectly installed oil flow meter with upstream strainer, bypass loop, and isolation valves at an Indian petrochemical plant

7. When to Call Service vs. Fix Yourself

While this troubleshooting guide empowers plant engineers to handle routine faults, certain situations require specialized intervention.

Fix it Yourself:

  • Cleaning upstream strainers and clearing pipeline blockages.
  • Removing the mechanical register to check for magnetic decoupling.
  • Reorienting the display head for better visibility.
  • Installing an upstream air release valve to fix over-registration.

Call for Factory Service:

  • The oval gears or rotary cylinders are deeply scored or chipped. (Requires precision machining or replacement of the measuring chamber).
  • The step-less calibration system is maxed out, but the meter still fails to achieve +/- 0.5% accuracy.
  • You require BIS or PESO certification compliance post-repair.
  • Integration of BTF 200 Combined Batching, Totalizer, and Rate of Flow Units to automated PLCs via 4-20mA signals is failing due to board-level electronic issues.

*

FAQ

Q: Why does my flow meter totalizer reset to zero randomly during operation?

A: Random resetting is usually caused by heavy pipeline vibrations triggering a loose mechanical reset clutch inside the register. Ensure the meter is isolated from pump vibrations using flexible bellows and check the reset knob spring tension.

Q: Can I use this meter without a power supply?

A: Yes. The standard models are equipped with mechanical totalizers driven entirely by fluid pressure and magnetic coupling. They require zero electrical power, making them ideal for remote Indian mining or construction sites.

Q: How does the change in weather (monsoon vs. winter) affect accuracy?

A: High-viscosity fluids like Furnace Oil thicken in winters (especially in North India), which actually improves the volumetric efficiency (reduces slip) of positive displacement meters. However, if it thickens too much, it causes high pressure drop. Ensure tracing/heating keeps viscosity within operational limits.

Q: What is the purpose of the 100-mesh strainer?

A: Positive displacement meters have microscopic clearances between the gears and the chamber. The 100-mesh strainer traps rust, sand, and particulate matter that would otherwise score the chamber walls or jam the gears, causing a complete stall.

Q: My meter indicates flow when the pump is off. Why?

A: This is called "thermal expansion" or "gravity siphoning." If valves are left open and the fluid in the pipes heats up in the sun, it expands and pushes through the meter. Always install and close positive shut-off valves or a Non-Return Valve (NRV).

Q: Are these meters approved by Indian Legal Metrology?

A: Our meters can be provided with features that meet precision standards, but for commercial custody transfer (selling fuel to third parties), the specific installation must be tested and stamped by the local Legal Metrology inspector.

Q: Can I upgrade my mechanical meter to an electronic display later?

A: Yes. The modular design allows you to add a PG 1 Pulse Generator later. This converts the mechanical rotation into a pulse signal that can be sent to a TF 200 Remote Totalizer or your plant's SCADA system.

If you are experiencing persistent metering issues, or need to properly size a new installation to avoid these common pitfalls, contact our engineering team. Provide us with your target fluid, maximum/minimum flow rates, pipeline size, and specific site conditions, and we will configure a flow measurement solution built for absolute reliability.

Turbine Flow Meters Troubleshooting: No Pulse Output, Intermittent RS485 Data, and Signal Dropouts

In the high-stakes environment of Indian industrial manufacturing, power generation, and petrochemical processing, accurate flow measurement is non-negotiable. Whether you are managing custody transfer of diesel at ₹90+ per liter, monitoring boiler feed water, or dosing solvents in a pharma plant, a flow measurement failure directly impacts the bottom line. For equipment investments ranging from ₹20,000 to over ₹10,00,000, instrumentation engineers cannot afford to rely on guesswork when a batching system goes blind.

When Turbine Flow Meters experience signal dropouts, intermittent RS485 communication, or a complete loss of pulse output, the root cause could be mechanical, electrical, or hydrodynamic. Given the harsh realities of Indian site conditions—ranging from severe voltage fluctuations and poor earth grounding to monsoon humidity, high ambient temperatures, and contaminated diesel—diagnosing these issues requires a systematic engineering approach.

This guide provides a comprehensive, step-by-step diagnostic workflow to isolate whether your pulse or RS485 data issues originate from the pickoff sensor, wiring infrastructure, electrical noise, or actual flow conditions affecting rotor velocity.

1. Quick Reference: How Turbine Flow Meters Work

Before diving into diagnostics, it is critical to understand the operating principle and the electromechanical handshake occurring inside the meter. The operation of Turbine Flow Meters is based on measuring the velocity of oil, heavy oil, furnace oil, water, and non-acidic liquids.

  1. Flow Conditioning: The flowing liquid is first accelerated and conditioned by the meter's straightening section. Straightening vanes remove undesired swirl, turbulence, and asymmetry before the fluid reaches the turbine wheel.
  2. Rotor Dynamics: The dynamic forces of the flowing fluid cause the rotor (typically S.S-304 or S.S-316) to rotate. The turbine wheel is mounted on a hard Stainless Steel-316 main shaft equipped with a precision carbon bush for low friction.
  3. Angular Velocity: The helical blades are set at a known angle relative to the fluid flow. The conditioned liquid drives the wheel with an angular velocity strictly proportional to the fluid velocity.
  4. Signal Generation: A proximity probe (magnetic pickoff sensor) generates a signal at each passing blade. As the stainless steel blades cut through the magnetic field of the sensor, an AC voltage or direct pulse is induced.
  5. Electronic Output: The meter generates pulses via an NPN open connector. The measured frequency is used to calculate the instantaneous flow rate, while accumulated pulses determine totalized volume based on the meter's specific K-factor.

Calibration Note & Engineering Formula

The fundamental relationship governing the meter's output is defined by its K-factor (pulses per unit volume).

Frequency (Hz) = (K-factor * Flow Rate in L/min) / 60

If your batch controller expects 100 pulses per liter and the meter is delivering 95, you will experience a 5% volumetric error. During troubleshooting, verifying the raw frequency output against the expected K-factor is often step one.

Labeled diagram of Turbine Flow Meters identifying the main shaft, SS-316 rotor, carbon bush bearings, and magnetic pickoff sensor assembly relevant to pulse troubleshooting

Technology Comparison Table

No single technology fits every application. When diagnosing chronic failures, engineers must verify if the right technology was selected for the fluid and site conditions.

ParameterTurbine Flow MeterElectromagnetic Flow MeterPositive Displacement (PD)Vortex Flow Meter
Operating PrincipleKinetic / VelocityFaraday's Law of InductionVolumetric TrappingKarman Vortex Street
Best Used ForClean, low-viscosity liquids (diesel, water)Conductive liquids (water, slurries)High viscosity oils, fuelsSteam, gases, clean liquids
Standard Accuracy+/- 0.5% to 1% FSD+/- 0.5%+/- 0.1% to 0.5%+/- 1%
Pressure DropModerate (increases with flow)Zero (unobstructed tube)High (due to tight clearances)Moderate (bluff body)
Viscosity LimitLow to MediumUnaffectedExcellent for High ViscosityLow
Susceptibility to DirtHigh (Requires upstream strainer)LowHigh (Will jam if unfiltered)Moderate

When to Use This Technology (Decision Matrix)

  • CHOOSE Turbine when you need cost-effective, high-accuracy (+/- 0.5% or 1% FSD) measurement of clean, low-viscosity fluids like diesel, light oils, or RO water. They offer excellent repeatability (0.1%) and handle high pressures (up to 6 Mpa) and wide temperature ranges (-20 to 120 °C).
  • AVOID Turbine if the fluid contains heavy particulates, fibers, or high viscosity variations. If your application involves conductive raw water with high suspended solids, Electromagnetic Flow Meters are the technically superior choice.

2. Troubleshooting Matrix

When a Turbine Flow Meters installation fails in an Indian industrial plant, the symptoms often overlap. Use the following diagnostic matrix to narrow down the root cause before dismantling the pipework.

SymptomLikely CauseDiagnosis StepsFix
Zero Pulse OutputNo power or severed cableCheck 12V DC power supply at sensor terminals.Repair wiring or restore 12V supply.
Zero Reading (Local LCD)Dead battery or jammed rotorCheck 3.3V lithium battery voltage. If good, inspect rotor.Replace 3.3V 10AH battery. Clear rotor debris.
Erratic/Jumping Flow RateGround loop or EMI noiseMeasure AC voltage on DC ground. Check for nearby VFDs.Shield cables, separate instrument cable from power cables.
Intermittent RS485 DataMissing Modbus termination / bad polarityVerify A(+) and B(-) wiring. Measure 120-ohm termination.Swap A/B if reversed. Install 120-ohm resistor at line ends.
Signal Dropouts at High FlowSensor gap too wide / CavitationCheck proximity sensor seating. Check downstream pressure.Adjust sensor gap. Increase downstream backpressure.
Over-registering TotalizerPipe vibration triggering false pulsesTurn off flow, monitor pulse output. Check for pump vibration.Isolate meter with flexible joints or improve pipe supports.
Under-registering TotalizerViscosity increase / Worn carbon bushVerify fluid temperature. Inspect shaft/bush for mechanical wear.Heat fluid to lower viscosity. Replace worn carbon bush.
High Pitched Noise / WhineBearing failure from overspeedingCheck flow rate against max capacity of the specific model.Replace internals. Install flow restrictor to prevent overspeed.
Output Signal Stuck HighNPN circuit failure / Short to powerMeasure NPN output state. Should alternate >8VDC and <0.8VDC.Replace the pulse output sensor module.
4-20mA Signal DriftLoop resistance too high / Poor 24V supplyMeasure loop resistance. Check 24V DC supply under load.Upgrade power supply. Ensure loop resistance is < 600 ohms.

Schematic or cross-section of Turbine Flow Meters showing internal flow path, upstream straightening vanes, and the proximity of the pickoff sensor to the passing helical rotor blades

3. Step-by-Step Field Diagnosis Procedure

When your control room reports a loss of flow indication, deploying an engineer with a multimeter and this 8-step field procedure is the fastest way to restore operation.

Required Tools: True-RMS Digital Multimeter, oscilloscope (optional but recommended for RS485), standard hand tools, Modbus polling software (like Modbus Poll on a laptop), and a portable frequency generator.

  1. Verify the Power Supply Under Load:
  • For pulse output sensors, verify exactly 12 V DC at the meter terminals. Indian industrial grids frequently suffer from voltage dips; a supply dropping to 9V under load will cause the sensor circuitry to fail.
  • For 4-20mA variants, verify 24 V DC.
  • For battery-operated models, confirm the dual row LCD is active. The 3.3V 10AH lithium battery should last over 5 years, but extreme heat (>50°C ambient) can degrade it faster. Note: Total flow values for ten years are saved in non-volatile memory during power loss.
  1. Validate NPN Open Connector Logic States:
  • Disconnect the output wire from the PLC. Hook a multimeter between the signal wire and ground.
  • Manually spin the rotor (if safe to remove) or allow slow flow.
  • The specification dictates a high electric level > 8 VDC and a low electric level < 0.8 VDC (based on a 12 VDC input). If the voltage hovers at 5V or doesn't drop below 0.8V, the NPN transistor is damaged or improperly pulled up at the PLC.
  1. Perform RS485 Communication Health Check:
  • Measure the DC voltage across the A and B terminals. It should idle around 200mV to 5V depending on the bias.
  • If using Modbus RTU, ensure the baud rate, parity, and slave ID match the DCS settings.
  • Check for a 120-ohm termination resistor at the far end of the RS485 daisy chain to prevent signal reflections, which cause intermittent data dropouts.
  1. Test for Ground Loops and EMI:
  • Measure AC voltage between the instrument ground and the plant earth. Anything above 1-2 VAC indicates a ground loop.
  • Indian plants frequently lack isolated clean earths. Ensure the shielded cable is grounded at ONE end only (typically at the control panel) to prevent circulating currents that mask the low-amplitude pickoff signal.
  1. Inspect the Magnetic Pickoff Sensor Assembly:
  • Unscrew the pickoff sensor from the S.S-304/S.S-316 enclosure. Check for moisture ingress or physical damage to the probe tip.
  • Verify the internal resistance of the coil (typically a few hundred ohms). An open circuit means the sensor must be replaced.
  1. Evaluate Flow Profile and Straight Piping Requirements:
  • Turbine meters require a fully developed velocity profile. Verify there is a minimum of 10 pipe diameters (10D) of straight run upstream and 5D downstream.
  • If installed immediately after a 90-degree elbow or a control valve, the resulting swirl will cause erratic pulse generation.
  1. Mechanical Inspection of Rotor and Bearings:
  • Isolate the line, depressurize, and remove the meter.
  • Inspect the S.S-304 / S.S-316 rotor. Check for broken helical blades or foreign debris wrapped around the shaft.
  • Spin the rotor by hand. It should spin freely and coast to a smooth stop. A sudden stop indicates a worn carbon bush or damaged hard stainless steel shaft.
  1. Verify Process Fluid Limits:
  • Ensure the temperature is within the -20 to 120 °C rating.
  • Check actual line pressure against the 6 Mpa maximum working pressure.
  • Verify the flow rate aligns with the meter's model sizing. For example, a CE-TFS-050 (50mm) is calibrated for 4,000~40,000 L/H. Operating below 4,000 L/H will result in severe pulse dropouts due to insufficient kinetic energy to overcome bearing friction.

4. Installation and Setup Errors That Cause Ongoing Problems

Even the most robust instruments will fail continuously if installed against engineering best practices. The following table highlights common installation errors seen in the Indian market and their necessary corrections.

Installation ErrorSymptom ObservedEngineering Correction
No Upstream Strainer InstalledJammed rotor, sudden loss of pulse, zero flowInstall a Y-strainer (e.g., 60-100 mesh) upstream to catch welding slag and scale.
VFD Power Cables Routed with RS485Erratic flow readings, false pulses totalizingSeparate signal cables from power cables by at least 300mm. Use dedicated steel conduits.
Meter Installed at High Point of PipeSignal dropouts, meter reads high due to airRelocate to a lower section or vertical upward flow to ensure the pipe remains 100% full.
Control Valve Placed UpstreamHighly erratic reading, cavitation noiseAlways install control valves downstream of the meter to maintain backpressure.
Insufficient Straight Run (e.g., 2D upstream)Poor accuracy, fails to meet +/- 0.5% specInstall flow straighteners/vanes or re-pipe to achieve 10D upstream / 5D downstream.
Pulsating Flow from Transfer PumpsNon-linear pulse generation, premature bearing wearInstall pulsation dampeners or use Diesel Transfer Pumps with smoother output profiles.

5. Preventive Maintenance to Avoid Recurrence

A reactive approach to instrumentation leads to unacceptable downtime. Implementing a scheduled maintenance regimen extends the lifespan of the carbon bush bearings and ensures the S.S-316 rotor maintains its precise helical geometry.

  • Weekly: Monitor the dual-row LCD for any error codes. Check instantaneous flow (m3/h or L/h) against pump curves to verify basic sanity.
  • Monthly: Blow down or clean the upstream Y-strainer. Contaminated diesel in transport applications is the number one cause of rotor jamming.
  • Bi-Annually: Inspect the electrical enclosure for moisture ingress, especially post-monsoon. Re-tighten M/F thread or flange connections to prevent micro-leaks.
  • Annually: Perform a master meter calibration check. Remove the meter, inspect the hard stainless steel shaft for scoring, and verify the carbon bush tolerances.
  • Every 5 Years: Proactively replace the 3.3 V 10AH lithium battery in remote, standalone installations.

Well-maintained Turbine Flow Meters installation integrated with RS485 telemetry and properly grounded shielded cables at a clean Indian petrochemical transfer facility

6. When to Call Service vs. Fix Yourself

Knowing when to escalate an issue saves time and prevents irreversible damage to precision instruments.

Fix Yourself:

  • Wiring faults, blown fuses, or failed 12V/24V power supplies.
  • Replacing the external magnetic pulse output sensor.
  • Replacing the 3.3V lithium battery.
  • Cleaning the upstream strainer or removing soft debris from the S.S rotor.
  • Correcting Modbus RS485 addresses, baud rates, or adding 120-ohm terminating resistors.

Call Factory Service / Return to Manufacturer:

  • The S.S-316 rotor blades are bent, chipped, or physically damaged.
  • The internal carbon bush bearing is worn, causing the rotor to wobble.
  • The meter requires recalibration and a new K-factor certification for Legal Metrology compliance or PESO documentation.
  • The internal straightening vanes are damaged due to a severe hydraulic shock or water hammer.

FAQ

Q: Why does my flow totalizer keep increasing even when the pump is turned off?

A: This is known as "ghost pulsing." It is usually caused by unshielded signal cables picking up electromagnetic interference (EMI) from nearby variable frequency drives (VFDs) or severe pipe vibration mechanically shaking the pickoff sensor. Ensure the cable shield is grounded at one end only.

Q: How do I calculate the K-factor if the original calibration certificate is lost?

A: You cannot accurately calculate it mathematically due to manufacturing tolerances. You must perform a volumetric calibration by running a known volume of fluid (e.g., exactly 1,000 liters verified by a calibrated tank or weigh scale) through the meter, counting the raw pulses, and dividing total pulses by the total volume.

Q: Will a turbine meter work for highly viscous fluids like furnace oil?

A: It depends on the operating temperature. At high temperatures (up to 120 °C) where furnace oil viscosity drops significantly, it can work. However, if the oil cools and thickens, the increased drag will cause the rotor to under-register or stall completely. For high viscosity, Positive Displacement meters are preferred.

Q: What is the maximum distance I can run the RS485 communication cable?

A: Under ideal conditions with high-quality shielded twisted-pair cable (like Belden 9841) and proper 120-ohm termination, RS485 can reliably transmit data up to 1,200 meters (4,000 feet).

Q: My PLC requires a PNP signal, but the meter outputs NPN. How do I fix this?

A: The meter utilizes an NPN open connector. You can use a simple pull-up resistor to convert the signal, or preferably, install a low-cost, high-speed optocoupler or signal converter relay in the panel to convert the NPN sinking signal into a PNP sourcing signal.

Q: Are these meters approved by the Legal Metrology Department of India for custody transfer?

A: For official custody transfer and commercial billing in India, meters must undergo specific model approval and stamping by the Legal Metrology Department. Verify with the manufacturer if the specific CE-TFS model being purchased holds current LMD certifications for your application.

Q: Why is my meter experiencing a high pressure drop?

A: Excessive pressure drop usually indicates that the flow rate exceeds the maximum rated capacity of the meter (e.g., pushing 50,000 L/H through a CE-TFS-050 rated for 40,000 L/H max), or the upstream strainer is severely clogged with debris.

To ensure you select the right measurement technology and avoid frustrating downtime, expert engineering sizing is essential. Contact us today with your specific fluid type, minimum/maximum flow rates, line size, and operating temperature. Our team will help you configure the perfect flow measurement solution tailored to your site's unique requirements.

Fuel Nozzles Maintenance Guide: Preventive Inspection, Seal Replacement, and Shutoff Performance Verification

The cost of unplanned dispensing equipment failure extends far beyond the price of replacement hardware. In high-throughput industrial environments—whether mining operations in Western Australia, chemical plants in Germany, or heavy logistics depots—a malfunctioning dispensing nozzle can lead to fugitive emissions, severe safety hazards, inaccurate fluid inventory, and environmental non-compliance. Establishing a rigorous fuel nozzles preventive maintenance schedule for industrial diesel dispensing is critical to optimizing operational uptime and ensuring safety under stringent global standards like API RP 1604, ATEX, and ISO 14001.

This technical guide outlines a comprehensive preventive inspection protocol, seal replacement procedure, and shutoff verification methodology for industrial Fuel Nozzles. By standardizing maintenance practices, plant managers and reliability engineers can eliminate premature shutoff issues, prevent hazardous drips, and maintain precise flow measurement accuracy across their dispensing networks.

1. Product Overview and Critical Wear Components

Industrial Fuel Nozzles operate using complex fluid dynamics and precision-machined mechanical components. At the core of the automatic shutoff mechanism is the Venturi effect. As fluid passes through the main poppet valve, it accelerates through a localized restriction, creating a pressure drop (vacuum). A sensing port at the tip of the 13/16" spout connects to this vacuum chamber via a continuous tube. As long as air is drawn through the spout tip, the vacuum is broken. When rising fluid in the receiving tank blocks the spout tip, the vacuum rapidly builds, pulling a sensitive diaphragm that trips the release latch, allowing the main spring to snap the poppet valve shut.

In advanced variants, such as digital metering nozzles, an integrated electronic or mechanical flow meter (typically utilizing a micro-turbine or oval gear mechanism) is housed within the nozzle body. This allows for dual-measurement and high-accuracy batch dispensing directly at the point of use.

Understanding the critical wear components of Fuel Nozzles is the first step in effective preventive maintenance:

  • Main Poppet Valve and O-Rings: Subjected to constant dynamic friction and chemical exposure. Wear leads to post-shutoff dripping.
  • Venturi Sensing Port & Tube: Susceptible to clogging from airborne dust, diesel particulate matter, or crystallized DEF (if misused). Clogs cause premature shutoff or total shutoff failure.
  • Diaphragm Assembly: Flexible elastomeric component that degrades due to temperature fluctuations and chemical attack.
  • Spout (13/16"): Experiences physical impact, bending stress, and abrasion from repeated insertion into tank fill necks.
  • Inlet Swivel (BSP3/4"): High-stress articulation point that requires leak-free rotation under pressures up to 0.18 MPa.

Cross-sectional diagram of industrial fuel nozzles highlighting the Venturi sensing port, main poppet valve, diaphragm assembly, and integrated digital flow meter components

Technology Comparison: Mechanical Shutoff vs. Digital Metering Nozzles

When upgrading dispensing infrastructure, engineers must select the appropriate nozzle technology based on process requirements.

Specification / ParameterMechanical Automatic Shutoff NozzlesDigital Metering Fuel Nozzles
:—:—:—
Primary FunctionHigh-speed dispensing with safe shutoffDispensing with integrated volume tracking
Flow Rate Capability0 – 60 L/min0 – 60 L/min
Operating Pressure0.18 MPa (26.1 PSI)0.18 MPa (26.1 PSI)
Flow Measurement AccuracyN/A (Relies on upstream Fuel Dispensers)± 0.5% to ± 1.0% (depending on viscosity)
Internal MechanismVenturi vacuum, mechanical diaphragmVenturi vacuum + Turbine/Gear measurement
Power RequirementNone (Hydro-mechanical)Internal Battery (AAA or Lithium for digital)
Weight ProfileStandard (approx. 0.8 – 1.0 kg)Heavier (Net weight: 1.14 kgs/pc)
Ideal ApplicationStandard fleet refueling, rugged environmentsBatch filling, decentralized inventory tracking

Decision Matrix: When to Use Which Technology

  • Use Mechanical Automatic Shutoff Nozzles When: The application is highly rugged, exposed to extreme physical abuse, or when high-accuracy custody transfer measurement is already being handled by upstream Diesel Flow Meters.
  • Use Digital Metering Nozzles When: Dispensing into remote equipment (e.g., generators, heavy mining vehicles) where decentralized, localized volume tracking is required, or when batching specific quantities of motor oil, diesel, or gasoline into secondary containers.

2. Preventive Maintenance Schedule

A robust maintenance program shifts the operational paradigm from reactive repair to proactive reliability. Implementing a fuel nozzles inspection checklist for leakage and shutoff sensitivity is critical for maintaining the 0.18 MPa pressure integrity and 60 L/min flow efficiency.

Fluid Dynamics & Calibration Note

For Digital Metering Fuel Nozzles, the integrated flow meter must be periodically calibrated to ensure accuracy. The fundamental calibration error calculation used during maintenance checks is:

Percentage Error = ((V_indicated – V_actual) / V_actual) * 100

Where V_indicated is the volume shown on the digital display, and V_actual is the volume captured in a certified volumetric proving standard. If the error exceeds ±1.0%, the internal calibration factor (K-factor) must be electronically adjusted.

Comprehensive Maintenance Schedule

Maintenance TaskFrequencyResponsible PersonnelEst. TimeTechnical Notes & Specifications
:—:—:—:—:—
Visual Inspection of Spout & BodyDailyOperator2 minCheck 13/16" spout for severe bends, cracks, or missing retention springs.
Verification of Free RotationDailyOperator1 minEnsure BSP3/4" inlet swivel rotates freely without binding to prevent hose torsion.
Sensing Port Clearance CheckWeeklyMaintenance Tech5 minEnsure the vacuum port at the spout tip is free of mud, ice, or grease.
Leak-Down TestWeeklyMaintenance Tech5 minPressurize to 0.18 MPa, release trigger. Verify zero dripping after 3 seconds.
Inline Strainer CleaningMonthlyMaintenance Tech15 minRemove swivel, extract internal mesh strainer, clean with solvent and compressed air.
Flow Rate VerificationMonthlyReliability Eng.10 minClock the dispensing rate into a prover. Must achieve near 60 L/min at optimal pump pressure.
Shutoff Sensitivity TestMonthlyReliability Eng.15 minSimulate full tank block. Snap-action must occur in < 0.5 seconds upon port immersion.
Digital Display & Battery CheckQuarterlyMaintenance Tech10 minCheck for fading LCD digits on metering nozzles. Replace internal batteries as required.
Volumetric Calibration CheckSemi-AnnuallyMetrology Tech30 minUse certified proving can to verify volumetric accuracy of the integrated digital meter.
Main Seal & Diaphragm Insp.AnnuallyMaintenance Tech45 minFull tear-down. Replace main poppet O-rings and inspect Venturi diaphragm for fatigue.

Exploded technical diagram of a digital metering fuel nozzle showing the BSP3/4 inlet thread, internal strainer, battery compartment, and required maintenance access points

3. Step-by-Step Procedures for Key Tasks

Industrial operations require strict adherence to standard operating procedures (SOPs). Below is the definitive industrial fuel nozzles seal replacement guide and preventive cleaning protocol.

Procedure 1: Strainer Cleaning and Flow Path Inspection

A clogged internal strainer creates a massive pressure drop, restricting the nozzle from achieving its 60 L/min specification and causing cavitation that can damage upstream pumps.

  1. De-energize and Isolate: Turn off the associated fuel pump and lock-out/tag-out (LOTO) the dispenser electronics.
  2. Depressurize the Line: Point the nozzle into an approved grounded safety container and squeeze the lever to relieve residual static pressure (0.18 MPa max).
  3. Disconnect the Swivel: Using two appropriately sized non-sparking wrenches, hold the nozzle inlet flat and loosen the BSP3/4" swivel connector.
  4. Extract the Strainer: Carefully remove the inlet swivel adapter to expose the internal mesh strainer located at the base of the handle. Use needle-nose pliers to gently pull the strainer cartridge out.
  5. Ultrasonic/Solvent Cleaning: Submerge the metallic strainer in a compatible solvent bath. If severe varnishing is present, utilize an ultrasonic cleaner for 5-10 minutes.
  6. Pneumatic Purging: Blow dry the strainer using low-pressure compressed air (max 30 PSI), directing airflow from the inside out to dislodge embedded particulate.
  7. Inspect Inlet O-Rings: Examine the FKM/Viton O-rings on the swivel mating surface. If flattened or cracked, discard and replace.
  8. Reassembly and Pressure Test: Reinsert the strainer, apply a small amount of petroleum-compatible thread sealant to the BSP3/4" threads (avoiding the first two threads), and torque the swivel to manufacturer specifications. Restore power and inspect for leaks under operating pressure.

Procedure 2: Main Seal Replacement and Shutoff Verification

When a nozzle fails the leak-down test (drips continuously after trigger release), the main poppet seal has failed.

  1. Preparation and LOTO: Isolate the pump, relieve line pressure into a safety can, and disconnect the nozzle completely from the dispensing hose. Move the nozzle to a clean, well-lit, static-free workbench.
  2. Remove the Spout Assembly: Loosen the retaining screws or retaining nut holding the 13/16" spout to the main aluminum body. Carefully pull the spout straight out to avoid damaging the internal vacuum tube.
  3. Extract the Poppet Valve: Remove the main top cap (usually secured by torx or hex bolts) covering the main spring and diaphragm assembly. Carefully lift out the heavy return spring and the poppet valve core.
  4. Replace the Main Seal: Using a brass or plastic pick, remove the primary elastomeric seal from the poppet groove. Clean the groove with a lint-free cloth. Lubricate the new manufacturer-specified O-ring with a light film of assembly lube and seat it firmly into the groove.
  5. Inspect the Diaphragm: Examine the automatic shutoff diaphragm beneath the poppet assembly. Look for pinhole leaks, edge tearing, or loss of elasticity. Replace if any degradation is observed.
  6. Reassemble Components: Reinstall the poppet valve, ensuring the sensing tube aligns correctly with the spout port. Seat the main spring and torque the top cap bolts in a cross-pattern to prevent housing warpage.
  7. Reattach Spout: Install the spout, ensuring the O-ring at the base of the spout is perfectly seated to maintain the critical vacuum seal.
  8. Shutoff Sensitivity Verification: Reattach the nozzle to the dispenser. Dispense fluid into a proving container at maximum flow (60 L/min). Suddenly submerge the tip of the spout into the fluid. The nozzle must immediately click off. If it continues to flow, the vacuum circuit is compromised, and the reassembly must be checked.

4. On-Site Spare Parts to Stock

To minimize downtime, procurement teams working with a trusted fuel nozzles supplier for manufacturers should maintain specific minimum and maximum inventory levels for consumable parts. Given the 1.14 kgs/pc build of these robust units, the internal soft parts are the primary consumables.

Part DescriptionMaterial TypeRecommended Site QtyReplacement Interval / Condition
:—:—:—:—
Main Poppet Seal KitFKM / Viton1 per 3 active nozzlesAnnually, or upon dripping
Spout Replacement KitAluminum (13/16")1 per 5 active nozzlesWhen bent, crushed, or scored
Inlet Swivel O-RingsNitrile / FKM2 per active nozzleAnnually, or upon swivel leakage
Internal Mesh StrainerStainless Steel1 per 10 active nozzlesWhen physically torn or crushed
Replacement DiaphragmFabric-reinforced1 per 5 active nozzlesEvery 2 years, or upon shutoff failure
AAA / Lithium BatteriesElectronic grade1 set per digital unitAnnually (for digital metering models)

5. Diagnosing Maintenance-Related Failures

Effective troubleshooting requires understanding the interconnected pneumatic and hydraulic principles governing the nozzle.

Failure SymptomMissed Maintenance TaskRoot Cause / Fluid Dynamic ResultCorrective Action required
:—:—:—:—
Nozzle will not shut offWeekly Sensing Port CheckVacuum port at spout tip is clogged with debris; Venturi cannot pull vacuum.Clear spout tip port with compressed air or fine wire.
Premature shutoff (clicks off constantly)Monthly Strainer CleaningFlow restriction causing artificial vacuum, or damaged inner sensing tube.Clean inlet strainer; check flow rate; replace spout if tube is crushed.
Drips continuously after trigger releaseAnnual Main Seal Insp.Main poppet O-ring is scored by debris or chemically degraded.Perform Procedure 2: Replace main poppet valve seal.
Flow rate severely restricted (< 30 L/min)Monthly Strainer CleaningDebris blocking the BSP3/4" inlet mesh or upstream filter bypass.Remove swivel and extract/clean internal strainer.
Leaking at the hose connectionAnnual Swivel O-Ring CheckTorsional stress has worn the swivel O-rings flat.Replace swivel O-rings; verify swivel rotates freely to prevent torsion.
Blank Digital Display / Inaccurate OutputQuarterly Battery/Cal CheckDead battery or miscalibrated K-factor due to fluid viscosity change.Replace internal batteries; perform volumetric proving and adjust K-factor.

Technician performing preventive maintenance and volumetric calibration on an industrial fuel nozzle attached to a diesel dispensing terminal

6. Extending Service Life in Global Operating Conditions

Industrial sites are unforgiving. For global facilities—from European automated transport depots to executing automatic shutoff fuel nozzles maintenance in India and across the extreme heat of the Middle East—the operating environment accelerates component wear.

Combating Extreme Temperatures:

In high ambient temperature zones, the elastomeric components (seals and diaphragms) are subjected to advanced thermal degradation. High temperatures also cause diesel and gasoline to expand, increasing static line pressure between the pump and the nozzle. Ensure that pressure relief valves on the dispensing lines are functioning so that static pressure does not exceed the nozzle's 0.18 MPa rating, which could blow out the main seal.

Managing High-Dust Environments:

In mining and construction applications, airborne particulate is the primary enemy of the Venturi vacuum system. Dust adheres to the residual fuel on the 13/16" spout, rapidly clogging the sensing port. Implement strict housekeeping protocols requiring operators to utilize protective nozzle boots or holsters that shield the spout from the environment when not actively dispensing.

Handling High-Throughput Vibration:

Continuous high-speed flow creates hydrodynamic vibration. Over time, this vibration can loosen the retaining screws on the spout and the top cap. Maintenance teams should incorporate a quarterly torque-check of all external fasteners into their preventive maintenance schedule to prevent structural fatigue.

By treating the fuel nozzle not as a disposable commodity, but as a highly engineered precision instrument, industrial operations can drastically reduce their total cost of ownership, eliminate environmental contamination risks, and maintain peak dispensing efficiency.

*

FAQ

Q: What is the maximum flow rate and operating pressure for these industrial digital fuel nozzles?

A: These nozzles are engineered to handle a maximum flow rate of 60 L/min with a maximum safe operating pressure of 0.18 MPa (approx. 26.1 PSI). Exceeding these limits can cause seal blowout and erratic shutoff behavior.

Q: Why does my automatic nozzle shut off continuously even when the tank is empty?

A: Constant premature shutoff is typically caused by a flow restriction creating an artificial vacuum in the Venturi. This is usually due to a clogged internal mesh strainer, a blocked sensing port on the spout tip, or a damaged/crushed internal sensing tube.

Q: Can these nozzles handle different types of fluids?

A: Yes, the mechanical and digital variants are compatible with diesel, gasoline, and motor oil. However, changing fluid viscosities (e.g., switching from diesel to motor oil) requires recalibrating the digital flow meter's K-factor to maintain accuracy.

Q: How often should the digital flow meter inside the nozzle be calibrated?

A: For industrial use, volumetric calibration checks against a certified proving standard should be performed semi-annually. In custody-transfer or high-precision batching environments, quarterly verification is recommended.

Q: My nozzle drips slightly after shutting off. Is this normal?

A: A drip of 1-2 drops immediately after snap-action is normal as the residual fluid in the spout drains. However, continuous dripping indicates a failure of the main poppet seal, requiring immediate lock-out and seal replacement to prevent hazardous spills.

Q: What thread standard does the nozzle use for connection?

A: The inlet features a BSP3/4" (British Standard Pipe) thread. It is critical to use compatible BSP fittings and appropriate thread sealants (avoiding PTFE tape that can shred and clog the poppet valve) during installation.

Q: Are replacement parts universal across all nozzle brands?

A: No. While outer dimensions like the 13/16" spout may be standard for certain vehicle fill necks, internal components like the diaphragm, poppet valves, and turbine mechanisms are proprietary. Always source exact manufacturer replacement kits to ensure functional safety and pressure integrity.

Ready to upgrade your dispensing infrastructure or establish a standardized preventive maintenance program? Contact our engineering team today to discuss Fuel Nozzles suited for your specific flow capacities, fluid dynamics, and unique site conditions, ensuring maximum reliability and measurement accuracy.

Fuel Transfer Pumps for Mining Fuel Bowser Refueling: High-Flow Diesel Transfer in Harsh Sites

Refueling heavy earth-moving machinery (HEMM) in remote open-pit mines, quarries, and massive construction sites presents a uniquely hostile fluid dynamics challenge. Standard off-the-shelf commercial pumps rapidly fail when exposed to the continuous ingress of silica dust, high-amplitude vehicular vibrations, and the severe pressure drops associated with long-hose reel deployments. For instrumentation and plant engineers, specifying Fuel Transfer Pumps requires moving beyond basic flow rate capacities to carefully evaluating suction lift physics, dynamic head constraints, and integrated motor protection under strictly intermittent power conditions.

In a mobile fuel bowser scenario, downtime is exceptionally costly. If the diesel transfer system fails, multiple multi-million-dollar excavators, haul trucks, and generators stop operating. This engineering guide details the mechanical specifications, deployment protocols, and sizing logic for utilizing heavy-duty Fuel Transfer Pumps in global harsh-site environments, ensuring consistent high-volume diesel delivery regardless of ambient extremes.

1. Industry Overview: The Fluid Challenge

Mobile diesel bowsers operate in environments characterized by massive ambient temperature swings, heavy airborne particulates, and constant mechanical shock. Diesel fuel itself presents measurement and handling challenges: its viscosity fluctuates significantly with temperature changes, and condensation within bulk tanks frequently introduces water and microbial contamination, creating highly abrasive sludge.

When deploying a Fuel Transfer Pumps system on a mobile service truck, engineers must account for the fluid friction generated by pumping high-viscosity diesel through 15 to 30 meters of reinforced rubber hose, often concluding in an automatic shut-off nozzle. This setup creates substantial backpressure. Standard centrifugal pumps cannot self-prime adequately in these top-draw tank configurations and lack the volumetric efficiency required to overcome high discharge head pressures. Furthermore, electrical availability on mobile bowsers is strictly limited to vehicle battery banks (12V or 24V DC), demanding a pump motor with high starting torque but an optimized current draw to prevent rapid battery depletion.

Heavy-duty fuel transfer pumps mounted on a mobile mining diesel bowser, showing rugged environmental conditions and long hose reel deployment in a global open-pit mine

2. Product Capabilities Matched to Industry Needs

Selecting the correct positive displacement architecture is critical to overcoming the environmental and fluidic challenges of the mining and heavy construction sectors.

Industry RequirementFuel Transfer Pump FeatureHow It Addresses the Need
:—:—:—
Top-Draw Bulk Tank RefuelingSelf-priming rotary vane designCreates a high vacuum on the suction port, enabling 2 to 4 meters of vertical suction lift without requiring a foot valve or manual priming.
High Backpressure OperationsIntegrated By-pass ValveRecirculates fluid internally when the delivery nozzle is closed, preventing instantaneous hydraulic shock and motor stalling.
Mobile DC Power ConstraintsPermanent Magnet Stator MotorsProvides high starting torque on 12V/24V DC systems while optimizing current draw (e.g., 21A on a 24V 80 L/min system).
Harsh Environment IngressIP55 Motor Protection GradeShields internal electrical components from heavy dust storms and low-pressure water jets common in washdown areas.
Continuous Mechanical ShockDie-Cast Aluminum & Cast Iron BodiesEliminates hairline fractures associated with plastic or thin-stamped housings when mounted on vibrating chassis.
Contaminated Fluid RisksBuilt-in StrainerCaptures large particulate matter (rust, tank scale) before it can enter the pumping chamber, protecting the acetal resin vanes.
Rapid Turnaround TimesHigh-Yield Flow OptionsAchieves delivery rates of 40 L/min, 70 L/min, 80 L/min, and up to 120 Litre/Min, minimizing HEMM downtime during shift changes.
Weight Limitations on SkidsSintered Steel Rotor / Acetal VanesDelivers maximum durability while keeping overall net weight exceptionally low (e.g., CE-40DC weighs just 3 KGS).

Technical process flow diagram illustrating a diesel transfer system layout from a mobile tank through the pump, bypass valve, and filtration unit to heavy earth-moving equipment

3. Technology Comparison & Decision Matrix

To provide a comprehensive view of industrial fuel transfer pump supplier specifications, we must compare the fundamental positive displacement and kinetic pumping technologies used in hydrocarbon transfer.

Technology Comparison Table

ParameterRotary Vane Pump (CE Series)External Gear PumpCentrifugal Pump
:—:—:—:—
Primary Fluid MatchDiesel, Kerosene (Low-to-medium viscosity)Heavy Fuel Oils, Lube Oils (High viscosity)Water, extremely light chemicals
Self-Priming CapabilityExcellent (Fast dry-lift up to 4m)Good (Slower, requires wet gears)Poor (Requires flooded suction)
Flow Stability at High HeadHigh (Volumetric efficiency > 85%)Very High (Virtually no slip)Low (Flow drops rapidly as head rises)
Tolerance to ParticulatesModerate (Acetal vanes wear gradually)Low (Gears jam on hard particulates)High (Open impellers pass solids)
RPM RequirementsHigh (e.g., 2800 RPM for CE-40DC)Low to Moderate (typically < 1500 RPM)Very High (2900 – 3600 RPM)
By-pass IntegrationEasily integrated into pump bodyUsually requires external relief loopsNot required (impeller can slip in fluid)

'When to Use This Technology' Decision Matrix

  • Specify Rotary Vane DC Pumps (CE-40DC, CE-70-A-DC, CE-80-DC): When deploying mobile diesel bowsers, skid tanks, or construction yard pickup trucks where fast self-priming, high flow rates (up to 120 L/min), and 12V/24V electrical architecture are the limiting factors.
  • Specify External Gear Pumps: When transferring highly viscous fluids, such as cold motor oils, heavy lubricants, or unheated heavy fuel oil (HFO), where the high torque and tight tolerances of gears are required to move thick fluids.
  • Specify Centrifugal Pumps: Only when transferring vast quantities of diesel in a stationary, gravity-fed (flooded suction) bulk terminal layout, where the pump sits completely below the tank fluid level.

4. Typical Installation Scenarios in This Industry

Scenario 1: High-Volume Mobile Bowser Deployment

In open-pit mining operations, specialized service trucks travel to stationary excavators to supply diesel. The pump is mounted directly to the vehicle chassis near the tank base. A CE-80-DC unit running on the vehicle's 24V system provides 80 L/min output. Because of the long 20-meter discharge hose mounted on a spring-rewind reel, friction loss is high. The pump's integrated by-pass valve is essential here; when the operator shuts the automatic nozzle at the excavator, the by-pass valve opens instantly, preventing the high-velocity fluid column from generating a destructive water-hammer effect back into the pump housing. Integrating these systems alongside Mobile Diesel Dispensers ensures accurate volume tracking for operational auditing.

Scenario 2: Remote Generator Skid Tanks

Remote drilling sites rely on heavy diesel generators that draw fuel from day tanks. These tanks are often L-shaped and require flexible, low-profile installations. A CE-40DC is utilized to transfer diesel from a delivery truck into the day tank, or from a primary bulk skid into the day tank. The die-cast aluminum construction is lightweight, and the pump's 30-minute duty cycle easily accommodates the transfer of 1,200 liters in a single, uninterrupted batch before thermal stabilization is required.

Scenario 3: Earth-Moving Machinery Primary System Integration

For heavy agricultural or mining machinery, transfer pumps are often hard-wired into the equipment's primary electrical system to allow the vehicle to self-load fuel from stationary IBC totes or drums left in the field. The CE-70-A-DC (rated for 70 L/min, 4A current draw, 10m head) is mounted onto the tractor or excavator frame. Its IP55 protection grade is crucial here, as it survives aggressive high-pressure washdowns and heavy rain exposure without electrical shorting.

5. Engineering Specifications and Flow Sizing Logic

Accurate specification requires mapping the pump's capability to the physical limitations of the site. Below are the core technical data sets for high flow diesel transfer systems:

  • CE-40DC Specifications: 40 L/min flow rate, 2800 RPM, Cast iron body with anti-corrosion paint, Acetal resin vanes, Sintered steel rotor, 3/4 inch I/O, 3 KGS net weight. 12V/24V DC.
  • CE-70-A-DC Specifications: 70 L/min flow rate, 10m maximum head, 2 to 4m suction lift, 3/4 inch I/O. Current draw of 4 Amps.
  • CE-80-DC Specifications: 80 L/min flow rate, 1 inch I/O. Current: 44A on 12V DC, 21A on 24V DC. 11 KGS net weight.
  • Maximum High-Yield Options: Up to 120 Litre/Min for specialized ultra-high flow demands.

Engineering Sizing and Calibration Note

When selecting a DC transfer pump, engineers must calculate the Total Dynamic Head (TDH) to ensure the pump will not stall.

TDH = Elevation Head + Friction Head Loss + Pressure Head

Friction head loss is severely impacted by hose diameter. Using a 3/4 inch hose for an 80 L/min pump over a 15-meter run will create massive friction, forcing the pump into premature by-pass mode. For flow rates exceeding 60 L/min, engineers must step up to a 1-inch internal diameter (ID) hose.

Furthermore, electrical cable sizing is paramount. The CE-80-DC pulls 44A on a 12V system. If the cable run from the vehicle battery to the pump is 6 meters, engineers must use heavy-gauge copper wiring (minimum 4 AWG to 2 AWG) to calculate and mitigate voltage drop. A 10% voltage drop will reduce motor RPM, exponentially dropping the volumetric flow rate and causing the pump motor to overheat as it struggles to overcome mechanical inertia.

Fuel Transfer Pumps actively operating at a global industrial plant in this specific sector, highlighting robust piping and heavy gauge electrical wiring connections

6. Compliance, Accuracy, and Protection Requirements

High flow diesel transfer operates within a highly regulated safety and metrology framework globally.

  • Motor Protection and Duty Cycles: The motors on these units are designed for intermittent service, specifically a strict 30-minute work cycle. Operating beyond this limit without allowing the stator to cool can degrade the permanent magnets and burn the brush motor commutators. Thermal overload protectors are required to shield the motor.
  • Ingress Protection: An IP55 rating dictates that the unit is protected against hazardous dust ingress and low-pressure water jets from any direction.
  • Fluid Cleanliness (ISO 4406): While the pumps feature a built-in strainer, transferring fuel to modern Tier 4 final diesel engines (which feature high-pressure common rail injectors) requires downstream micro-filtration.
  • Measurement and Accuracy: Transfer pumps themselves move fluid but do not measure it. For fuel custody transfer and consumption auditing, these pumps must be paired with precision Turbine Flow Meters on the discharge side, ensuring batch accuracies of +/- 0.5% or better.

7. Installation and Deployment Procedure

Strict adherence to mechanical and electrical engineering principles during installation prevents premature vane wear and motor failure. Follow this standard deployment protocol for mobile fuel transfer systems:

  1. Calculate Net Positive Suction Head Available (NPSHa): Position the pump as low as physically possible relative to the fuel tank. While the pump supports 2 to 4 meters of suction lift, minimizing vertical lift prevents fluid cavitation inside the rotor housing.
  2. Mount with Vibration Isolators: Secure the die-cast aluminum or cast iron pump base to the vehicle chassis using rubber anti-vibration dampeners to isolate the pump from high-frequency vehicular shock.
  3. Install Rigid Suction Lines: Use non-collapsible, steel-wire reinforced suction hose. Standard rubber hose will collapse under the vacuum generated by the rotary vanes, starving the pump.
  4. Wire for Minimal Voltage Drop: Connect the DC motor directly to the vehicle's battery bank using adequately sized copper cables (accounting for the 44A draw on 12V systems). Ensure an in-line fuse is installed as close to the battery terminal as possible.
  5. Verify By-pass Valve Operation: Briefly dead-head the pump by closing the discharge nozzle. Ensure the internal by-pass valve cracks open smoothly and allows recirculation without stalling the motor. Note: Never operate in by-pass mode for more than 2 to 3 minutes, as fluid friction will rapidly heat the trapped diesel.
  6. Conduct Thermal Duty-Cycle Testing: Run the pump under normal load for 20 minutes. Check the motor housing temperature and verify that electrical connections are not generating excess resistive heat.

8. Selection Checklist for This Industry

Before finalizing procurement for heavy-duty fuel management systems, plant managers and procurement heads should verify the following parameters:

  1. System Voltage Match: Confirm whether the mobile fleet utilizes 12V or 24V electrical architecture. (e.g., specifying the CE-70-A-DC 24V version for heavy earth-moving equipment).
  2. Required Flow Rate: Match the flow rate to the machinery tank size. An 80 L/min pump fills a 400-liter excavator tank in 5 minutes; a 40 L/min pump takes 10 minutes.
  3. Duty Cycle Adherence: Ensure the total batch volume can be transferred within the pump's 30-minute continuous operation limit.
  4. Suction Lift Constraints: Measure the vertical distance from the bottom of the deepest bulk tank to the pump inlet; it must not exceed 4 meters.
  5. Fluid Compatibility Check: Confirm the fluid is diesel, kerosene, or light fuel oil. These pumps are not rated for highly volatile fluids like aviation gasoline (Avgas) or highly viscous gear oils.
  6. Port Sizing: Match the pump inlet/outlet (e.g., 3/4 inch for CE-40DC, 1 inch for CE-80-DC) to the existing hose reels to avoid restrictive pipe bushings.
  7. Filtration Integration: Ensure adequate space exists between the pump discharge and the hose reel to mount a particulate/water-absorbing spin-on filter.
  8. IP Rating Verification: For exterior chassis mounting, mandate minimum IP55 protection to survive environmental exposure.

FAQ

Q: Can these rotary vane pumps be run dry?

A: They are capable of running dry for a very brief period (typically less than 30 seconds) during the initial self-priming phase. Prolonged dry running will rapidly overheat and disintegrate the acetal resin vanes due to a lack of fluid lubrication.

Q: Why is there a strict 30-minute duty cycle on DC fuel transfer pumps?

A: DC brush motors with permanent magnet stators generate significant internal heat during operation. The 30-minute limit ensures the motor windings and commutators do not exceed their thermal threshold. The pump must be allowed to cool to ambient temperature before the next cycle.

Q: What causes the pump motor to stall or blow fuses immediately upon startup?

A: This is almost always caused by a blocked suction line, a seized rotor due to ingested debris, or insufficient electrical current reaching the motor due to undersized wiring (voltage drop).

Q: How does the internal by-pass valve function?

A: When the delivery nozzle is closed, pressure spikes in the discharge line. The internal spring-loaded by-pass valve is forced open by this pressure, allowing the fluid to loop directly from the discharge port back to the suction port within the pump body.

Q: Can I use a 3/4 inch hose on an 80 L/min pump?

A: It is highly discouraged. Pushing 80 liters per minute through a 3/4 inch hose creates severe fluid friction, significantly reducing the actual flow at the nozzle and potentially forcing the pump to run partially in by-pass mode. Always use a 1-inch ID hose for flows above 60 L/min.

Q: Are these pumps suitable for transferring heavy engine oils?

A: No. Positive displacement vane pumps are engineered for low-to-medium viscosity fluids like diesel and kerosene. High viscosity fluids will overload the motor and prevent the centrifugal force from adequately pushing the vanes against the pump housing.

Q: How do ambient temperature extremes affect pump performance?

A: In sub-zero temperatures, diesel fuel can gel, dramatically increasing its viscosity and causing the pump to draw higher electrical current. In extreme heat, the motor will reach its maximum thermal threshold faster, requiring shorter duty cycles to prevent internal component damage.

To engineer a resilient and highly efficient mobile refueling infrastructure, accurate fluid data is paramount. Contact our instrumentation team today with your specific application details—including required flow capacity, fluid viscosity, operating voltage, and site environmental conditions—so we can specify the exact Fuel Transfer Pumps and integrated flow measurement solutions tailored to your operational demands.

Diesel Flow Meters Troubleshooting: Under-Reading and Over-Reading During Fuel Transfer—Causes and Fixes

In Indian industrial operations—ranging from petrochemical plants in Gujarat to mining sites in Odisha—diesel is a critical, high-cost resource. At current fuel prices, even a 1% measurement error during high-speed diesel (HSD) decantation or batching can result in financial losses running into lakhs of rupees annually. Plant managers and procurement heads frequently face a frustrating scenario: the supplier's transport tanker dip shows one quantity, while the plant’s Diesel Flow Meters register a significantly different volume.

Determining whether the Diesel Flow Meters are under-reading (registering less than actual flow) or over-reading (registering more than actual flow) is the first step in resolving these expensive disputes. Often, perfectly functional Diesel Flow Meters are discarded and replaced—at costs ranging from ₹9,999 to ₹62,499—when the actual root cause is system-level physics, such as air ingress, viscosity shifts due to extreme Indian ambient temperatures, or bypass leakage.

This guide provides a methodical diagnostic workflow for instrumentation engineers to troubleshoot quantity mismatches, isolate accuracy issues, and restore reliable volumetric measurement to your fuel transfer systems.

1. Quick Reference: How Diesel Flow Meters Works

To diagnose measurement errors, you must first understand the fundamental operating principle of the instrumentation. Diesel Flow Meters primarily utilize Positive Displacement (PD) technology. A positive displacement meter directly measures the volume of the liquid passing through it by repeatedly entrapping the fluid.

You can visualize this process as repeatedly filling a bucket with liquid, then dumping the contents downstream. The number of times the "bucket" is filled and emptied directly correlates to the total volumetric flow. Within the meter body, entanglement is typically achieved using turning parts (like oval gears, rotary vanes, or nutating discs) that form moving seals between each other and the flow meter casing.

Because the rotating parts have extremely tight tolerances, these seals prevent the liquid from bypassing the measurement chamber without being quantified—a phenomenon known as "slippage." The rotation is then detected either mechanically (driving a standard register) or magnetically (generating pulse outputs for digital displays or RS-485 communication).

The Slippage and Viscosity Dynamic

In fluid administration, increasing thickness (viscosity) actually decreases slippage and increases the pressure drop across the flow meter. Interestingly, precision can genuinely improve at low flow conditions in a given positive displacement meter when fluid viscosity increases, because the internal clearances are better sealed by the thicker fluid. Conversely, if diesel temperature rises significantly (e.g., during peak summer in Rajasthan reaching 45°C+), viscosity drops, slippage increases, and the meter may marginally under-read at low flow rates.

Engineering Formula: Volumetric Flow Calculation

The basic calculation governing positive displacement meters is:

Q = V_trap * N * Volumetric Efficiency

Where:

Q = Total Volumetric Flow Rate

V_trap = Volume of the measurement chamber (the "bucket")

N = Rotational speed of the internal gears/vanes

Volumetric Efficiency = 1 – (Slippage Volume / Total Volume)

Labeled cross-section of a Positive Displacement Diesel Flow Meter showing internal oval gears, fluid entrapment chambers, pulse transmitter, and standard mechanical register

Technology Comparison Table: Flow Measurement for Diesel

Plant engineers often ask why they should specify a PD meter over other technologies. No single-technology site provides an unbiased view. Below is a comparative analysis comparing Positive Displacement against other common industrial technologies like Turbine Flow Meters and Electromagnetic Flow Meters.

ParameterPositive Displacement (PD) MetersTurbine Flow MetersElectromagnetic (Mag) Meters
Measurement PrincipleVolumetric (Mechanical entrapment)Velocity (Rotor speed)Faraday’s Law of Induction
Suitability for DieselExcellent (Diesel lubricates moving parts)Good (For clean, low-viscosity diesel)Incompatible (Diesel is non-conductive; Mag meters require >5µS/cm)
Accuracy (Standard)±0.5% to ±0.2% of reading±0.5% to ±1.0% of reading±0.2% to ±0.5% of reading (for conductive fluids only)
Viscosity HandlingHigh (Accuracy improves with viscosity)Low (Viscosity spikes cause massive under-reading)High (Independent of viscosity)
Straight Pipe RequirementNone (Can be installed next to elbows/valves)High (Typically 10D upstream, 5D downstream)Moderate (5D upstream, 3D downstream)
Cost Range (Indian Market)₹9,999 – ₹62,499+₹15,000 – ₹80,000+₹25,000 – ₹1,50,000+
Pressure Drop (Delta P)Moderate to High (Increases with viscosity)Low to ModerateZero (Unobstructed flow tube)

"When to Use This Technology" Decision Matrix

Use this matrix to determine if Positive Displacement Flow Meters are the correct specification for your application:

  • Choose PD Meters When:
  • High precision (±0.5% or better) is mandatory for custody transfer or inventory control.
  • Plant piping layout is constrained and lacks the straight pipe runs required by velocity meters.
  • Operating with liquids that have lubricating properties (Diesel, LDO, HFO, Lubricants).
  • Flow rates vary significantly, and you need high accuracy at the low end of the flow range.
  • Avoid PD Meters When:
  • Pumping highly abrasive or dirty liquids containing particulate matter (unless heavy upstream filtration is possible).
  • Operating far above the maximum specified pressure drop limit, which will prematurely wear internal bearings.
  • Fluid contains large, shifting amounts of entrained gas or air bubbles without an air eliminator.

2. Troubleshooting Matrix: Diagnosing Quantity Mismatches

When a fuel quantity mismatch occurs, you must systematically categorize the symptom. Over-reading generally points to air entrapment, while under-reading points to mechanical wear, high pressure drop bypass, or increased slippage.

Below is an extensive troubleshooting matrix for Diesel Flow Meters deployed in harsh Indian industrial environments.

SymptomLikely CauseDiagnosis StepsFix
Consistent Over-Reading (Meter shows 1050L, tank received 1000L)Air ingress/Gas bubblesCheck for vortexing in source tank, leaks in suction piping, or dry runs when tank empties.Install an Air Eliminator upstream. Repair suction leaks. Maintain minimum tank head.
Consistent Under-Reading (Meter shows 950L, tank received 1000L)Rotor/Vane wear causing excess slippageInspect measuring chamber for worn sealing surfaces. Run meter at minimum flow rate; if slippage is high, meter will stall or read zero.Replace internal rotors/gears. Recalibrate meter K-factor if wear is minor and linear.
Zero Reading (Fluid flows but display is dead)Mechanical jam or broken couplingCheck if fluid is actually flowing. Remove register to see if magnetic drive coupling is rotating.Clean measuring chamber of debris. Replace sheared coupling pins.
Zero Reading (Digital Output)Power fault or faulty pulse transmitterMeasure voltage at transmitter terminals. Check for pulse output using an oscilloscope or DMM on Hz setting.Restore stable power (use UPS/stabilizer to counter voltage fluctuations). Replace faulty Hall-effect sensor.
Erratic/Jumping ReadingsElectrical noise (EMI) or severe flow pulsationCheck RS-485/Pulse cable shielding. Look for VFD cables routed parallel to meter signal cables. Check pump type (diaphragm pumps cause pulsation).Re-route signal cables. Ground cable shield at one end only. Install pulsation dampeners if using pulsating pumps.
Progressive Under-Reading over timeBearing wear / Increased frictionMeasure pressure drop across meter. An abnormal increase in pressure drop indicates bearings are failing, slowing the rotors.Replace bearings. Ensure operating flow rate does not exceed maximum pressure drop specification.
Display Error / Garbled LCDMoisture ingress or overheatingCheck IP65/IP67 enclosure seals. Inspect for condensation inside the glass (common during Indian monsoons).Replace desiccant packs. Reseal enclosure with high-quality industrial silicone. Shield meter from direct sunlight.
Leakage from Meter BodyBlown gaskets / O-ringsVisually inspect mating flanges and register housing. Check if system pressure exceeded the meter’s pressure rating.Replace gaskets/O-rings with Viton/PTFE. Ensure pressure relief valves are functional.
Loud Grinding NoiseParticulate contamination (Dirt/Rust)Isolate meter and open Y-strainer. Check for metal shavings or rust flakes from old plant piping.Clean strainer basket. Flush meter body. Upgrade to a finer mesh size (e.g., 80 mesh for diesel).
Valve Not Responding (Batch Systems)Solenoid failure or signal lossIn batching setups, check the relay output from the meter or batch controller to the pneumatic/electric valve.Replace burnt solenoid coils (common with unstable Indian power). Verify 4-20mA or relay control signals.

Schematic of a Diesel Flow Meter installation showing the correct placement of Y-strainers, Air Eliminators, the Flow Meter, and downstream valves to prevent diagnostic errors

3. Step-by-Step Field Diagnosis Procedure

When a massive mismatch is reported between the receipt and the meter, do not immediately dismantle the equipment. Follow this standardized 8-step field diagnostic procedure.

Tools Required: Standard spanner set, multimeter (with Hz frequency measurement), clear 20-liter or 50-liter Legal Metrology stamped standard volumetric measure (SVM) can, pressure gauges, and protective gear (PPE).

  1. Safety and System Isolation: Before beginning, shut off power to Fuel Transfer Pumps and electronic registers. Close upstream and downstream isolation valves to secure the meter.
  2. Visual & Environmental Inspection: Inspect the pipeline for any physical damage, leaks at the flanges, or signs of tampering with the calibration seals. Look for bypass valves that might be partially open, allowing unmetered diesel to circumvent the meter.
  3. Bleed Air and Check Eliminator: Air bubbles are measured as volume by a PD meter. If the supply tanker runs completely dry, air is forced into the system. Ensure the mechanical air eliminator valve is functioning and the float mechanism is not jammed by dirt.
  4. Strainer Inspection: Unbolt the upstream Y-strainer. In India, transport tankers often contain rust, sludge, or adulterated fuel. A plugged strainer can cause cavitation in the pump, leading to vapor bubbles that artificially inflate the meter reading. Clean the 80-mesh/100-mesh filter.
  5. Volumetric Calibration Test (Bucket Test): This is the definitive test to prove accuracy.
  • Procure a Legal Metrology certified 20L or 50L Standard Volumetric Measure.
  • Dispense exactly 50 liters into the calibrated vessel at the normal operating flow rate.
  • Compare the vessel's reading against the meter's mechanical or digital register.
  • Calculate the error percentage: Error % = [(Meter Reading – Actual Volume) / Actual Volume] * 100.
  1. Flow Rate Validation: Check if the system is operating within the specified flow range. Operating a 100 LPM meter at 5 LPM will result in massive under-reading due to high percentage slippage. Operating it at 150 LPM will cause over-speeding, premature bearing wear, and eventual catastrophic failure.
  2. Pressure Drop (Delta P) Test: Install pressure gauges immediately upstream and downstream of the meter. Run the system. A high pressure drop indicates excessive internal friction or fluid viscosity higher than calibrated parameters. Operating over the pressure drop limits will severely damage bearing assemblies.
  3. Electronics and Pulse Verification: For digital models, navigate to the calibration menu. Check the K-Factor (pulses per liter). Ensure no unauthorized personnel have altered this value. If using an external batch controller, use the multimeter to verify that clean, square-wave pulses are reaching the controller without interference.

4. Installation and Setup Errors That Cause Ongoing Problems

Many troubleshooting calls end with the realization that the meter was never installed correctly. Diesel Flow Meters require strict adherence to piping best practices to maintain their ±0.5% accuracy.

Installation ErrorResulting SymptomEngineering Correction
Absence of Upstream StrainerSudden meter stalling, internal scratches, high slippage, under-reading.Install a Y-strainer or basket strainer (min 80 mesh) immediately upstream of the meter.
Absence of Air EliminatorOver-reading by 2% to 10%, especially when emptying storage tanks or tanker trucks.Install an air/vapor eliminator on the highest point upstream of the meter to vent entrained gas.
Installing at Pipeline High PointsAir gets trapped in the meter body, causing erratic flow and over-reading.Install the meter at lower elevations or in vertical lines with upward flow to keep the pipe full of liquid.
Reverse Flow InstallationMeter runs backward (mechanical) or fails to output correct directional pulses.Ensure the flow arrow cast on the meter body strictly aligns with the fluid transfer direction.
Lack of Downstream BackpressureFluid flashes into vapor (cavitation) inside the meter, causing over-reading and gear damage.Install a backpressure valve or elevate the downstream pipe to keep the meter completely flooded with liquid.
Vibration from Nearby PumpsFalse pulse generation on digital meters; premature wear on mechanical registers.Decouple the meter using flexible stainless-steel bellows and provide rigid structural support to piping.

5. Preventive Maintenance to Avoid Recurrence

Once you have diagnosed and fixed the issue, a rigid preventative maintenance (PM) schedule is vital. Indian site conditions are exceptionally harsh. Heavy monsoon rains create extreme humidity that penetrates poorly sealed electronics, while summer dust storms introduce particulate matter into open breathers.

  • Weekly: Inspect all flanges and seals for weeping leaks. Verify that calibration seals (lead seals or digital locks) are intact.
  • Monthly: Open and clean the upstream strainers. During monsoon, check the fuel tanks for water ingress. Water has a different viscosity than diesel and lacks lubricity, which can cause internal rust and scaling on the measuring gears. Drain water from the bottom of storage tanks regularly.
  • Quarterly: Conduct a 50-liter or 100-liter calibration proving test using a Legal Metrology certified proving can. Adjust the mechanical calibration screw or digital K-factor if a drift of more than 0.2% is observed.
  • Bi-Annually: For meters exposed to the elements, replace silica gel desiccant packs inside the electronic housings to prevent display screen failure. Re-apply anti-corrosion spray to external bolts and mechanical register gears.

A perfectly installed Diesel Flow Meter at an Indian factory showing an upstream Y-strainer, air eliminator, isolation valves, and bypass piping on a concrete plinth

6. When to Call Service vs. Fix Yourself

Knowing the limits of field maintenance prevents permanent damage to precision instrumentation.

What you can fix yourself (Field-Fixable):

  • Cleaning strainers and un-jamming air eliminators.
  • Recalibrating the meter using the internal calibration mechanism or digital K-factor adjustment, provided you have a certified proving measure.
  • Replacing external digital displays, pulse transmitters, or mechanical registers.
  • Replacing O-rings and flange gaskets to stop external leaks.

When to call factory service (Return to Base):

  • Measuring Chamber Damage: If dirt has deeply scored the oval gears or the internal casing walls, the slip volume is permanently altered. The unit requires factory re-machining or complete internal replacement and bench calibration.
  • Bearing Seizures: If the meter completely locks up due to over-speeding or lack of lubrication, replacing bearings in the field often leads to misalignment.
  • Legal Metrology Certification: If your flow meter is used for custody transfer or retail sale, any breaking of the government-stamped seals requires a certified Legal Metrology inspector and an authorized service center to recalibrate and re-seal the unit according to PESO and BIS norms.

FAQ

Q: Why does my diesel flow meter read higher than the actual volume received from the tanker?

A: The most common cause of over-reading is air ingress. When the tanker empties, air is sucked into the hose and passes through the meter. Since Positive Displacement meters measure volume, they will measure the trapped air bubbles as if they were fluid. Installing an air eliminator resolves this.

Q: Can changes in ambient temperature affect the accuracy of the meter?

A: Yes. Extreme temperature shifts change the viscosity of diesel. In peak Indian summers, diesel becomes thinner (lower viscosity), which slightly increases internal slippage in the meter, potentially causing minor under-reading at very low flow rates.

Q: How often do I need to calibrate my industrial flow meter?

A: For internal accounting, a bi-annual calibration check using a certified proving measure is recommended. If the meter is used for custody transfer (buying/selling), calibration must adhere to the Legal Metrology Act, 2009, which typically requires annual stamping by a designated officer.

Q: What happens if I operate the meter above its maximum rated flow capacity?

A: Operating above the maximum flow rate causes excessive pressure drop across the internal components. This leads to over-speeding of the gears, rapid bearing wear, and eventual catastrophic failure of the flow meter mechanism.

Q: My digital flow meter display is blank, but fuel is flowing. What is wrong?

A: This usually indicates an electrical fault. Check the power supply and ensure it is protected from voltage fluctuations. If battery-operated, replace the internal lithium battery. Also, inspect the magnetic pickup sensor to ensure it hasn't failed or been disconnected.

Q: Is it necessary to install a straight run of pipe before a positive displacement meter?

A: No. Unlike Turbine or Electromagnetic meters, PD meters do not require a fully developed flow profile. You can install them directly adjacent to elbows, valves, or T-junctions without sacrificing accuracy.

Q: Why is my meter suddenly making a grinding noise?

A: A grinding noise indicates heavy particulate contamination (rust, scale, or dirt) has bypassed the strainer and entered the tight-tolerance measuring chamber. Stop the flow immediately, isolate the meter, and clean the internal chamber to prevent permanent scoring.

If your plant is continuously facing diesel reconciliation mismatches, or if you are setting up a new bulk fuel decantation facility, selecting the correct meter specification is critical. Contact our engineering team with your required flow rate, pipeline size, maximum pressure, and specific site conditions (e.g., coastal humidity or high dust environments) so we can recommend the exact Diesel Flow Meters and accessory setup to guarantee ±0.5% accuracy for your operations.

How to Choose Turbine Flow Meters for Fuel, Oil, and Water: Specifications Checklist

Precision in fluid measurement is not merely a matter of operational tracking; it is the bedrock of mass balance, custody transfer, and process optimization in global industrial applications. Selecting the wrong instrumentation for transfer skids, generator day tanks, or bulk receipt lines leads to volumetric discrepancies, pump cavitation, and costly downtime. As industrial facilities scale operations—whether offshore platforms, chemical batching plants, or power generation facilities—the demand for robust, highly accurate flow measurement technologies becomes paramount.

This comprehensive buyer's guide provides a methodical selection checklist for matching flow meter performance to real-world operating conditions, specifically focusing on viscosity ranges, temperature extremes, line pressures, and required accuracy classes. By examining critical specifications, this guide equips instrumentation engineers, plant managers, and procurement heads with the technical framework required to evaluate and specify Turbine Flow Meters for complex fluid networks. Whether you are upgrading an existing pipeline or commissioning a new facility, understanding these parameters ensures compliance with international measurement standards and guarantees long-term reliability.

1. What Are [Turbine Flow Meters] and How Do They Operate

At their core, Turbine Flow Meters are velocity-based measurement devices designed for the highly accurate volumetric calculation of low-viscosity, non-acidic liquids such as diesel, water, heavy oil, and furnace oil. Their operation relies on the conservation of angular momentum and the dynamic forces of the flowing fluid.

The measurement process begins as the flowing liquid enters the meter body and passes through a straightening section. These integrated straightening vanes condition the liquid flow profile by neutralizing undesired swirl, turbulence, and asymmetry before the fluid reaches the measurement rotor. Once conditioned, the liquid impacts a freely suspended turbine wheel featuring helical blades set at a precise, known angle relative to the fluid flow. The kinetic energy of the fluid drives the turbine wheel, causing it to rotate at an angular velocity that is strictly proportional to the linear fluid velocity.

The rotor is mounted on a hard stainless steel main shaft supported by special high-precision, low-friction ball bearings and a carbon bush, minimizing mechanical drag. As the turbine wheel spins, a proximity probe (magnetic pickoff sensor) detects the passing of each rotor blade, generating a pulsed electrical signal. Each pulse represents a discrete, known volume of liquid. By applying a device-specific K-factor (pulses per unit volume), the electronic display or data acquisition module calculates total passed volume and instantaneous flow rate. Alternatively, mechanical index heads driven via shafts and gears can indicate these values on an eight-digit counter.

Below are the defining technical specifications for industrial turbine flow meters for non-acidic liquids:

Technical SpecificationValue / RatingEngineering Notes
Measuring PrincipleVolumetric VelocityProportional angular velocity via helical rotor
Material of ConstructionEnclosure & Rotor: S.S-304 / S.S-316Corrosion-resistant; suitable for harsh environments
Shaft AssemblyHard Stainless Steel-316 with Carbon BushLow friction, extended operational lifespan
Standard Accuracy+/- 0.5% or 1% FSDRequires fully developed flow profile
Repeatability0.1%Excellent for batching and process control
Maximum Working Pressure6 MPa (approx. 60 Bar)Suitable for high-pressure transfer lines
Temperature Range-20 to 120 °CAmbient and fluid temperature tolerance
Pulse Output SignalNPN Open Connector (12V DC power)High Level: >8 VDC / Low Level: <0.8 VDC

Product overview showing key features and build quality of Turbine Flow Meters

2. Key Selection Criteria for Global Industrial Buyers

Specifying a flow meter requires evaluating the fluid's physical properties against the mechanical and electronic capabilities of the instrument. When evaluating turbine flow meter specifications for industrial buyers, instrumentation engineers must weigh several critical parameters against alternative technologies.

Technology Comparison Table

To understand where turbine technology fits into your plant architecture, compare it against other dominant flow measurement principles such as Electromagnetic Flow Meters and Positive Displacement Flow Meters.

ParameterTurbine Flow MeterElectromagnetic MeterVortex Flow MeterPositive Displacement
Primary Fluid TargetClean liquids (Fuel, Oil, Water)Conductive liquids (Water, Slurry)Liquids, Gases, SteamHighly viscous fluids (Syrups, Heavy Oils)
Viscosity ToleranceLow to MediumIrrelevantLowHigh to Very High
Pressure Drop (Head Loss)Moderate (varies by flow rate)Zero (unobstructed pipe)Moderate (bluff body)High (mechanical clearances)
Accuracy CapabilityHigh (+/- 0.5% to 1%)High (+/- 0.5% to 1%)Moderate (+/- 1% to 1.5%)Very High (+/- 0.1% to 0.5%)
Straight Pipe Requirement10D Upstream / 5D Downstream5D Upstream / 3D Downstream15D Upstream / 5D DownstreamNone required
Maintenance NeedBearings require periodic checkMinimal (no moving parts)Minimal (no moving parts)High (wear on gears/vanes)

Criterion 1: Fluid Viscosity and Reynolds Number Limits

Turbine meters operate optimally within specific kinematic viscosity ranges. If the fluid viscosity exceeds design limits, the drag on the rotor blades increases, shifting the calibration curve and degrading accuracy. Since turbine meters are dependent on a fully developed turbulent flow profile (typically a Reynolds number greater than 10,000), using them for highly viscous heavy oils below the critical flow threshold requires careful K-factor characterization.

Criterion 2: Pressure Drop and System Cavitation

All mechanical flow meters introduce pressure drop (head loss). At high flow velocities, the pressure immediately downstream of the turbine rotor drops. If this pressure falls below the vapor pressure of the liquid, cavitation occurs—vapor bubbles form and subsequently collapse. Cavitation not only causes severe mechanical damage to the stainless steel rotor blades and carbon bush but also causes the meter to over-register. Engineers must ensure sufficient downstream backpressure, typically calculated as: Backpressure = 2 x (Pressure Drop) + 1.25 x (Vapor Pressure).

Criterion 3: Material Compatibility and Operational Extremes

Global operating conditions—whether in corrosive coastal facilities or extreme temperature zones—dictate strict material choices. A standard build using an S.S-304 or S.S-316 enclosure and rotor provides broad chemical resistance against fuels, water, and non-acidic process fluids. The pressure rating of 6 MPa (60 bar) and temperature tolerance from -20 to 120 °C covers the vast majority of boiler feed lines, generator fuel lines, and loading arm applications.

Criterion 4: Transmitter, Display, and Communications

Modern industrial networks require seamless data integration into DCS or SCADA systems. Buyers must specify the correct power and output architecture:

  • Pulse Output: A 12V DC powered NPN open connector is ideal for high-speed batching controllers.
  • Analog Output: 24V DC powered 4 to 20 mA signals are standard for long-distance DCS analog inputs.
  • Digital Communication: Many buyers opt to buy turbine flow meters with RS485 output, utilizing Measurement Systems Pickoff Sensor modules for robust, multi-drop digital integration across vast plant networks.
  • Standalone Power: For remote wellheads or unpowered transfer skids, a battery-operated meter featuring a 3.3V 10AH lithium battery provides over 5 years of continuous operation, complete with an LCD displaying instantaneous flow and an eight-digit cumulative total with power-fail protection.

Technical diagram showing selection decision flow for Turbine Flow Meters based on application parameters

3. Model and Variant Comparison

Sizing the meter correctly is the single most important step in the procurement process. An oversized meter will run in its non-linear low-end range, while an undersized meter will create excessive pressure drop, wear out the bearings prematurely, or induce cavitation. Match your expected nominal flow rate to the mid-point of the meter's specified range.

Below is the technical data for the CE-TFS series line sizes and corresponding flow ranges:

Model NumberLine SizeFlow Range (Liters / Hour)Application Suitability
CE-TFS-00404 MM40 ~ 400 L/HMicro-dosing, pilot plant testing, small burner feeds
CE-TFS-01212 MM600 ~ 6,000 L/HStandard generator day tanks, light transfer pumps
CE-TFS-02525 MM1,000 ~ 10,000 L/HCommercial fuel dispensers, process batching
CE-TFS-04040 MM2,000 ~ 20,000 L/HMid-scale chemical transfer, water treatment lines
CE-TFS-05050 MM4,000 ~ 40,000 L/HBulk fuel loading, medium industrial process lines
CE-TFS-08080 MM10,000 ~ 100,000 L/HHigh-volume transfer skids, offloading stations
CE-TFS-100100 MM20,000 ~ 200,000 L/HMain plant intake lines, large boiler feeds
CE-TFS-150150 MM30,000 ~ 300,000 L/HHeavy industrial bulk transfer, pipeline monitoring
CE-TFS-150 (High Cap)150 MM80,000 ~ 800,000 L/HMajor terminal operations, large-scale custody transfer

4. Common Mistakes Industrial Buyers Make When Choosing

Even top-tier instrumentation will fail if poorly selected or incorrectly installed. Global procurement teams consistently run into a few structural pitfalls when deploying volumetric measurement systems. Avoid these five critical mistakes:

  1. Skipping Upstream Filtration
  2. Turbine meters contain precision bearings and tight clearances between the rotor blades and the housing. Allowing particulate matter, pipe scale, or weld slag into the meter will jam the rotor or destroy the bearings. Always install an appropriate Y-strainer or basket filter upstream of the meter body.

  1. Ignoring Straight Pipe Run Requirements
  2. Turbine meters rely on a symmetrical, fully developed flow profile. Installing a meter immediately after a pump, a 90-degree elbow, or a control valve introduces swirl and fluid jetting. This distorts the velocity profile striking the helical blades, causing massive accuracy errors. Always provide a minimum of 10 pipe diameters (10D) of straight, unobstructed pipe upstream and 5 pipe diameters (5D) downstream.

  1. Sizing Based Only on Pipe Diameter
  2. Procurement often makes the mistake of matching the flow meter size directly to the existing pipe size without checking actual fluid velocities. If a 100 MM pipe is only carrying 5,000 L/H, a CE-TFS-100 meter will barely turn, leading to massive under-registration. Always size the meter based on the actual Min/Max Flow Rate, even if it means using pipe reducers.

  1. Failing to Account for Extreme Viscosity Shifts
  2. When learning how to choose turbine flow meters for diesel fuel transfer, buyers must account for seasonal temperature changes. Diesel fuel thickens significantly at -10 °C compared to 30 °C. As viscosity increases, the meter's K-factor shifts. If temperature fluctuations are extreme, multi-point calibration curves or a transition to Positive Displacement meters may be required.

  1. Inadequate Electrical Grounding in Hazardous Areas
  2. Industrial facilities processing fuels are classified hazardous environments (ATEX, IECEx, or Class I Div 1). Using standard pulse outputs without proper intrinsically safe barriers, galvanic isolators, or shielded cables leads to noisy signals, phantom pulse counting, and severe safety risks. Always match the sensor housing and wiring standards to the site's classification.

5. Enquiry Specification Checklist

To streamline procurement and eliminate engineering ambiguity—especially when dealing with international vendors or evaluating a turbine flow meters supplier in India for export to global facilities—use this methodical checklist when requesting a quotation.

When to Use This Technology: A Decision Matrix

Operating ScenarioRecommended TechnologyReasoning
Clean Diesel / Water / Light Oil, steady flow, tight budgetTurbine Flow MeterHigh accuracy at lower capital cost, excellent repeatability.
Extremely viscous crude oil, fluctuating pressuresPositive DisplacementImmune to viscosity shifts, no straight pipe requirement.
Raw wastewater with high particulate, conductiveElectromagneticZero obstruction, no moving parts to jam, handles solids.
High-temperature steam or mixed gasVortex Flow MeterOperates across extreme temperatures, no moving parts.

Engineering Calibration Note: The K-Factor

Every turbine meter is delivered with a calibration certificate detailing its unique K-factor (Pulses per Liter or Pulses per Gallon). The fundamental equation governing the instrumentation is:

Flow Rate = (Pulse Frequency * 60) / K-factor

Where Flow Rate is in Liters per Minute, Frequency is in Hertz (pulses per second), and the K-factor is Pulses per Liter. During installation, this exact K-factor must be entered into the local LCD, the PLC, or the batch controller. Failure to program the precise K-factor results in permanent systemic error.

8-Step Specification Checklist

  1. Fluid Properties: Specify the exact fluid type, density, and expected kinematic viscosity range (in centistokes or cSt) under operating conditions. Note if the liquid is non-acidic.
  2. Operating Flow Range: Define the absolute minimum, normal, and maximum expected flow rates (e.g., L/H or m3/h). Ensure the nominal flow falls at roughly 60% of the meter's maximum capacity.
  3. Line Size and Connections: Specify the nominal pipe size and the required mechanical connection (e.g., Flange ANSI 150#, PN16, or Threaded M/F).
  4. Temperature Profile: State the ambient environment temperature and the fluid operating temperature (must fall within the -20 to 120 °C rating).
  5. Pressure Rating: Document the normal operating pressure and maximum system design pressure (up to 6 MPa).
  6. Required Accuracy Class: Specify the maximum allowable error (+/- 0.5% or +/- 1% FSD) and required repeatability (standard is 0.1%).
  7. Materials of Construction: Confirm S.S-304 or S.S-316 requirements for both the body enclosure and the internal rotor mechanism.
  8. Output and Power Requirements: Clearly state if the site requires a standalone 3.3V battery-operated LCD, a 12V DC NPN pulse output for a controller, a 24V DC 4-20mA analog signal for DCS, or RS485 communication protocols for plant-wide data acquisition.

Turbine Flow Meters installed and operating at an industrial facility showing correct setup

FAQ

Q: Can turbine flow meters measure highly acidic or corrosive chemicals?

A: No. While the S.S-304/S.S-316 stainless steel body and rotor provide excellent durability for fuels, water, and non-acidic liquids, highly corrosive acids will degrade the carbon bush and rotor blades. For harsh acids, specialized lined electromagnetic meters or ultrasonic meters are required.

Q: Do I need a straight pipe run if I install a flow straightener?

A: Yes. Even though high-quality turbine meters feature internal straightening vanes to condition the fluid profile, they still mandate a minimum external straight pipe run. Industry standard dictates 10 pipe diameters upstream and 5 pipe diameters downstream to guarantee the +/- 0.5% or 1% FSD accuracy.

Q: What happens if air or gas bubbles enter the turbine meter?

A: Air entrapment causes the fluid velocity to spike artificially, spinning the rotor much faster than the actual liquid volume warrants. This leads to massive over-measurement (often registering 20-30% more volume). Always install an air eliminator upstream if the line is susceptible to two-phase flow or air pockets.

Q: How often do the internal bearings and carbon bush need replacement?

A: Maintenance intervals depend strictly on fluid lubricity and operating hours. For lubricating fluids like diesel or hydraulic oil, bearings can last several years without degradation. For non-lubricating fluids like demineralized water, instrumentation teams should inspect and potentially recalibrate the rotor assembly annually.

Q: What is the benefit of buying a meter with RS485 output?

A: RS485 is a robust, multi-drop serial communication standard that resists electrical noise across long cable runs. It allows a single plant network to collect precise digital flow data, totalized volumes, and diagnostic alerts from dozens of meters using a single integrated loop, bypassing the calibration drift associated with analog 4-20mA signals.

Q: What does the power-fail protection on the battery-operated model do?

A: The battery-operated meter utilizes a dual-row LCD powered by a 3.3V 10AH lithium battery. The power-fail protection features non-volatile memory that safely stores the instrument coefficient (K-factor) and the accumulated total flow values for up to ten years, ensuring no critical mass-balance data is lost during battery swaps or power drops.

Q: Can these meters handle bidirectional flow?

A: Standard industrial turbine meters are calibrated and optimized for unidirectional flow, as indicated by the flow direction arrow on the meter body. Reversing the flow will strike the trailing edge of the helical blades, yielding highly inaccurate pulse data and potentially unseating the bearing assembly over time.

To discuss your specific fluid application, viscosity constraints, or to verify sizing configurations for your facility, contact our technical instrumentation team today. Please provide your nominal flow rate, fluid type, operating temperature, and required communication output, and we will engineer a precise volumetric measurement solution tailored to your site's operational demands.
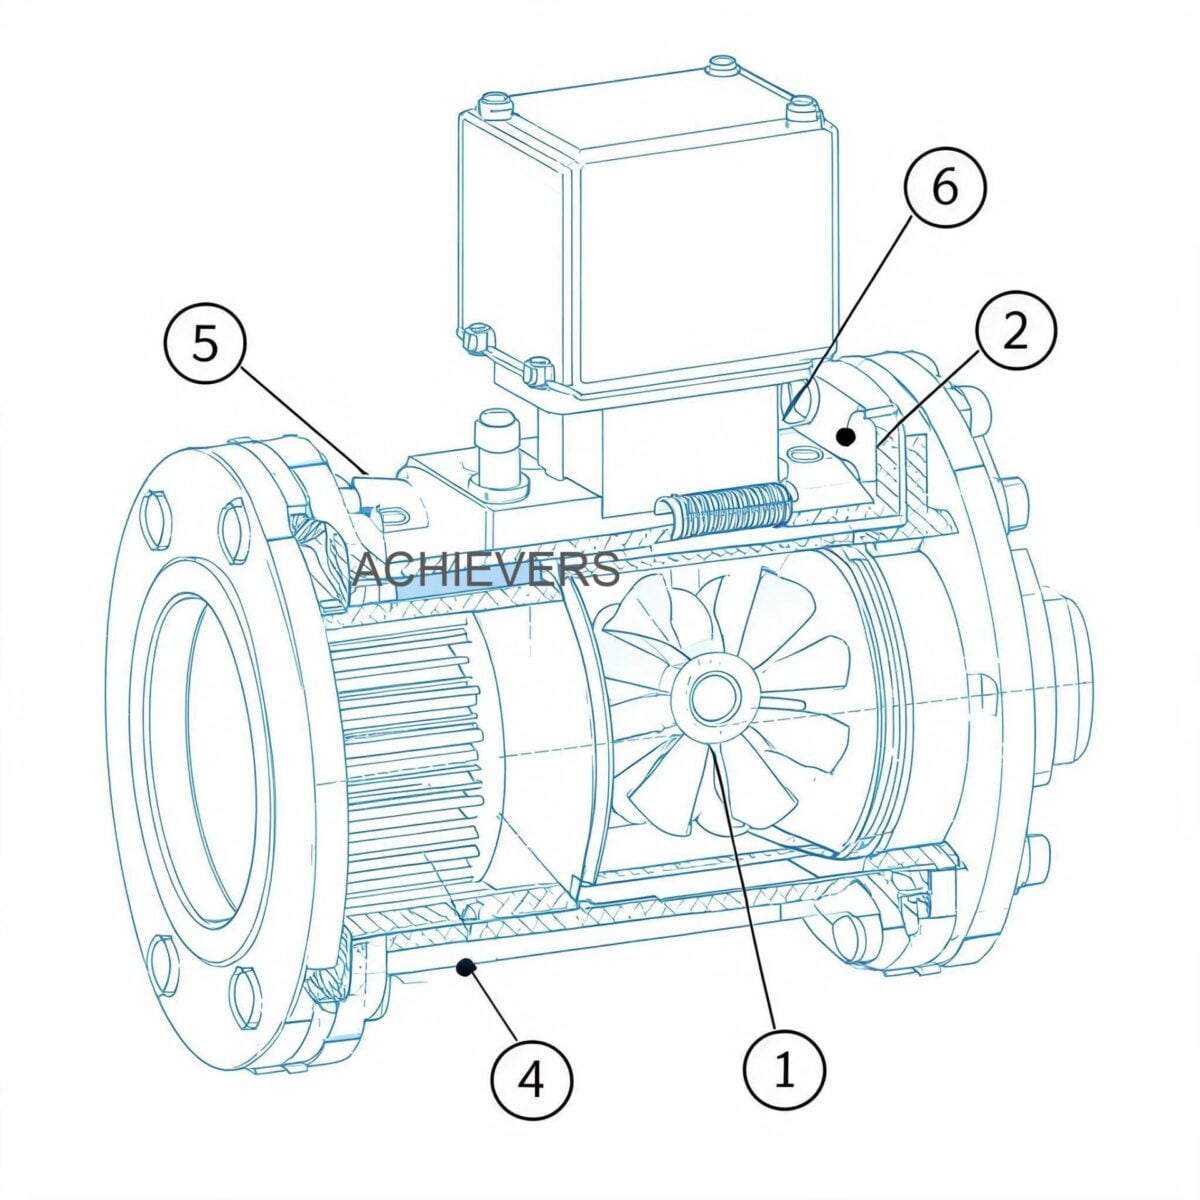
Liquid Batching Systems Maintenance Guide: Preventive Checks for Meter Accuracy, Preset Control, and Pump Health

In modern industrial processing, the cost of an unplanned batching failure extends far beyond the price of a replacement component. When a batch is inaccurately dosed, it results in off-spec products, expensive chemical rework, regulatory non-compliance, and severe production bottlenecks. Maintaining absolute repeatability requires a rigorous approach to fluid dynamics, electromechanical timing, and wear mitigation.

A proactive preventive maintenance program for Liquid Batching Systems is not merely a recommendation; it is an engineering necessity. High-cycle automated dispensing—particularly with varying viscosities like diesel, transmission fluids, and heavy motor oils—places immense stress on gear tolerances, pump seals, and solenoid valve diaphragms. By standardizing calibration checks and component inspections, plant managers can ensure that every preset volume is delivered with zero drift.

This technical guide serves as a comprehensive maintenance framework for industrial Liquid Batching Systems. We will analyze the critical wear parts of the oval gear metering unit, the electromechanical delays in solenoid control, and the mechanical health of the transfer pump. Whether your facility is an automotive assembly plant filling crankcases or a chemical processing unit managing additive dosing, these engineering protocols will maximize your system's operational lifecycle and measurement integrity.

1. Product Overview and Critical Wear Components

At the core of these Liquid Batching Systems is a highly engineered electromechanical loop designed for maximum endurance and low support requirements. The system integrates a continuous-duty transfer pump, an oval gear flow meter (a type of positive displacement meter), an electronic batch controller, and a fast-acting solenoid valve.

Based on the precise technical specifications of the Achievers brand units, the operational parameters are defined as follows:

  • Maximum Volumetric Capacity: 60 Litres/Min
  • Base Accuracy Rating: ±0.5 %
  • Power Requirement: 220 V AC
  • Primary Measurement Technology: Oval Gear (Positive Displacement)
  • Viscosity Capability: Ranges from light diesel up to maximum thickness motor and transmission oils

The primary wear components in this architecture are the oval gears and their central bearings. Because positive displacement meters rely on the fluid to drive the measuring elements, particulate contamination or fluid starvation can cause micro-abrasions on the gear teeth. Over time, this increases the mechanical clearance (slip) between the gears and the measuring chamber wall, leading to under-registration of highly viscous fluids. The solenoid valve, responsible for cutting off flow the millisecond the preset volume is reached, is also subjected to continuous hydraulic shock and requires regular inspection of its pilot orifice and sealing diaphragm.

Liquid Batching Systems with labeled components highlighting the oval gear metering unit, solenoid valve, preset controller, and pump housing that require regular maintenance

2. Technology Comparison Table and Decision Matrix

To understand why oval gear technology is selected for this system over other methodologies, engineers must evaluate fluid characteristics against measurement principles. Below is a comparative analysis of oval gear technology versus other common flow measurement methods used in batching.

ParameterOval Gear (Positive Displacement)Electromagnetic Flow MetersTurbine Flow Meters
Working PrincipleVolumetric displacement of fluidFaraday's Law of InductionKinetic energy of fluid turning a rotor
Best Fluid MatchHigh viscosity (Oil, Diesel, Lube)Conductive fluids (Water, Chemicals)Low viscosity, clean liquids (Water, Light fuels)
Viscosity LimitsExcellent (Accuracy improves with thickness)Unaffected by viscosityPoor (Performance drops with high viscosity)
Standard Accuracy±0.5%±0.2% to ±0.5%±0.5% to ±1.0%
Straight Pipe Run Req.None required5D upstream, 3D downstream10D upstream, 5D downstream
Moving PartsYes (Rotors/Gears)NoneYes (Rotor and bearings)
Maintenance FrequencyModerate (Gear wear, filters)Low (Electrode cleaning)High (Bearing replacement, calibration)

When to Use This Technology (Decision Matrix)

  • Choose Oval Gear Batching Systems: When dispensing viscous, non-conductive fluids like transmission fluid, motor oil, and diesel fuel at variable flow rates. Ideal for tight installations without straight pipe runs.
  • Choose Electromagnetic Systems: When batching highly corrosive aqueous chemicals, wastewater, or food-grade conductive slurries where zero pressure drop is mandatory.
  • Choose Turbine Systems: When batching high volumes of ultra-clean, low-viscosity liquids (like light solvents) where long-term steady-state flow is expected.

3. Engineering Formula and Calibration Note

Achieving ±0.5% accuracy at 60 Litres/Min requires compensating for the mechanical response time of the solenoid valve. In high-speed batching, there is an inherent delay between the controller sending the stop signal and the solenoid valve completely closing.

Calibration Formula for Batch Overrun:

Actual Volume = (Total Pulses / K-Factor) + Overrun Volume

Where:

  • Total Pulses: The number of electrical pulses generated by the Hall effect sensor.
  • K-Factor: The number of pulses per litre (e.g., 100 pulses/L).
  • Overrun Volume: The fluid that passes through the valve during the milliseconds it takes to fully actuate.

Engineering Calibration Note: If you notice consistent over-batching of 0.1 litres on a 50-litre preset, do not immediately alter the meter's mechanical K-factor. Instead, adjust the Advanced Preset Controller's pre-actuation value (or slow-close parameter). Program the controller to drop power to the primary solenoid coil slightly before the target volume—for instance, at 49.9 litres—allowing the hydraulic momentum to perfectly coast to 50.0 litres.

4. Preventive Maintenance Schedule

Under heavy industrial duty cycles, components degrade predictably. Adhering to the following maintenance table prevents catastrophic failures and ensures ISO compliance for product dispensing.

Maintenance TaskFrequencyResponsible PersonnelEst. TimeEngineering Notes
Visual Leak & Housing InspectionDailyPlant Operator5 minsCheck pump shaft seals, meter flanges, and solenoid fittings.
Strainer / Filter BlowdownWeeklyMaintenance Tech15 minsClogged filters cause pump cavitation and gear starvation.
Pump Motor Current (Amp) DrawMonthlyElectrical Engineer10 minsHigh current indicates bearing wear, fluid too cold/viscous, or blocked filter.
Pre-Set Controller Output TestMonthlyInstrumentation Tech15 minsVerify 220 V AC pulse reaches the solenoid instantly.
Volumetric Proving / CalibrationQuarterlyQuality/Metrology60 minsUse certified volumetric proving cans. Adjust K-factor if drift exceeds ±0.5%.
Gear Chamber FlushingBi-AnnuallyMaintenance Tech45 minsFlush with light solvent to remove metallic sludge and hardened additives.
Solenoid Diaphragm InspectionBi-AnnuallyMaintenance Tech30 minsCheck for tear, elastomer degradation, and pilot hole blockage.
O-Ring and Seal ReplacementAnnuallyMaintenance Engineer60 minsReplace all dynamic seals regardless of visible wear.
Oval Gear / Bearing Micrometer CheckAnnuallyMechanical Engineer90 minsMeasure gear tooth clearance against factory spec. Replace if out of tolerance.
Electrical Terminal Re-torquingAnnuallyElectrical Engineer20 minsVibration loosens connections, causing intermittent signal drops and batch errors.

Maintenance diagram and exploded cross-section of Liquid Batching Systems showing service access points, gear tolerances, and replaceable solenoid components

5. Step-by-Step Procedures for Key Tasks

Procedure 1: Upstream Strainer and Filter Cleaning

A blocked strainer is the leading cause of flow meter inaccuracy and pump cavitation. The oval gears require a steady, non-turbulent column of fluid to maintain the ±0.5% accuracy.

  1. Power isolation: De-energize the 220 V AC system at the main breaker to prevent accidental pump start-up.
  2. Hydraulic isolation: Close the upstream and downstream manual isolation valves to lock out the fluid pressure.
  3. Pressure relief: Carefully open the bleed valve or cautiously loosen the strainer cap to relieve trapped line pressure.
  4. Cap removal: Unbolt the strainer housing cover. Inspect the housing O-ring for flattening or chemical degradation.
  5. Basket extraction: Remove the stainless-steel mesh basket. Note the type of debris (e.g., metal flakes suggest upstream pump wear; sludge suggests degraded oil).
  6. Cleaning: Wash the mesh basket in a compatible solvent. Use compressed air (blowing from the outside in) to dislodge embedded particles. Do NOT use wire brushes that can alter the micron rating of the mesh.
  7. Reassembly: Insert the clean basket, install a new housing O-ring (lubricated lightly with the process fluid), and torque the bolts in a star pattern.
  8. Purging: Open the upstream valve slightly to flood the housing and purge air through the bleed valve before fully reopening the system.

Procedure 2: Oval Gear Meter Inspection and Sensor Cleaning

If the controller displays erratic flow rates or fails to register flow while the pump is running, the oval gear chamber must be inspected.

  1. Isolate and drain: Lock out the electrical supply and isolate the hydraulic lines. Drain the metering unit completely into a safe receptacle.
  2. Sensor removal: Unscrew the Hall effect pickup sensor from the top of the meter body. Inspect the tip for accumulated ferromagnetic debris and wipe clean with a lint-free cloth.
  3. Faceplate removal: Remove the hex bolts securing the front cover of the measuring chamber. Pull the cover off evenly to avoid binding on the alignment pins.
  4. Rotor extraction: Carefully slide the two oval gears off their central shafts. Note their orientation; many gears have a specific timing mark that must align during reassembly.
  5. Chamber inspection: Illuminate the internal measuring chamber. Look for deep scoring on the chamber walls or backplate, which indicates particulate damage and excessive fluid slip.
  6. Bearing check: Rotate the bearings inside the oval gears. They should roll smoothly without lateral play. If using carbon or ceramic bearings, look for hairline fractures.
  7. Re-timing and assembly: Reinstall the gears, ensuring they are perfectly meshed at a 90-degree offset. Rotate them manually; they must turn freely with zero binding.
  8. Sealing: Install a new PTFE or Viton faceplate seal, replace the cover, and torque the bolts sequentially to the manufacturer's specified torque rating.

6. On-Site Spare Parts to Stock

Supply chain delays for critical instrumentation parts can halt automotive assembly lines or fluid packaging plants. Maintaining an on-site inventory of fast-wear and critical path parts is mandatory for high-uptime operations.

Part DescriptionComponent TypeRecommended QtyWhen to Replace
Stainless Steel Strainer MeshConsumable2 per unitWhen mesh is torn or cannot be fully cleaned.
O-Ring & Gasket Seal KitConsumable3 setsAnnually, or whenever the meter housing is opened.
Hall Effect Pickup SensorElectrical1 per unitIf flow is present but the controller registers zero pulses.
Solenoid Valve Diaphragm KitMechanical Wear2 setsIf the valve fails to shut off tightly or chatters.
Oval Gear & Bearing SetCritical Spare1 set per unitIf accuracy drift cannot be corrected via controller K-factor calibration.
220V Solenoid CoilElectrical1 per unitIf the coil burns out due to voltage spikes or overheating.

7. Diagnosing Maintenance-Related Failures

Even with rigorous preventive maintenance, environmental factors or fluid contamination can cause operational anomalies. Use this diagnostic matrix to trace symptoms back to root mechanical or electrical failures.

Failure SymptomProbable CauseCorrective Action
Consistent Over-BatchingSolenoid valve closing too slowly or debris under the diaphragmClean the solenoid pilot hole and replace the diaphragm. Adjust pre-actuation settings.
Erratic / Skipping Flow DisplayFerromagnetic debris on the magnetic pickup sensor tipRemove the sensor, wipe the magnetic tip clean, and flush the gear chamber.
Pump Running but Zero Flow RegisteredOval gears locked by solid particulate, or sheared pump couplingOpen the meter chamber, clear the obstruction. Verify the mechanical integrity of the pump shaft.
Gradual Loss of Accuracy (Under-Batching)Gear wear leading to increased fluid slip inside the chamberRecalibrate K-factor. If wear is excessive, replace the oval gears and bearings.
High Noise / Chattering from PumpCavitation due to blocked suction strainer or high fluid viscosityClean upstream filters. Ensure fluid temperature is high enough to maintain pumpable viscosity.
Controller Display Dead220 V AC power surge or blown internal glass fuseVerify incoming line voltage. Replace internal controller fuse and install a surge protector.

Liquid Batching Systems operating productively at an industrial chemical and oil blending facility with proper piping supports and maintenance access

8. Extending Service Life in Harsh Operating Conditions

Industrial flow measurement equipment often operates in severe environments. From offshore oil platforms dealing with saline atmospheres to heavy mining facilities contending with extreme dust, operators must adapt their maintenance strategies to the operating theater.

Managing High Ambient Temperatures

In regions like the Middle East or in heavy metallurgical plants, ambient temperatures can exceed 50°C. High heat lowers the viscosity of oils and fuels, potentially increasing slip past the oval gears. Calibration should be performed at the actual operating temperature, not at a baseline 20°C. Furthermore, prolonged heat degrades the potting on the solenoid coils; ensure the unit has adequate shading and ventilation to prevent coil burnout.

Mitigating Power Quality Issues

Industrial grids frequently experience severe voltage sags and spikes, especially when large inductive loads (like heavy compressors) start up on the same network. Because the batch controller relies on precise microprocessor timing, power fluctuations can cause it to miss pulse counts or drop the 220 V AC signal to the solenoid prematurely. Installing an industrial-grade UPS (Uninterruptible Power Supply) and isolation transformers will protect the batch controller's motherboard and ensure ±0.5% accuracy is maintained regardless of grid stability.

Handling High-Viscosity and Contaminated Fluids

When batching recycled motor oils, transmission fluids, or heavy bunker fuels, particulate contamination is a constant threat. Cold startups are particularly dangerous; if the fluid is highly viscous due to low temperatures, the pump will struggle to pull the liquid, leading to cavitation and severe mechanical strain on the oval gears. Implement heat tracing on the piping and ensure the fluid is within the optimal kinematic viscosity range before initiating a high-speed 60 L/Min batch. For heavily contaminated fluids, upgrading to a dual-stage filtration system (a coarse Y-strainer followed by a finer basket strainer) will drastically prolong the life of the positive displacement metering elements.

FAQ

Q: How often should we physically prove or calibrate our batching system?

A: For standard industrial oils and non-custody transfer applications, a quarterly calibration check using a certified volumetric proving can is sufficient. If the system is used for critical chemical blending or packaging for retail sale, monthly verification is highly recommended.

Q: Can this batching system handle water or water-based chemicals?

A: Oval gear meters are generally designed for lubricating fluids like diesel and oils, which naturally lubricate the internal gear bearings. For water-based chemicals, a magmeter, such as Electromagnetic Flow Meters, is the technically superior choice due to the lack of moving parts and resistance to corrosion.

Q: Why does the batch occasionally overrun the preset target by a few decilitres?

A: Overruns are almost always caused by mechanical delay in the solenoid valve closure, known as water hammer or hydraulic momentum. Adjusting the "slow close" or "pre-actuation" parameter in your electronic controller allows the valve to shut slightly before the target, letting the fluid coast perfectly to the preset.

Q: Is it safe to operate the pump continuously without flow?

A: No. Operating the transfer pump against a closed solenoid valve without an internal bypass or pressure relief mechanism will rapidly dead-head the pump. This causes extreme heat generation, cavitation, and eventual failure of the pump seals and motor windings.

Q: How do we compensate for changes in fluid temperature during the day?

A: Temperature changes alter fluid viscosity and volume. Because this system measures absolute displaced volume, a drop in viscosity (due to heat) might marginally increase gear slip. For ultra-precise operations, you must either maintain strict temperature control of your storage tanks or apply a mathematical volume correction factor based on the fluid’s coefficient of thermal expansion.

Q: What is the maximum pressure rating for standard maintenance procedures?

A: Maintenance should only be performed when the system is completely depressurized (0 bar). Operational pressure limits depend on the specific flanges and pump model utilized, but standard industrial systems typically operate between 3 to 10 bar. Always refer to the nameplate data before initiating high-pressure transfers.

Q: Why is the flow rate fluctuating wildly on the controller display?

A: Fluctuating flow rates are typically caused by air entrainment in the fluid (often from a leak in the suction line), a partially clogged upstream strainer causing pump cavitation, or a loose wire on the magnetic pickup sensor sending erratic pulse trains to the controller.

For expert technical support, system sizing, or to request a customized quote, please contact our engineering team with your required product specifications, target flow rate, fluid viscosity, and site operating conditions. Our specialists are ready to help you configure the exact system required to optimize your industrial batching process.